1. Introduction
This manual provides comprehensive instructions for the safe and efficient operation, setup, and maintenance of the Weller WR3M Digital Self-Contained 3-Function Rework Station. The WR3M is designed for professional repair, industrial production, and laboratory applications, offering versatile functionality for soldering, desoldering, and hot air rework tasks.
Please read this manual thoroughly before operating the device to ensure proper usage and to prevent damage or injury.
2. Safety Information
Always observe the following safety precautions to prevent electric shock, fire, or injury:
- Ensure the unit is connected to a properly grounded power outlet.
- Do not operate the rework station in damp or wet conditions.
- Always use appropriate personal protective equipment, including safety glasses.
- Hot tools can cause severe burns. Allow tools to cool before handling or changing tips.
- Ensure adequate ventilation when soldering or desoldering to avoid inhaling fumes.
- Disconnect the unit from the power supply before performing any maintenance or when not in use.
- Do not use the unit for purposes other than those specified in this manual.
3. Product Overview
The Weller WR3M is a powerful 400-watt digital rework station capable of simultaneously operating up to three soldering tools. It features independently controlled channels, integrated air and vacuum pumps, and a clear LCD display for monitoring critical functions.
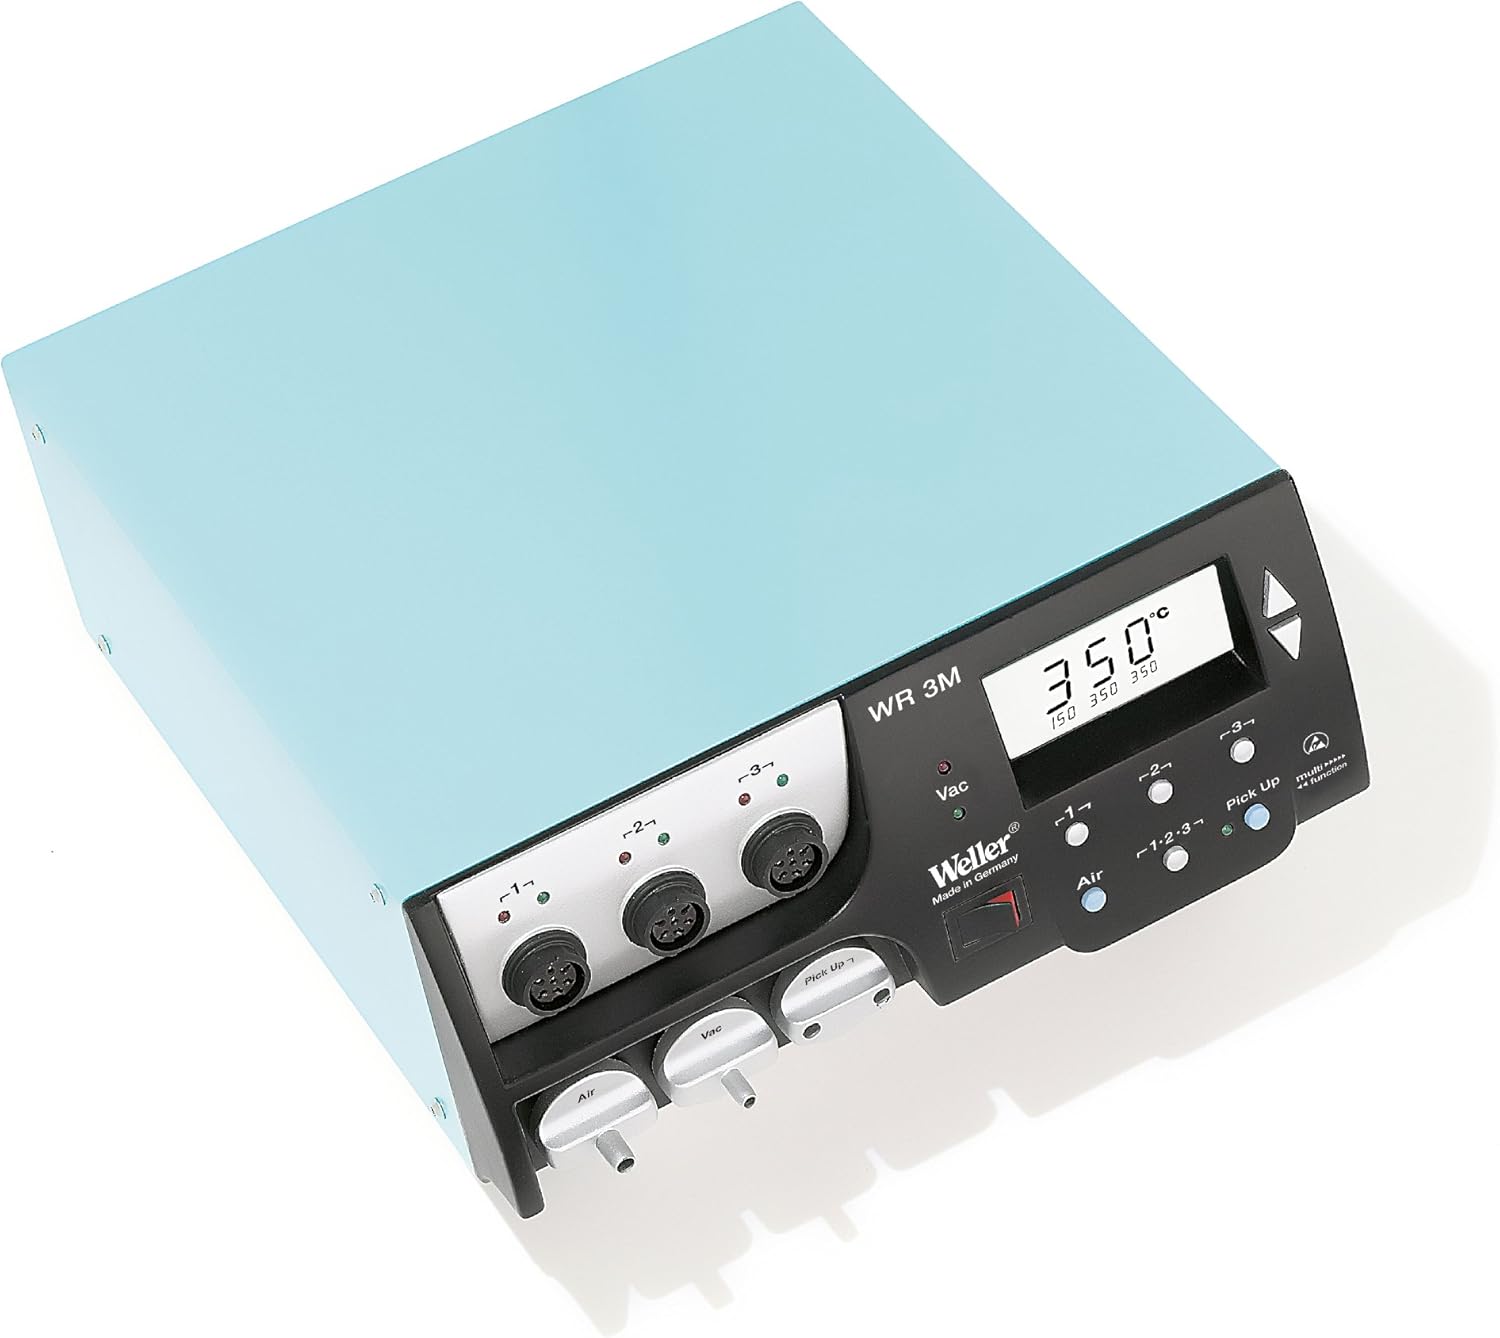
Figure 1: Front panel of the Weller WR3M Rework Station. This image displays the main unit with its digital display showing "350°C", three tool connection ports labeled -1-, -2-, -3-, and controls for Air, Vac, and Pick Up functions. The Weller logo and "Made in Germany" are also visible.
Key Features:
- 400 watts of total power across three independently controlled channels.
- Integrated air and vacuum ports for simultaneous use of up to three tools.
- Compatibility with high-speed micro tools (e.g., WMRP, WMRT).
- USB port for PC software connectivity and data logging.
- Large, intuitive LCD display for monitoring all three channels.
- Temperature range: 150°F to 850°F (65°C to 450°C).
- Air flow volume: 1 l/min to 15 l/min.
4. Package Contents
The Weller WR3M package typically includes:
- Weller WR3M Rework Station Base Unit
- Power Cord
- USB Cable
- Air Nozzle Adapters (various sizes)
- Air Filters (e.g., 6 pieces)
- Instruction Manual
- Software CD (for PC connectivity)
Note: Soldering irons, desoldering tools, hot air pencils, and vacuum pick-up tools are sold separately and are not included with the base unit.
5. Setup
5.1 Power Connection
- Place the WR3M unit on a stable, heat-resistant surface.
- Ensure the power switch on the rear of the unit is in the "OFF" position.
- Connect the power cord to the power inlet on the rear of the WR3M.
- Plug the other end of the power cord into a grounded 120V AC power outlet.
5.2 Connecting Tools
The WR3M features three tool connection ports (labeled -1-, -2-, -3-) on the front panel. Each port can accommodate a different Weller soldering, desoldering, or hot air tool.
- Align the connector of your Weller tool with one of the ports (-1-, -2-, or -3-).
- Gently push the connector into the port until it clicks securely into place.
- For tools requiring air or vacuum (e.g., hot air pencil, desoldering tool, vacuum pick-up), connect the corresponding air/vacuum hose to the "Air" or "Vac" ports located below the tool connectors.
- Place the tool in its designated safety rest or stand.
6. Operating Instructions
6.1 Powering On/Off
- To power on, flip the main power switch on the rear of the unit to the "ON" position. The LCD display will illuminate.
- To power off, flip the main power switch to the "OFF" position.
6.2 Tool Selection and Temperature Adjustment
The WR3M automatically detects connected tools. The LCD display shows the set and actual temperatures for each active channel.
- Use the channel selection buttons (labeled -1-, -2-, -3- on the front panel) to select the desired tool channel. The selected channel's display will be highlighted.
- Use the Up and Down arrow buttons next to the display to adjust the set temperature for the selected tool.
- The display will show the set temperature, and the actual temperature will rise or fall to match it.
6.3 Airflow Adjustment (for Hot Air Tools)
For hot air tools, airflow can be adjusted:
- Select the channel connected to the hot air tool.
- Press the Air button on the front panel.
- Use the Up and Down arrow buttons to adjust the airflow volume (1 l/min to 15 l/min).
6.4 Vacuum Function (for Desoldering and Pick-Up Tools)
The vacuum function is used for desoldering and with vacuum pick-up tools.
- For desoldering tools, the vacuum is typically activated by a trigger on the tool itself once the channel is selected.
- For vacuum pick-up tools, select the channel and press the Pick Up button to activate the vacuum.
- The "Vac" indicator light will illuminate when the vacuum pump is active.
6.5 PC Software Connectivity
The WR3M includes a USB port for connecting to a PC. This allows for data logging, firmware updates, and advanced control via the provided software.
- Install the software from the included CD onto your Windows PC.
- Connect the WR3M to your PC using the supplied USB cable.
- Launch the software and follow the on-screen instructions to establish a connection and utilize its features.
7. Maintenance
7.1 Air Filter Replacement
Regular replacement of air filters is crucial for maintaining optimal performance and preventing damage to the internal pumps.
- Ensure the WR3M is powered off and disconnected from the mains.
- Locate the Air and/or Vac air nozzles on the front panel (below the tool connectors).
- Rotate the desired air nozzle approximately 30 degrees counter-clockwise.
- Gently pull the nozzle outwards to access the internal air filter.
- Remove the old filter and insert a new one.
- Reinsert the nozzle and rotate it clockwise until it locks securely in place.
- Replace filters regularly, especially if you notice reduced airflow or vacuum performance.
7.2 Soldering Tip Care
- Always tin soldering tips before and after use to prevent oxidation.
- Clean tips frequently using a damp sponge or brass wool.
- Avoid excessive pressure when soldering, as this can damage tips.
- Replace worn or damaged tips promptly to ensure efficient heat transfer.
7.3 General Cleaning
- Clean the exterior of the unit with a soft, dry cloth.
- Do not use abrasive cleaners or solvents.
- Ensure all vents are clear of dust and debris to prevent overheating.
8. Troubleshooting
| Problem | Possible Cause | Solution |
|---|---|---|
| Unit does not power on. | No power supply; power cord loose; main switch off. | Check power connection; ensure main switch is ON; test outlet. |
| Tool not heating up. | Tool not properly connected; faulty tool; incorrect temperature setting. | Ensure tool is securely connected; check temperature setting; try another tool if available. |
| Reduced airflow/vacuum. | Clogged air filter; hose obstruction. | Replace air filters (refer to Section 7.1); check hoses for kinks or blockages. |
| Difficulty with button interface. | Unfamiliarity with multi-function buttons. | Refer to Section 6 for detailed operating instructions; practice button combinations for tool selection and adjustments. |
| PC software not connecting. | Incorrect USB driver; software compatibility issue; faulty USB cable. | Ensure correct drivers are installed; check software compatibility with OS; try a different USB cable. |
9. Specifications
- Model: WR3M
- Input Voltage: 120V AC
- Power Consumption: 400 Watts
- Temperature Range: 150°F - 850°F (65°C - 450°C)
- Air Flow Volume: 1 - 15 l/min
- Pump Type: Rotary Vane
- Display: LCD
- Dimensions (L x W x H): 17.91 x 7.48 x 14.57 inches (approx.)
- Weight: 18.08 pounds (approx.)
- Material: Copper (internal components)
- Manufacturer: Cooper Hand Tools (Weller)
10. Warranty and Support
For warranty information and technical support, please refer to the documentation included with your purchase or visit the official Weller website. Keep your proof of purchase for warranty claims.
For further assistance, contact Weller customer service.


