Introduction
Thank you for purchasing the KLH AUDIO KL-300i Nostalgia 5-n-1 System. This integrated audio system combines classic and modern audio playback capabilities, including a turntable, CD player, cassette player, AM/FM radio, and an iPod dock. This manual provides essential information for setting up, operating, and maintaining your system to ensure optimal performance and longevity.
Safety Information
Please read all safety instructions carefully before operating this product. Keep this manual for future reference.
- Power Source: Connect the unit only to an AC power outlet of the specified voltage.
- Ventilation: Ensure adequate ventilation. Do not block ventilation openings.
- Water and Moisture: Do not expose the unit to rain or moisture. Do not place objects filled with liquids, such as vases, on the unit.
- Heat: Do not place the unit near heat sources such as radiators, heat registers, stoves, or other apparatus (including amplifiers) that produce heat.
- Cleaning: Unplug the unit from the wall outlet before cleaning. Use a dry cloth only.
- Servicing: Do not attempt to service this product yourself. Refer all servicing to qualified service personnel.
Package Contents
Verify that all items listed below are included in the package:
- KLH AUDIO KL-300i Main Unit
- Remote Control
- Auxiliary Input Cable
- AM/FM Antenna Wire
- Instruction Manual (this document)
Product Overview
Familiarize yourself with the various components and controls of your KLH AUDIO KL-300i system.
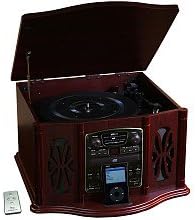
This image displays the KLH AUDIO KL-300i Nostalgia 5-n-1 System. The unit features a dark wood finish. The top lid is open, revealing a turntable. Below the turntable, the front panel includes controls for the CD player, AM/FM radio tuner, and an iPod dock. A small remote control is visible to the left of the main unit.
Front Panel Controls:
- Power Button: Turns the unit on or off.
- Function Selector: Switches between Phono, CD, Radio, iPod, and Aux modes.
- Volume Knob: Adjusts the master volume level.
- CD Player Controls: Play/Pause, Stop, Skip Forward/Backward.
- Radio Tuner: AM/FM band selector, Tuning knob.
- iPod Dock: Connector for iPod devices.
- Aux-In Jack: 3.5mm input for external audio devices.
- Headphone Jack: 3.5mm output for private listening.
Top Panel:
- Turntable: For playing vinyl records.
- Lid: Protects the turntable when not in use.
Side Panel:
- Cassette Deck: For playing audio cassette tapes.
Setup
Follow these steps for initial setup of your audio system.
- Placement: Place the unit on a stable, flat surface away from direct sunlight, heat sources, and excessive dust or moisture. Ensure there is adequate space around the unit for ventilation.
- Connect Antenna: For optimal AM/FM radio reception, connect the supplied antenna wire to the antenna terminal on the rear of the unit. Extend the wire fully for better reception.
- Power Connection: Plug the AC power cord into a standard wall outlet.
- Initial Power On: Press the Power button on the front panel to turn on the unit.
Operating Instructions
General Operation:
- Power On/Off: Press the Power button to turn the unit on or off.
- Function Selection: Use the Function Selector knob or buttons to choose your desired audio source (Phono, CD, Radio, iPod, Aux).
- Volume Adjustment: Rotate the Volume knob to increase or decrease the sound level.
Turntable Operation:
- Lift the lid of the unit.
- Place a vinyl record on the turntable platter.
- Select the appropriate speed (33 1/3, 45, or 78 RPM) using the speed selector switch. For 45 RPM records, place the included adapter on the spindle if needed.
- Gently lift the tonearm and position the stylus over the desired starting groove of the record.
- Lower the tonearm slowly onto the record. Playback will begin automatically.
- To stop playback, gently lift the tonearm and return it to its rest.
CD Player Operation:
- Press the Function Selector to CD mode.
- Press the Eject button to open the CD tray.
- Place a CD with the label side facing up into the tray.
- Press the Eject button again to close the tray. The CD will begin playing automatically or display the track count.
- Use the Play/Pause, Stop, and Skip buttons to control playback.
Cassette Player Operation:
- Insert a cassette tape into the cassette slot on the side of the unit.
- Press the Play button to begin playback.
- Use the Fast Forward (FF) button to advance the tape quickly.
- To stop playback, press the Stop/Eject button. Pressing it halfway will eject the tape.
AM/FM Radio Operation:
- Press the Function Selector to Radio mode.
- Select either AM or FM band using the band selector switch.
- Rotate the Tuning knob to search for radio stations.
- Adjust the antenna wire for best reception.
iPod Dock Operation:
- Press the Function Selector to iPod mode.
- Carefully place your compatible iPod device onto the iPod dock connector.
- Use your iPod's controls to select and play music. Audio will be routed through the KLH AUDIO system's speakers.
Aux-In Operation:
- Press the Function Selector to Aux mode.
- Connect an external audio device (e.g., MP3 player, smartphone) to the Aux-In jack on the front panel using the supplied 3.5mm auxiliary cable.
- Play audio from your external device. The sound will be played through the KLH AUDIO system's speakers.
Remote Control Usage:
The remote control primarily operates the CD player functions (Play, Pause, Stop, Skip). Note that the remote cannot turn the unit on or off.
Maintenance
Proper care will ensure the longevity of your system.
- Cleaning the Unit: Wipe the exterior of the unit with a soft, dry cloth. Do not use abrasive cleaners, waxes, or solvents.
- Stylus Care: Handle the turntable stylus with extreme care. Clean the stylus periodically with a soft brush, brushing from back to front.
- CD/Cassette Care: Keep CDs and cassette tapes clean and free of dust. Store them in their cases when not in use.
Troubleshooting
If you experience issues with your system, refer to the following common problems and solutions.
| Problem | Possible Cause | Solution |
|---|---|---|
| No Power | Power cord not securely plugged in. | Check power cord connection to unit and wall outlet. |
| No Sound | Volume too low; Incorrect function selected; Headphones connected. | Increase volume; Select correct function; Disconnect headphones. |
| Turntable not spinning | Unit not powered on; Belt dislodged. | Ensure unit is on; Contact service if belt issue suspected. |
| Poor Radio Reception | Antenna not extended or positioned correctly. | Extend and adjust the antenna wire for better signal. |
| CD not playing | CD inserted incorrectly; CD is scratched or dirty. | Ensure CD is label-side up; Clean or replace CD. |
Specifications
| Feature | Specification |
|---|---|
| Power Source | AC 120V ~ 60Hz |
| Dimensions (W x D x H) | Approx. 17" x 17" x 10.5" (43.2 cm x 43.2 cm x 26.7 cm) |
| Turntable Speeds | 33 1/3, 45, 78 RPM |
| Radio Frequency Range | AM: 530-1710 kHz, FM: 88-108 MHz |
| CD Compatibility | CD, CD-R/RW |
| iPod Dock | Compatible with older generation iPods (30-pin connector) |
Warranty and Support
This product is covered by a limited manufacturer's warranty. For specific warranty terms and conditions, please refer to the warranty card included with your purchase or contact KLH customer support. If you require technical assistance or have questions not covered in this manual, please contact KLH customer service through their official website or the contact information provided with your product.


