1. Product Overview
The ONKYO AV Center SA-205HD is a 5.1-channel AV receiver designed to enhance your home entertainment experience. It supports high-definition audio formats such as DOLBY TrueHD and DTS-HD Master Audio, providing immersive sound for movies, music, and games. Featuring multiple HDMI inputs and digital audio connections, this unit serves as the central hub for your audio and video components.

Figure 1.1: Front view of the ONKYO AV Center SA-205HD. This image shows the silver-colored receiver with its main volume knob, display, and front panel controls.
2. Front Panel Controls and Indicators
Familiarize yourself with the front panel controls for easy operation.

Figure 2.1: Detailed view of the ONKYO AV Center SA-205HD front panel, highlighting the main controls and display area.
- ON/STANDBY Button: Press to turn the unit on or put it into standby mode.
- MASTER VOLUME Knob: Adjusts the overall sound level.
- PHONES Jack: Connect headphones for private listening.
- DISPLAY: Shows current input, volume level, and sound mode.
- SW LVL CTRL (Subwoofer Level Control): Adjusts the subwoofer output level.
- LISTENING MODE Buttons: Selects various audio listening modes (e.g., Stereo, Surround).
- INPUT Selectors: Cycles through available input sources (e.g., HDMI 1, Optical 2).
- SETUP MIC Jack: Connect the included setup microphone for automatic speaker calibration.
3. Rear Panel Connections
The rear panel provides all the necessary ports for connecting your audio and video devices, as well as your speakers.

Figure 3.1: Rear panel of the ONKYO AV Center SA-205HD, showing all input and output terminals.
- HDMI IN (1, 2): Connect HDMI-compatible devices such as Blu-ray players, game consoles, or cable boxes.
- HDMI OUT: Connect to your TV or projector for video output.
- DIGITAL IN (OPTICAL 1, 2 / COAXIAL 1): Connect digital audio sources like TVs, CD players, or satellite receivers.
- ANALOG AUDIO IN (LINE 1, 2, 3): Connect analog audio devices using RCA cables.
- SPEAKER TERMINALS (FRONT, CENTER, SURROUND): Connect your passive speakers. Ensure correct polarity (+/-).
- SUBWOOFER PRE OUT: Connect to a powered subwoofer.
- REMOTE CONTROL: Input for external IR receiver (if applicable).
4. Setup
4.1 Speaker Connection
Connect your 5.1 channel speakers to the corresponding terminals on the rear panel. Ensure that the positive (+) and negative (-) terminals on the receiver match those on your speakers. Use appropriate speaker wire for optimal performance.
Important Note: Speaker compatibility is not guaranteed. Ensure your speakers' impedance matches the receiver's specifications. The receiver supports 3Ω for the subwoofer and 6Ω for other speakers.
4.2 Audio/Video Device Connection
- HDMI Devices: Connect your Blu-ray player, game console, or streaming device to the HDMI IN 1 or 2 ports. Connect the HDMI OUT port to your TV.
- Digital Audio Devices: For devices without HDMI, use optical or coaxial cables to connect to the DIGITAL IN ports.
- Analog Audio Devices: Use RCA cables to connect older audio equipment to the ANALOG AUDIO IN ports.
4.3 Power Connection
After all audio/video and speaker connections are made, connect the power cord to the receiver and then to a wall outlet.
5. Operating Instructions
5.1 Basic Operation
- Power On/Off: Press the ON/STANDBY button on the front panel or the remote control.
- Input Selection: Use the INPUT selector buttons on the front panel or the remote control to choose your desired source (e.g., HDMI 1, Optical 2).
- Volume Adjustment: Rotate the MASTER VOLUME knob on the front panel or use the volume buttons on the remote control.
5.2 Sound Mode Selection
Press the LISTENING MODE buttons on the front panel or remote control to cycle through available sound modes, such as Stereo, Direct, or various surround sound modes (e.g., Dolby TrueHD, DTS-HD Master Audio) depending on the input signal.
5.3 Using the Remote Control
The included remote control provides full functionality for your AV receiver. Insert two AAA batteries (not included) into the remote control before use.
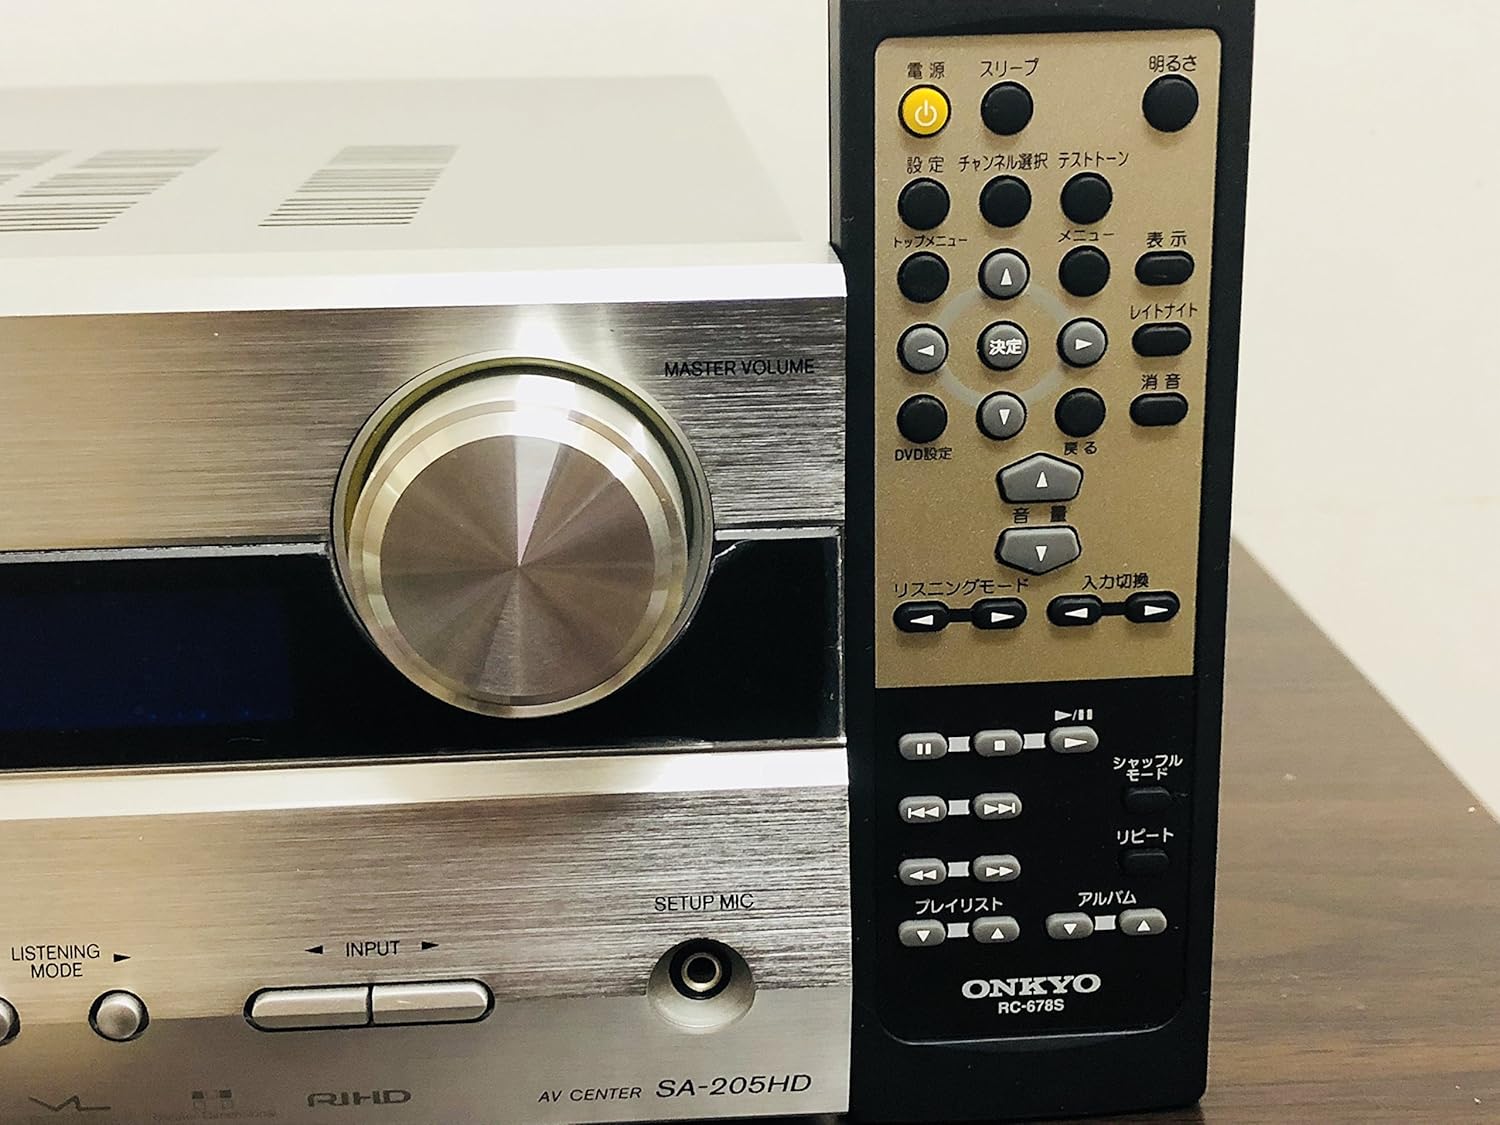
Figure 5.1: The ONKYO AV Center SA-205HD shown with its dedicated remote control, which allows for convenient operation from a distance.
6. Maintenance
- Cleaning: Wipe the unit with a soft, dry cloth. Do not use abrasive cleaners or solvents.
- Ventilation: Ensure adequate ventilation around the unit. Do not block the ventilation openings on the top or sides. Overheating can cause malfunction.

Figure 6.1: Top view of the ONKYO AV Center SA-205HD, illustrating the ventilation grilles essential for proper heat dissipation.
7. Troubleshooting
If you encounter issues, refer to the following common problems and solutions:
| Problem | Possible Cause | Solution |
|---|---|---|
| No sound | Incorrect input selected, volume too low, speaker wires disconnected. | Select correct input, increase volume, check speaker connections. |
| No picture | HDMI cable not connected properly, incorrect input selected on TV. | Check HDMI cable connections, select correct HDMI input on TV. |
| Remote control not working | Batteries depleted or inserted incorrectly, obstruction between remote and receiver. | Replace batteries, ensure correct polarity, remove obstructions, point remote directly at receiver. |
| Unit turns off unexpectedly | Overheating due to poor ventilation, power surge. | Ensure proper ventilation, connect to a surge protector. |
8. Specifications
- Model: SA-205HD
- Channels: 5.1-channel
- Maximum Output Power: 210W (30W x 5 channels + 60W subwoofer)
- Supported Audio Formats: DOLBY TrueHD, DTS-HD Master Audio, AAC
- Digital Audio Inputs: Optical x 2, Coaxial x 1
- HDMI Inputs: 2
- HDMI Outputs: 1
- Analog Audio Inputs: RCA (Line 1, 2, 3)
- Connectors: HDMI, RCA, USB (for service/firmware, not user device port)
- Supported Media Formats (via USB, if applicable): WAV, WMA
- Speaker Impedance: Subwoofer 3Ω, Other Speakers 6Ω
- Color: Silver
- Product Weight: 4.5 kg
- Remote Control Batteries: 2 x AAA (not included)
9. Warranty and Support
For warranty information and technical support, please refer to the official Onkyo website or contact your local Onkyo dealer. Keep your purchase receipt as proof of purchase for warranty claims.


