1. Product Overview
The Waring YM350 Professional Yogurt Maker is designed for home use, allowing you to easily prepare homemade yogurt. This appliance features a digital timer and comes with multiple containers for convenient batch preparation and storage.
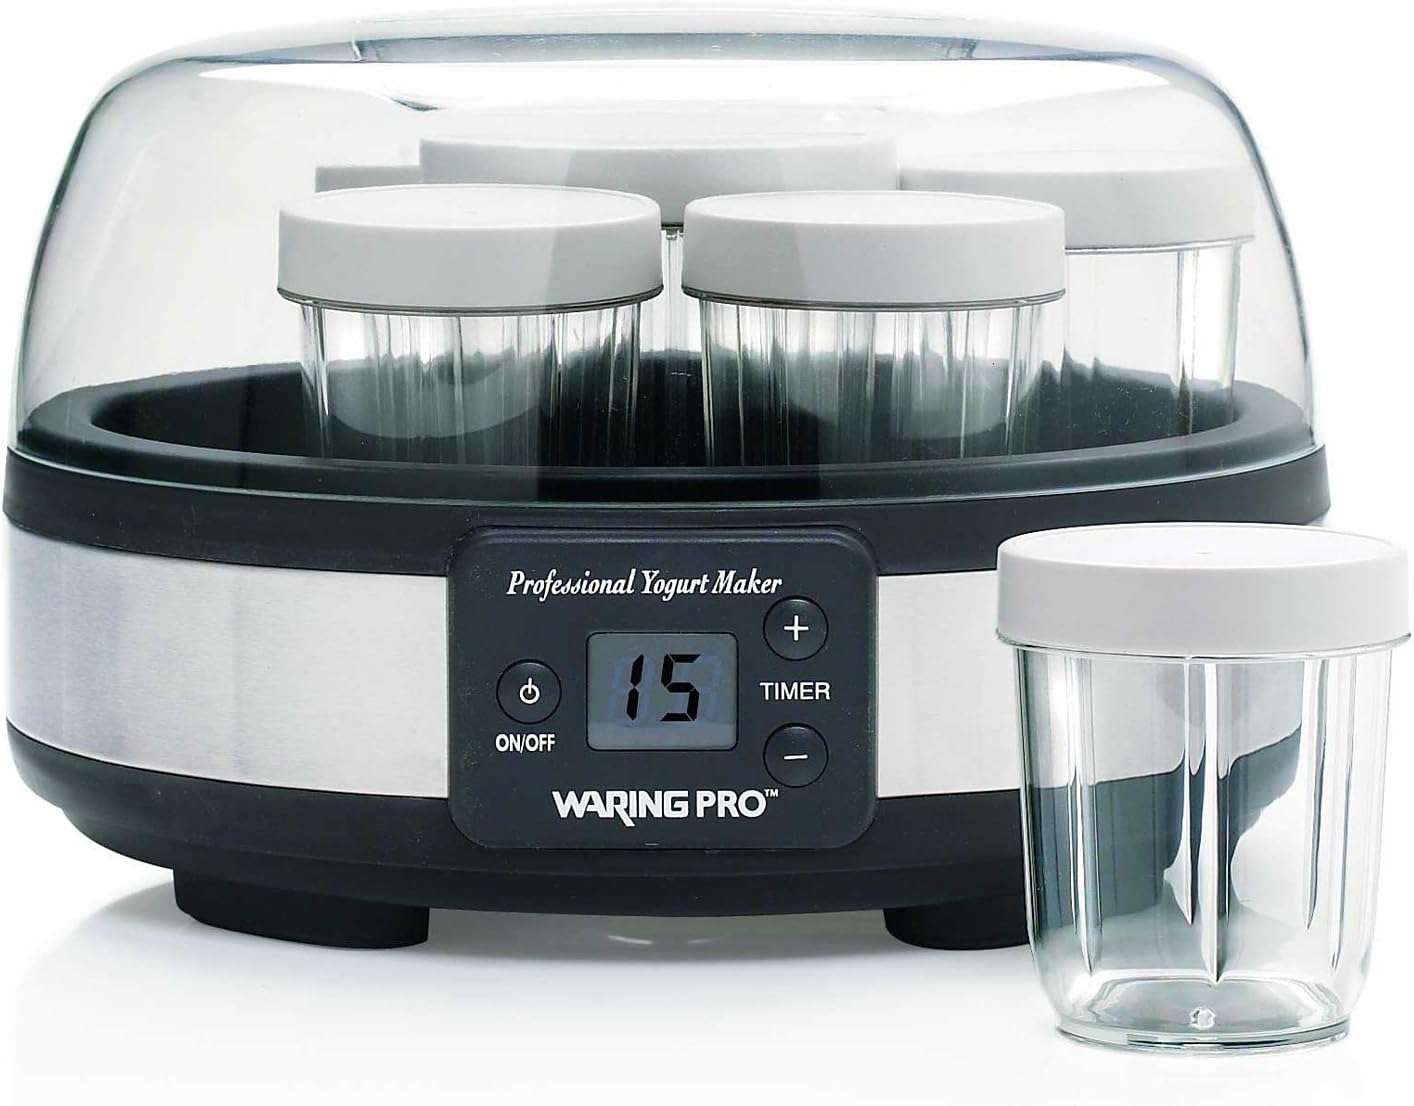
Image 1.1: The Waring YM350 Professional Yogurt Maker, showcasing its clear lid, control panel with digital display, and multiple yogurt jars. One jar is shown separately for scale.
Components:
- Yogurt Maker Base with heating element and control panel
- Clear Lid
- Six 8-ounce polycarbonate stackable jars with lids
- Two 16-ounce polycarbonate stackable jars with lids
2. Important Safety Instructions
When using electrical appliances, basic safety precautions should always be followed to reduce the risk of fire, electric shock, and/or injury to persons, including the following:
- Read all instructions before operating the appliance.
- Do not touch hot surfaces. Use handles or knobs.
- To protect against electrical hazards, do not immerse the cord, plugs, or the appliance base in water or other liquids.
- Close supervision is necessary when any appliance is used by or near children.
- Unplug from outlet when not in use and before cleaning. Allow to cool before putting on or taking off parts.
- Do not operate any appliance with a damaged cord or plug, or after the appliance malfunctions or has been damaged in any manner. Return appliance to the nearest authorized service facility for examination, repair, or adjustment.
- The use of accessory attachments not recommended by the appliance manufacturer may cause injuries.
- Do not use outdoors.
- Do not let cord hang over edge of table or counter, or touch hot surfaces.
- Do not place on or near a hot gas or electric burner, or in a heated oven.
- Always attach plug to appliance first, then plug cord into the wall outlet. To disconnect, turn any control to "off", then remove plug from wall outlet.
- Do not use appliance for other than intended use.
3. Setup and First Use
Before First Use:
- Unpack the yogurt maker and all its components.
- Wash the polycarbonate jars, lids, and the clear top cover in warm, soapy water. Rinse thoroughly and dry. These parts are also dishwasher safe.
- Wipe the base unit with a damp cloth. Do not immerse the base in water.
- Ensure the appliance is placed on a stable, flat, heat-resistant surface, away from water sources.
4. Operating Instructions
This section outlines the general process for making yogurt using the Waring YM350. Specific recipes may vary.
Basic Yogurt Preparation:
- Prepare the Milk:
- Heat the desired amount of milk (e.g., 8-8.5 cups for a full batch) to 180°F (82°C). This can be done on a stovetop or in a microwave. Heating the milk helps to denature the proteins, resulting in a thicker yogurt.
- Allow the milk to cool down to between 106°F and 110°F (41°C-43°C). This temperature range is optimal for the yogurt cultures to thrive.
- (Optional) For thicker yogurt, stir in 1 cup of non-fat dry milk powder after the milk has cooled.
- Add Starter Culture:
- In a separate small bowl, combine about 1 cup of plain yogurt (containing active cultures) or a yogurt starter packet with a small amount of the cooled milk. Mix until smooth.
- Pour this mixture back into the main batch of cooled milk and stir gently until thoroughly combined.
- Fill Jars:
- Distribute the milk and culture mixture evenly into the clean polycarbonate jars. Do not place the lids on the individual jars at this stage.
- Place the filled jars into the yogurt maker base. The unit can accommodate various combinations of the 8-ounce and 16-ounce jars.
- Set Incubation Time:
- Place the clear top cover onto the yogurt maker base.
- Plug the appliance into a standard electrical outlet. The blue LED timer display will illuminate.
- Press the ON/OFF button to turn the unit on.
- Use the TIMER + and TIMER - buttons to set the desired incubation time. A typical incubation period is 8-12 hours, depending on desired thickness and tartness. The display shows hours.
- The yogurt maker will maintain a consistent temperature for the set duration.
- Cooling and Storage:
- Once the set time has elapsed, the unit will beep and automatically shut off.
- Remove the clear cover. Place the lids onto the individual yogurt jars.
- Transfer the jars to the refrigerator and chill for at least 4 hours before serving. Chilling stops the fermentation process and further thickens the yogurt.
Note: The fermentation time can be adjusted to achieve different consistencies and levels of tartness. Longer fermentation generally results in thicker, tangier yogurt.
5. Maintenance and Cleaning
Cleaning:
- Always unplug the yogurt maker from the electrical outlet and allow it to cool completely before cleaning.
- The clear top cover, individual jars, and their lids are dishwasher safe (top rack recommended) or can be washed by hand in warm, soapy water. Rinse thoroughly and dry.
- Wipe the exterior of the base unit with a soft, damp cloth. Do not use abrasive cleaners or scouring pads.
- Never immerse the base unit, power cord, or plug in water or any other liquid.
Storage:
Ensure all parts are clean and dry before storing. Store the yogurt maker in its original packaging or in a clean, dry place. The stackable jars allow for compact storage.
6. Troubleshooting
| Problem | Possible Cause | Solution |
|---|---|---|
| Yogurt is too thin or not setting. |
|
|
| Yogurt is too tart or lumpy. |
|
|
| Appliance does not turn on. |
|
|
7. Specifications
- Model: YM350
- Brand: Waring
- Product Dimensions: 12.7 x 12.7 x 9.2 inches
- Item Weight: 5.5 pounds
- Jar Capacity: Six 8-ounce jars, Two 16-ounce jars
- Timer: 19-hour blue LED display
- Dishwasher Safe Parts: Cover, jars, and lids
8. Warranty and Support
For warranty information and customer support, please refer to the documentation included with your purchase or visit the official Waring website. Specific warranty terms and conditions may vary and are typically provided by the manufacturer.
When contacting support, please have your model number (YM350) and purchase date available.


