
Coby DP769
Coby 7" (16:9) Digital Photo Frame
Model: DP769
Introduction
This manual provides comprehensive instructions for the setup, operation, and maintenance of your Coby 7" (16:9) Digital Photo Frame, Model DP769. This device allows you to display digital photos and play MP3 audio files, offering a versatile way to enjoy your media.
Safety Information
- Do not expose the device to rain or moisture to prevent fire or electric shock.
- Do not expose the device to direct sunlight or extreme temperatures.
- Ensure proper ventilation; do not block ventilation openings.
- Use only the power adapter supplied with the unit.
- Keep out of reach of children.
- Do not attempt to disassemble or repair the unit yourself. Refer all servicing to qualified personnel.
Package Contents
Please check the package for the following items:
- Coby 7" (16:9) Digital Photo Frame (Model DP769)
- AC Power Adapter
- User Manual (this document)
Product Overview
Familiarize yourself with the components of your digital photo frame.
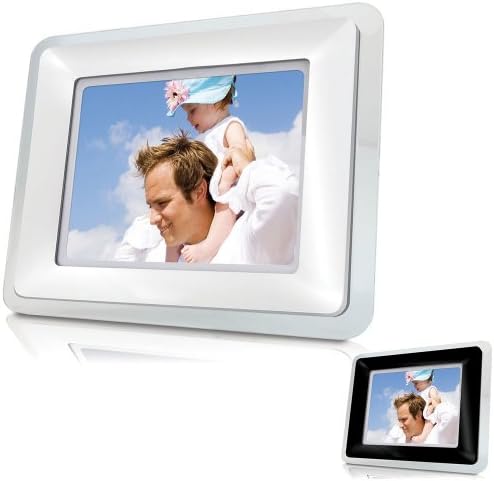
Front view of the Coby 7-inch Digital Photo Frame, featuring a white acrylic frame. The screen displays a vibrant image, highlighting the device's primary function.
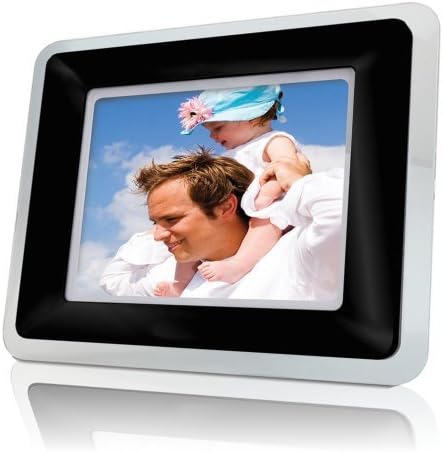
Front view of the Coby 7-inch Digital Photo Frame, featuring a black acrylic frame. This image shows an alternative color option for the frame, demonstrating its aesthetic versatility.
Controls and Ports:
- Power Button: Turns the device on or off.
- Menu Button: Accesses the main menu.
- Navigation Buttons (Up/Down/Left/Right): Used to navigate through menus and select options.
- Enter Button: Confirms selections.
- Exit/Return Button: Returns to the previous screen or exits the menu.
- SD/MMC Card Slot: For inserting compatible memory cards.
- USB Port: For connecting USB flash drives.
- DC IN Port: For connecting the AC power adapter.
Setup
1. Power Connection:
- Connect the small end of the supplied AC power adapter to the DC IN port on the back of the digital photo frame.
- Plug the other end of the AC power adapter into a standard electrical outlet.
- The frame will typically power on automatically or can be turned on using the Power button.
2. Inserting a Memory Card or USB Drive:
- For SD/MMC Cards: Insert the memory card into the SD/MMC card slot with the metal contacts facing down until it clicks into place.
- For USB Flash Drives: Insert the USB flash drive into the USB port.
- The frame should automatically detect the inserted media and prompt you to view content or begin a slideshow.
Operating
Basic Navigation:
- Use the Navigation Buttons (Up, Down, Left, Right) to move through menu options.
- Press the Enter Button to select an option or confirm a setting.
- Press the Exit/Return Button to go back to the previous screen or exit the current menu.
Photo Playback:
- Insert a memory card or USB drive containing photos.
- From the main menu, select 'Photo' or 'Slideshow'.
- The frame will begin displaying photos in a slideshow format.
- During a slideshow, you can use the navigation buttons to manually advance or go back to photos.
MP3 Playback:
- Ensure your memory card or USB drive contains MP3 audio files.
- From the main menu, select 'Music' or 'MP3'.
- Navigate to the desired MP3 file and press 'Enter' to play.
- Use the navigation buttons for volume control, play/pause, and track skipping.
System Settings:
Access the 'Settings' menu to customize your frame's behavior:
- Slideshow Interval: Adjust the duration each photo is displayed.
- Display Mode: Choose between original, fit to screen, or crop.
- Brightness/Contrast: Adjust screen display settings.
- Language: Select your preferred language.
- Date & Time: Set the current date and time.
Maintenance
- Cleaning the Screen: Gently wipe the screen with a soft, lint-free cloth. For stubborn marks, slightly dampen the cloth with water or a non-abrasive screen cleaner. Do not spray liquid directly onto the screen.
- Cleaning the Frame: Use a soft, dry cloth to wipe the frame.
- Storage: If storing the frame for an extended period, disconnect it from power and store it in a cool, dry place.
Troubleshooting
| Problem | Possible Solution |
|---|---|
| Frame does not power on. | Ensure the AC power adapter is securely connected to both the frame and a working electrical outlet. Try a different outlet. |
| No photos displayed. | Check if the memory card or USB drive is inserted correctly. Ensure the photos are in a compatible format (e.g., JPEG). Verify the media is not corrupted. |
| MP3s not playing. | Confirm MP3 files are present on the inserted media. Check the volume settings. Ensure files are not corrupted. |
| Screen is dim or distorted. | Adjust brightness and contrast settings in the menu. Ensure the screen is clean. |
| Buttons are unresponsive. | Disconnect the power adapter, wait 10 seconds, then reconnect to reset the device. |
Specifications
| Feature | Detail |
|---|---|
| Screen Size | 7 Inches |
| Aspect Ratio | 16:9 |
| Display Technology | TFT LCD |
| Resolution | WXGA |
| Compatible Devices | Personal Computer (for media transfer) |
| Supported Media | SD/MMC Cards, USB Flash Drives |
| Supported Photo Formats | JPEG (common format) |
| Supported Audio Formats | MP3 |
| Power Source | Corded Electric (AC Adapter) |
| Item Weight | 2.1 pounds |
| Model Number | DP769 (Internal SKU: 5823651519) |
Warranty and Support
For warranty information and technical support, please refer to the warranty card included with your product or visit the official Coby website. Keep your purchase receipt as proof of purchase for warranty claims.
For further assistance, you may contact Coby customer service through their official channels, typically found on their website or product packaging.
Ask a question about this manual
Ask about setup, troubleshooting, compatibility, parts, safety, or missing instructions. Manuals+ will review the question and use this page’s manual context to help answer it.