
DYMO 1738976
DYMO LabelManager 210D Label Maker Instruction Manual
Model: 1738976
Brand: DYMO
Introduction
The DYMO LabelManager 210D is a versatile label maker designed for ease of use in various office and personal organizational tasks. It features a QWERTY keyboard, a large graphical display, and quick-access buttons for efficient text entry and formatting. This device supports 6 font sizes, 7 text styles, 8 box styles, and a wide variety of symbols, enabling comprehensive labeling solutions.
What's in the Box
Upon unboxing your DYMO LabelManager 210D kit, please verify that all the following components are present:
- DYMO Label Maker 210D unit
- Two D1 label cassettes: one black print on white (1/2-inch x 10-feet) and one black print on yellow (1/2-inch x 23-feet)
- Six AA batteries
- AC adapter
- Quick reference guide
- Instruction manual (this document)
- 1-year limited warranty card
- Storage case

Figure 1: Complete contents of the DYMO LabelManager 210D kit.
Setup
1. Powering the Device
The LabelManager 210D can be powered using either the included AC adapter or six AA batteries.
- Using the AC Adapter: Connect the AC adapter to the power port on the side of the label maker and plug it into a standard electrical outlet.
- Installing AA Batteries: Open the battery compartment cover on the back of the device. Insert six AA batteries, ensuring correct polarity (+/-). Close the battery compartment cover securely.
2. Loading a Label Cassette
To begin printing, a label cassette must be properly installed.
- Ensure the label maker is turned off.
- Open the label cassette compartment cover located on the top-right side of the device.
- Insert a D1 label cassette into the compartment with the label side facing down, ensuring it clicks firmly into place. The label tape should extend slightly from the cassette opening.
- Close the label cassette compartment cover.
Operating Instructions
1. Basic Label Creation
The LabelManager 210D features a familiar QWERTY keyboard for easy text input.
- Turning On/Off: Press the blue power button (⏻) to turn the device on or off.
- Typing Text: Use the QWERTY keyboard to type your desired label text. The text will appear on the large LCD screen.
- Editing Text: Use the arrow keys (◄ ►) to navigate the cursor and the backspace key (⌫) to delete characters.
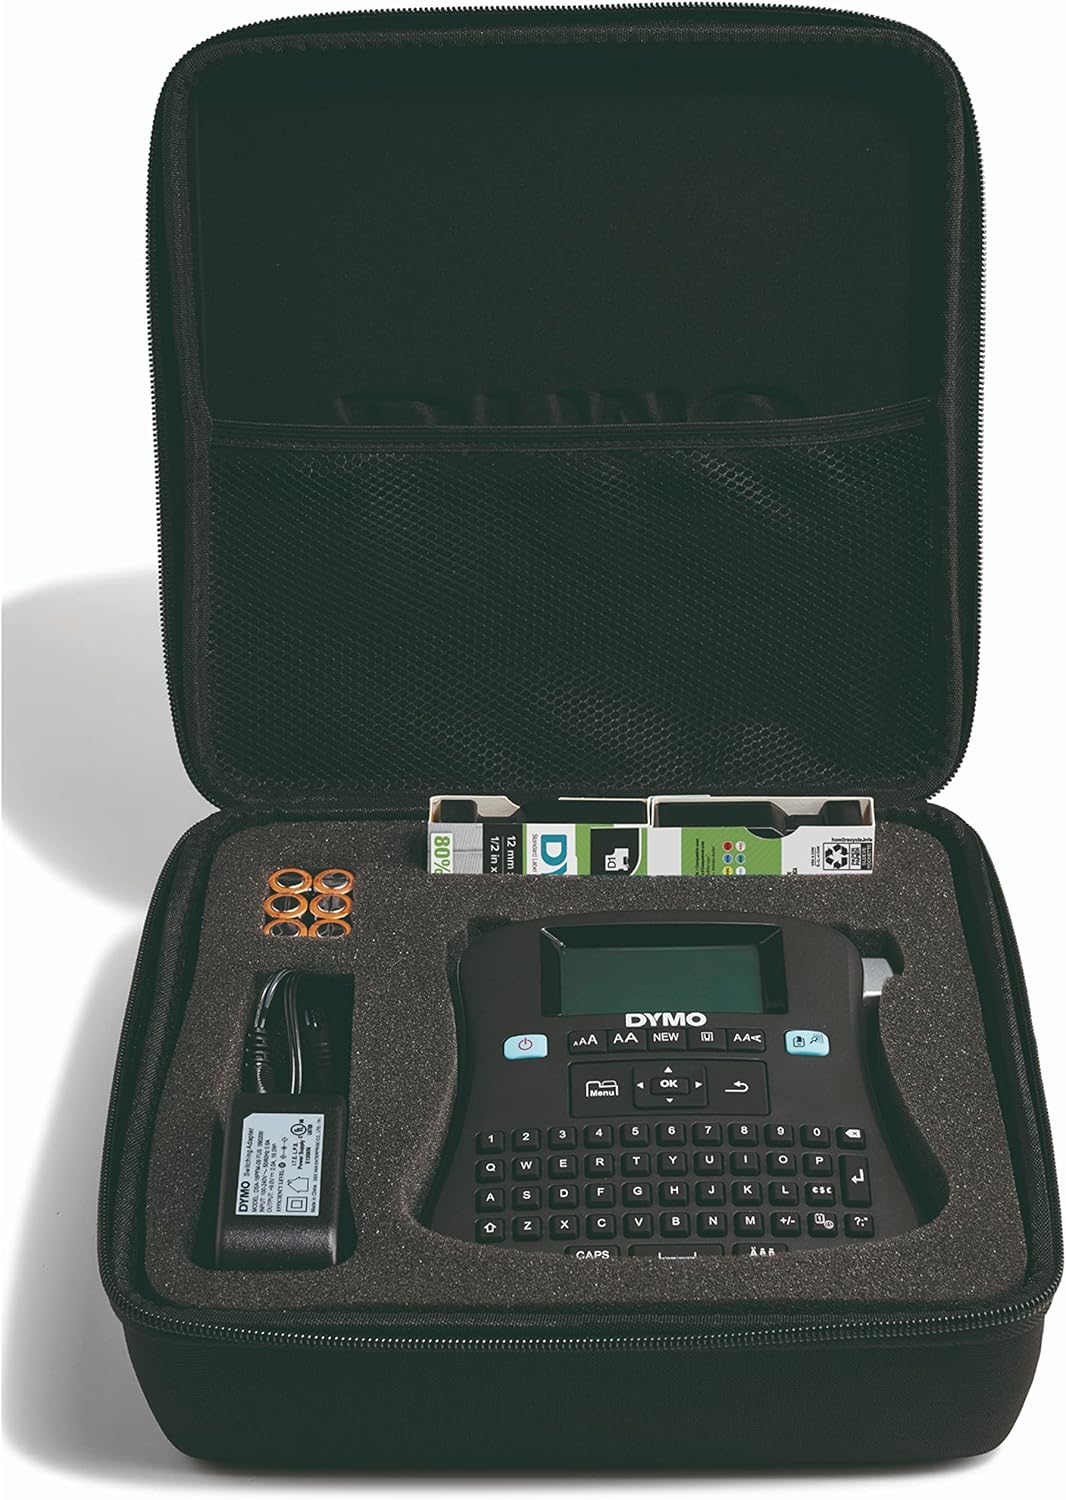
Figure 2: Close-up of the LabelManager 210D's keyboard and display.
2. Formatting Labels
Customize your labels using various formatting options.
- Font Size: Press the AA button to cycle through available font sizes.
- Text Style: Press the A/a button to access options like bold, italic, underline, and vertical text.
- Symbols & Punctuation: Use the dedicated symbol and punctuation keys for quick access to common characters.
- Boxes & Borders: The device offers various box and border styles to enhance your labels. Refer to the quick reference guide for specific button functions.

Figure 3: The label maker in use for home organization.
3. Printing Labels
Once your label text and formatting are complete, you can print the label.
- Press the Print button (usually indicated by a printer icon).
- The label will feed out of the device.
- Use the built-in cutter to cleanly cut the label from the tape.
- Peel the backing from the label and apply it to your desired surface.

Figure 4: Applying a printed label to a file folder.
4. Saving and Recalling Labels
The LabelManager 210D allows you to save frequently used labels for quick reprinting.
- Saving: After creating a label, press the Save button (often indicated by a folder icon) and follow the on-screen prompts to store it. The device can store up to 9 labels.
- Recalling: Press the Recall button (often indicated by a folder with an arrow) and select the desired saved label from the list.
Maintenance
To ensure optimal performance and longevity of your DYMO LabelManager 210D, follow these maintenance guidelines:
- Cleaning the Print Head: Periodically clean the print head using a DYMO cleaning cassette or a soft, lint-free cloth dampened with rubbing alcohol. Ensure the device is off before cleaning.
- Cleaning the Cutter Blade: If the cutter blade becomes dull or accumulates adhesive residue, carefully clean it with a cotton swab dampened with rubbing alcohol. Exercise caution as the blade is sharp.
- Exterior Cleaning: Wipe the exterior of the label maker with a soft, damp cloth. Avoid using abrasive cleaners or solvents.
- Storage: When not in use, store the label maker in its provided storage case in a cool, dry place, away from direct sunlight and extreme temperatures. Remove batteries if storing for extended periods.
Troubleshooting
This section addresses common issues you might encounter with your LabelManager 210D.
| Problem | Possible Cause | Solution |
|---|---|---|
| Device does not turn on. | Low or dead batteries; AC adapter not connected properly. | Replace batteries or ensure AC adapter is securely plugged in. |
| Poor print quality or blank labels. | Print head is dirty; label cassette is empty or improperly installed. | Clean the print head; replace the label cassette or re-install it correctly. |
| Label tape jams. | Tape is not properly aligned; cutter blade is dirty. | Open the cassette compartment and re-align the tape; clean the cutter blade. |
| Error message on screen. | Specific error condition. | Refer to the quick reference guide or the full instruction manual for specific error code meanings and solutions. |
Specifications
| Feature | Detail |
|---|---|
| Model Name | LabelManager 210D |
| Item Model Number | 1738976 |
| Dimensions (L x W x H) | 11.63 x 3.13 x 10.31 inches |
| Item Weight | 2.46 pounds |
| Power Source | 6 AA batteries (included) or AC adapter (included) |
| Display Type | LCD |
| Keyboard Layout | QWERTY |
| Print Technology | Dot Matrix |
| Max Media Size | 3 x 5 inch (referring to label tape width) |
| Max Input Sheet Capacity | 10 (referring to copies of a label) |
| Memory Storage Capacity | 1 GB (for saved labels) |
| Special Features | Print Preview, Auto Power Off, QWERTY keyboard |
Warranty and Support
Warranty Information
The DYMO LabelManager 210D Label Maker comes with a 1-year limited warranty. Please refer to the included warranty card for detailed terms and conditions regarding coverage and claims.
Customer Support
For further assistance, technical support, or to inquire about replacement parts and accessories, please visit the official DYMO website or contact their customer service department. Contact information can typically be found on the manufacturer's website or in the quick reference guide.
Related documents1738976


Ask a question about this manual
Ask about setup, troubleshooting, compatibility, parts, safety, or missing instructions. Manuals+ will review the question and use this page’s manual context to help answer it.