Introduction
The Stealth Cam STC-SLB2B Patroller is a security device combining a 2.0-megapixel digital camera with a powerful 500-watt halogen floodlight. Designed to enhance the security of your home or property, this unit activates its light and camera upon detecting motion, capturing images or video footage of activity. This manual provides essential information for the proper setup, operation, and maintenance of your Patroller security system.
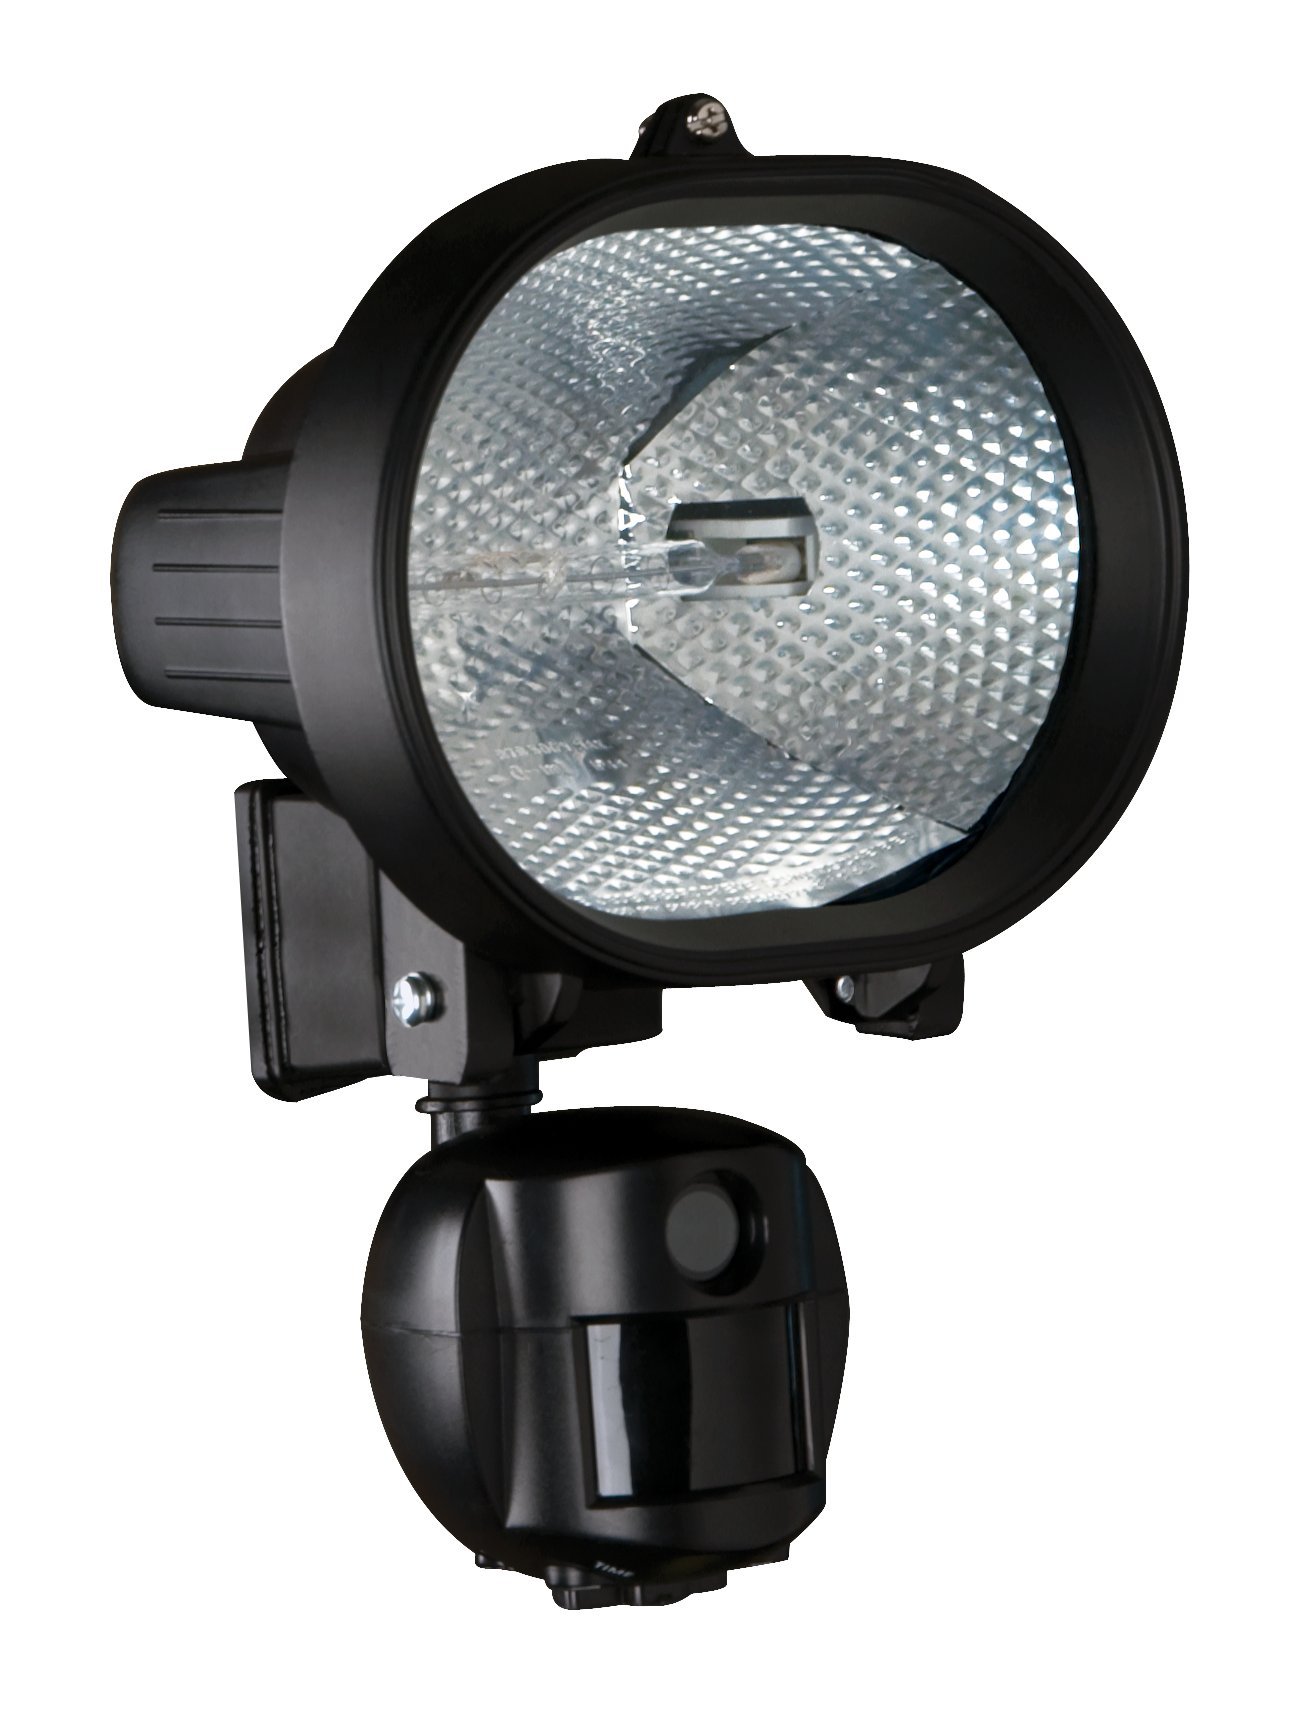
Image: The Stealth Cam STC-SLB2B Patroller Security Camera and Floodlight unit, featuring the camera lens and floodlight housing.
Product Features
- Built-in 2.0 Megapixel color digital security camera for clear image capture.
- Motion-activated system triggers both the light and camera.
- Capable of capturing up to 2 still images or 10 seconds of video per activation.
- Powerful 500-watt security light with an ultra-bright halogen bulb for illumination.
- Records time and date stamps on every captured still image for event tracking.
Package Contents
Please ensure all items are present before beginning installation:
- Stealth Cam STC-SLB2B Patroller Security Camera and Floodlight Unit
- Halogen Bulb (pre-installed or separate)
- Mounting Hardware (screws, wire nuts, gasket)
- User Manual
- SD Memory Card (typically 1GB or 2GB, may vary)
Setup and Installation
Proper installation is crucial for optimal performance. It is recommended to have a qualified electrician perform the wiring if you are unfamiliar with electrical installations.
1. Mounting Location
- The unit is designed for wall mounting, typically to a standard junction box.
- Choose a location that provides the desired coverage area for both the floodlight and the camera.
- Consider mounting heights between 8 to 15 feet for effective illumination and camera range. The unit primarily swivels up and down, so horizontal positioning is critical during installation.
2. Electrical Connection
- Ensure power to the circuit is turned OFF at the breaker before beginning any wiring.
- Connect the unit's wiring to your household electrical system (AC/DC power source) according to local electrical codes.
- Secure the unit to the junction box using the provided mounting hardware.
3. SD Card Installation
- Locate the SD card slot, typically behind a protective cover on the unit.
- Insert the provided SD memory card (up to 2GB capacity supported) into the slot until it clicks into place. Ensure the card is inserted in the correct orientation.
4. Initial Power On and Testing
- Once installation is complete, restore power to the circuit.
- The unit will power on. Allow a few moments for it to initialize.
- Test the motion sensor by walking into its detection zone. The floodlight should activate, and the camera should capture images or video.
Operating Instructions
The Patroller unit features an LCD screen and control buttons, usually located behind a protective cover. Programming can be challenging due to the unit's design and mounting position. It is advisable to perform initial programming at ground level using an extension cord if possible, before final mounting.
1. Accessing Controls
- Open the protective cover to reveal the LCD screen and control buttons.
- Familiarize yourself with the navigation buttons (e.g., MENU, UP, DOWN, OK/ENTER).
2. Setting Time and Date
- Navigate to the "Time/Date" setting in the menu.
- Use the UP/DOWN buttons to adjust the year, month, day, hour, and minute. Confirm each selection with the OK/ENTER button.
- Note: The unit does not have a backup battery. Loss of power will reset the time and date, requiring manual re-entry.
3. Camera Mode Settings
- Access the "Camera Mode" or "Capture Settings" menu.
- Select between still image capture (e.g., 1 or 2 images per trigger) or video capture (e.g., 10 seconds per trigger).
- Adjust image resolution if available (e.g., 2.0 MP).
4. Motion Sensor Sensitivity
- Locate the "PIR Sensitivity" or "Motion Sensor" setting.
- Adjust the sensitivity level (e.g., Low, Medium, High) to suit your environment and minimize false triggers.
5. Viewing Captured Media
- To view images or videos, you must manually retrieve the SD card from the unit.
- Insert the SD card into a compatible card reader connected to a computer or other viewing device.
- The files will be organized by date and time.
Maintenance
1. Cleaning
- Periodically clean the camera lens and floodlight glass with a soft, damp cloth to ensure clear images and optimal light output.
- Keep the motion sensor clear of obstructions like spiderwebs or debris.
2. SD Card Management
- The unit is designed to overwrite older files once the SD card is full. Regularly check the card to save important footage.
- Consider formatting the SD card periodically (after backing up data) to maintain performance.
3. Halogen Bulb Replacement
- If the floodlight bulb burns out, ensure power is OFF at the breaker.
- Allow the bulb to cool completely before attempting to replace it.
- Carefully remove the old 500-watt halogen bulb and insert a new one of the same type and wattage. Avoid touching the new bulb directly with bare hands, as oils can reduce its lifespan.
Troubleshooting
| Problem | Possible Cause | Solution |
|---|---|---|
| Unit is unresponsive or "locked up". | Temporary software glitch. | Turn off power to the unit at the circuit breaker for at least 15 minutes, then restore power. This performs a hard reset. |
| Light activates during daylight hours. | Motion sensor sensitivity too high or faulty photocell. | Adjust the motion sensor sensitivity setting to a lower level. Ensure the photocell (light sensor) is not obstructed or dirty. |
| Time and date stamp are incorrect after power interruption. | No internal backup battery. | Manually reset the time and date settings via the unit's control panel. |
| Camera misses moving subjects or captures them partially. | Slow camera activation, incorrect sensor placement, or subject moving too quickly. | Ensure the unit is positioned to capture subjects entering the detection zone from a distance. Adjust the angle of the unit to optimize the field of view for both the sensor and camera. Understand that there may be a slight delay in capture. |
| Difficulty programming the unit. | Awkward control placement, unclear instructions. | Review the operating instructions carefully. If possible, program the unit at ground level before final installation. Use a flashlight if working in low light. |
| No images/videos on SD card. | SD card not inserted correctly, card full (and not overwriting), or unit not set to record. | Ensure the SD card is properly inserted. Check camera mode settings to confirm it's set to capture. Verify the SD card is not corrupted; try formatting it (after backing up data) or using a different compatible SD card. |
Specifications
- Model: STC-SLB2B
- Camera Resolution: 2.0 Megapixel
- Light Source: Halogen
- Light Wattage: 500 Watts
- Power Source: AC/DC
- Material: Glass (for light lens)
- Finish Type: Black
- Mounting Type: Wall Mount
- Item Weight: 3.6 pounds
- Package Dimensions: 21.2 x 14.8 x 5 inches
Warranty Information
Specific warranty details for the Stealth Cam STC-SLB2B Patroller are not available in this document. Please refer to the product packaging or contact Stealth Cam customer support for current warranty terms and conditions.
Customer Support
For technical assistance, troubleshooting beyond this manual, or inquiries regarding parts and service, please visit the official Stealth Cam website or contact their customer service department. Contact information is typically provided on the product packaging or their official website.
You can visit the Stealth Cam store on Amazon for more information: Stealth Cam Store
Video Resources
No official product videos from the seller are available for embedding in this manual.