
Introduction
This manual provides detailed instructions for the installation, operation, and maintenance of your Stens Kwik Loader 385-698 Plastic Fixed Dual Line Trimmer Head. Designed for heavy-duty use, this trimmer head offers an efficient solution for string trimming tasks. Please read this manual thoroughly before use to ensure safe and effective operation.
Important Safety Information
Always prioritize safety when operating power equipment. Failure to follow safety guidelines can result in serious injury.
- Always wear appropriate safety gear, including safety glasses, when using this product.
- Be aware of the risk of flying debris.
- Keep a safe distance from people and objects while in operation.
- Ensure the trimmer is turned off and disconnected from its power source before performing any installation, maintenance, or line changes.
Package Contents
Your Stens Kwik Loader 385-698 Trimmer Head package includes the following items:
- Stens Kwik Loader Trimmer Head
- Four (4) pieces of 8-inch square 0.095 trimmer line
- Various adapters and color-coded hardware for universal fit
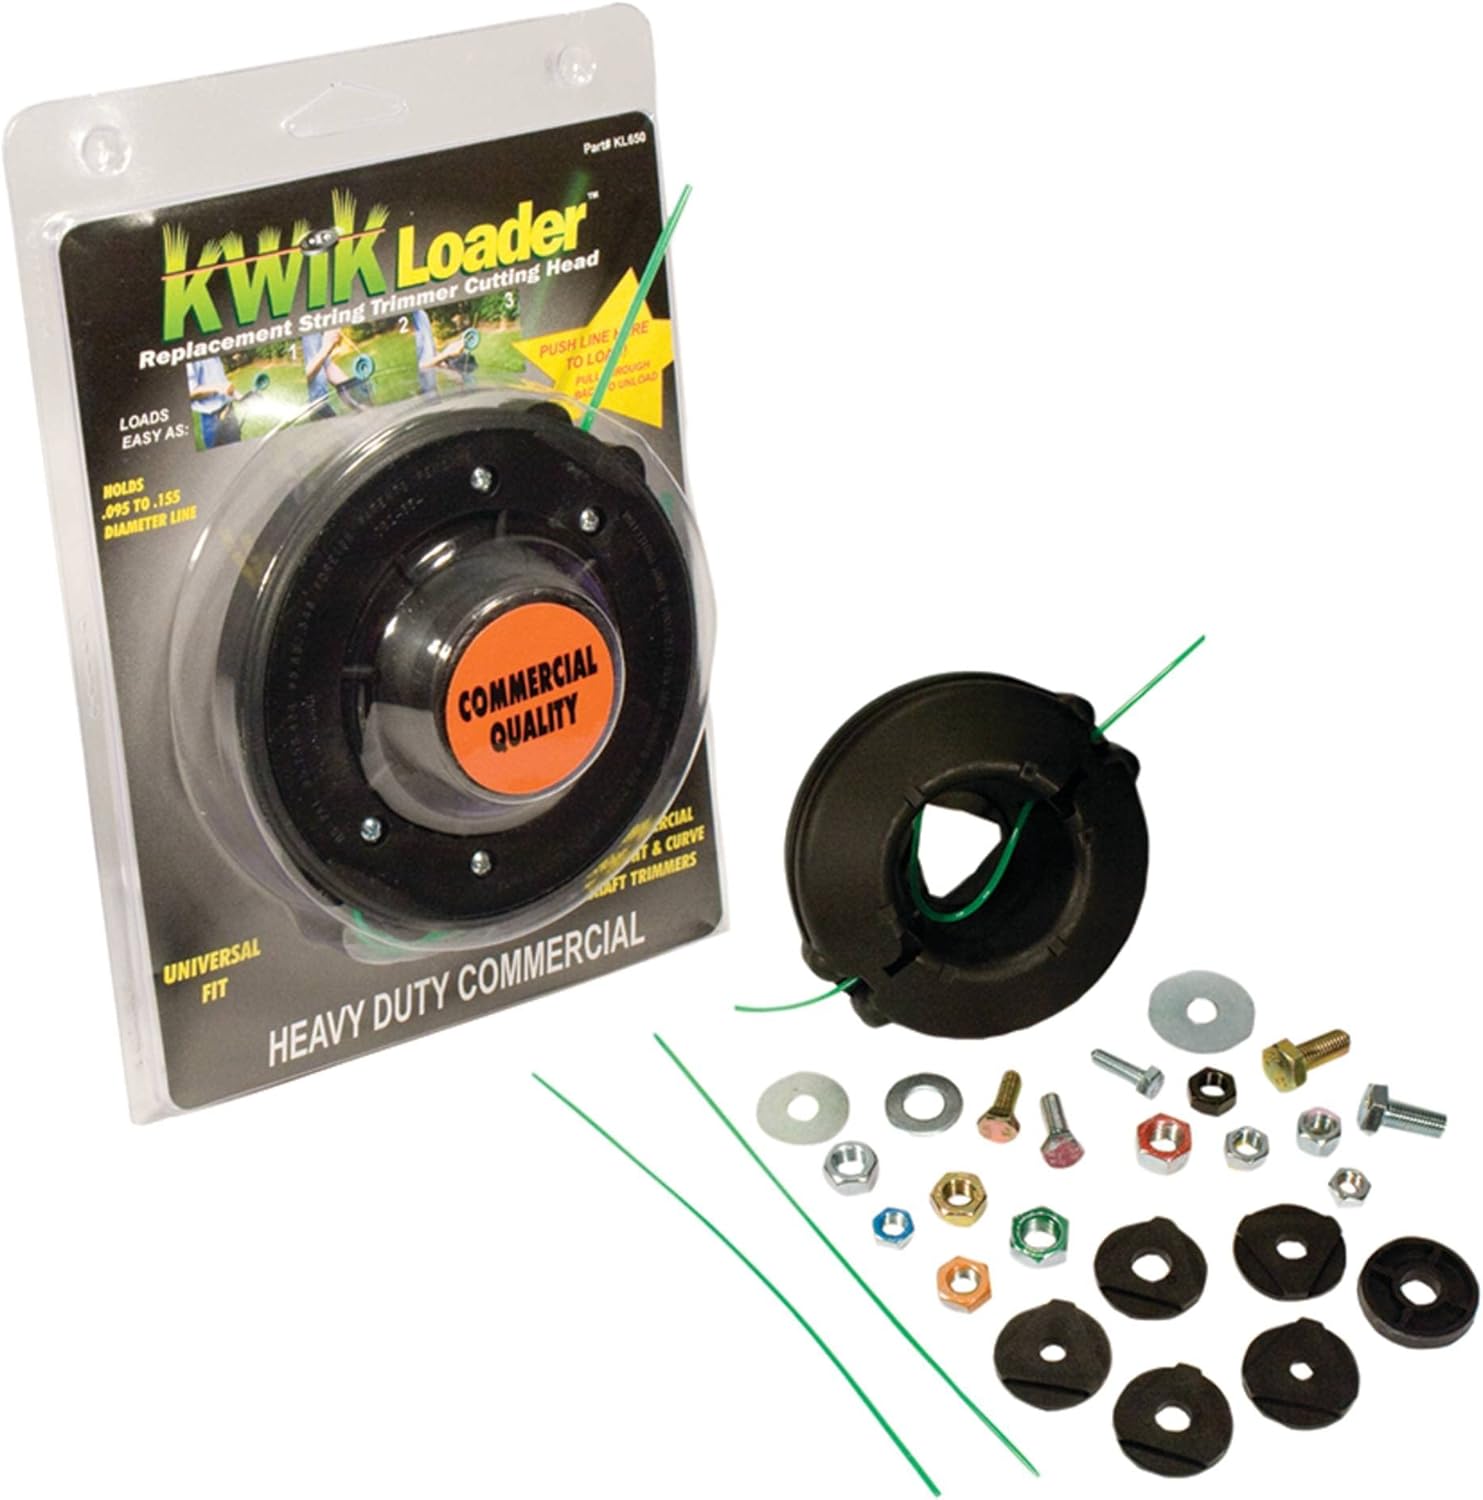
Image: Stens Kwik Loader Trimmer Head, showing the product in its packaging alongside included pre-cut trimmer line and a selection of adapters and hardware for installation.
Installation Instructions
The Stens Kwik Loader Trimmer Head is designed for universal fit on most straight shaft trimmers. It comes with a variety of adapters to ensure compatibility.
Compatible Trimmer Brands:
- Craftsman
- Echo
- Husqvarna
- Maruyama
- Poulan/Poulan Pro
- Red Max
- Sears
- Shindaiwa
- Stihl
- And many more.
General Installation Steps:
- Prepare Your Trimmer: Ensure your string trimmer is turned off and the spark plug wire is disconnected (for gas models) or the battery is removed (for electric models).
- Remove Existing Head: Carefully remove your trimmer's existing head. This may require specific tools or techniques depending on your trimmer model. Refer to your trimmer's instruction manual if needed.
- Select Correct Adapter: Identify the appropriate adapter and hardware from the included assortment that matches your trimmer's shaft. It is crucial to select the correct parts for a secure fit. You may need to consult online resources or your trimmer's manual for guidance on adapter selection.
- Attach Kwik Loader Head: Securely attach the Stens Kwik Loader Trimmer Head using the selected adapter and hardware. Ensure it is tightened according to your trimmer's specifications to prevent loosening during operation.

Image: Underside view of the Stens Kwik Loader Trimmer Head, showing the central attachment point and line locking mechanisms.
Operating Instructions
Loading Trimmer Line
The Kwik Loader head is designed for easy loading of pre-cut trimmer line. It accommodates line diameters from 0.095 to 0.155 inches and is typically used with 8-inch lengths of pre-cut line.
- Prepare Line: Use pre-cut trimmer line of the appropriate diameter (0.095 to 0.155 inches) and length (typically 8 inches). For easier insertion, you may angle-cut one end of each line piece with heavy scissors to create a sharper point.
- Insert Line: Locate the line insertion holes on the trimmer head. Push one end of a pre-cut line piece firmly into one of the holes until it is securely seated.
- Verify Securement: Gently tug on the line to ensure it is held firmly by the internal locking mechanism. The line should not pull out easily.
- Repeat: Insert the second piece of trimmer line into the other hole.
Removing Trimmer Line
When lines become too short or need replacement, follow these steps:
- Pull Towards Center: To remove a line, pull it towards the center of the trimmer head, not outwards. Pulling outwards will cause the line to wedge more tightly.
- Use Pliers (if needed): If a heavy line gets stuck, especially due to heat deformation, use pliers to grasp and pull it out towards the center.
Maintenance
Regular maintenance ensures optimal performance and extends the life of your trimmer head.
- Cleaning: After each use, clean the trimmer head to remove grass, dirt, and debris. This prevents buildup that can hinder performance.
- Lubrication: Periodically lubricate the line receptacles within the trimmer head. This helps prevent clogging or rust and ensures the line locking mechanism functions correctly.
- Inspection: Regularly inspect the trimmer head for any signs of wear, cracks, or damage. Replace the head if it shows significant wear or damage.
Troubleshooting
If you encounter issues with your Stens Kwik Loader Trimmer Head, consider the following:
- Line Not Holding: Ensure the line is inserted correctly and fully seated. Verify that the line diameter is within the recommended range (0.095-0.155 inches). Inspect the internal locking mechanism for debris or damage.
- Difficulty Loading Line: Ensure the line ends are cut cleanly, and consider angle-cutting the ends for easier insertion. Check for any obstructions in the line holes.
- Excessive Line Breakage: Ensure you are using high-quality trimmer line appropriate for the task. Inspect the trimmer head for sharp edges or burrs that might be prematurely cutting the line.
If problems persist, contact the seller or manufacturer for further assistance.
Product Specifications
| Feature | Specification |
|---|---|
| Brand | Stens |
| Model Number | 385-698 |
| Item Weight | 1 pound (454 Grams) |
| Product Dimensions | 25 x 25 x 15 inches (packaging dimensions) |
| Line Compatibility | 0.095 to 0.155 inch diameter |
| Line Length (Pre-cut) | 8 inches |
| Power Source | Manual (for line loading) |
| Assembly Required | No (referring to the head itself, but installation onto trimmer is required) |
| UPC | 648855006503 |
Warranty and Support
For information regarding product warranty, returns, or technical support, please refer to the documentation provided at the time of purchase or contact your retailer. You may also visit the official Stens website or their Amazon store for additional resources: