
Introduction
This instruction manual provides detailed guidance for installing the Scosche TA2053B Double DIN Radio Install Dash Kit. This kit is specifically designed to integrate an aftermarket double DIN car stereo into select 2005-2008 Toyota Tacoma vehicles, ensuring a factory-like appearance and secure fit. Please read all instructions carefully before beginning the installation process.
Vehicle Compatibility
This dash kit is compatible with select 2005-2008 Toyota Tacoma models. Refer to the fit guide image to verify your vehicle's compatibility.

Image: Fit Guide for Scosche TA2053B showing compatibility with 2005-2008 Toyota Tacoma.
Safety Information
Always disconnect the negative battery terminal before beginning any electrical work on your vehicle to prevent electrical shorts and potential injury. Ensure all connections are secure before reconnecting the battery. If you are unsure about any step, consult a professional installer.
Video: Scosche Stereo Installation Guide. This video demonstrates the general process of installing a car stereo, including disconnecting the battery and preparing the dash kit.
What's in the Box
Your Scosche TA2053B kit includes the following components:
- Radio Bezel
- Mounting Brackets
- Instruction Manual

Image: Components of the Scosche TA2053B kit, showing the radio bezel, mounting brackets, and other parts.
Tools Required
For a successful installation, you will typically need the following tools:
- Screwdriver (Phillips head)
- Panel removal tool (plastic pry tool)
- Wrench (for battery terminal)
- Wire crimpers/strippers (if connecting a wire harness)
Installation Instructions
Step 1: Disconnect Vehicle Battery
Before starting any work, disconnect the negative terminal of your vehicle's battery. This prevents electrical shorts and ensures safety during installation.
Step 2: Prepare the Dash Kit
Review the included instruction manual for specific details regarding your aftermarket stereo. Break off any tabs on the mounting brackets that are not required for your specific stereo application. The kit is designed to fit true Double DIN stereos with a maximum faceplate opening of 96.8mm x 173mm. Some radios labeled as Double DIN may be oversized and require minor trimming of the kit for a proper fit.

Image: Diagram illustrating the standard Double DIN opening dimensions (96.8mm x 173mm) for compatibility.
Step 3: Mount Aftermarket Stereo to Dash Kit
Secure your new aftermarket stereo to the Scosche mounting brackets using the screws provided with your stereo unit. Ensure the stereo is firmly attached to the brackets.

Image: Aftermarket stereo attached to the Scosche mounting brackets, ready for installation into the vehicle's dash.
Step 4: Remove Factory Stereo
Using a panel removal tool, carefully pry off the trim panels surrounding your factory stereo. Unscrew and remove the factory stereo from the dashboard. Disconnect all wiring harnesses from the back of the factory stereo.
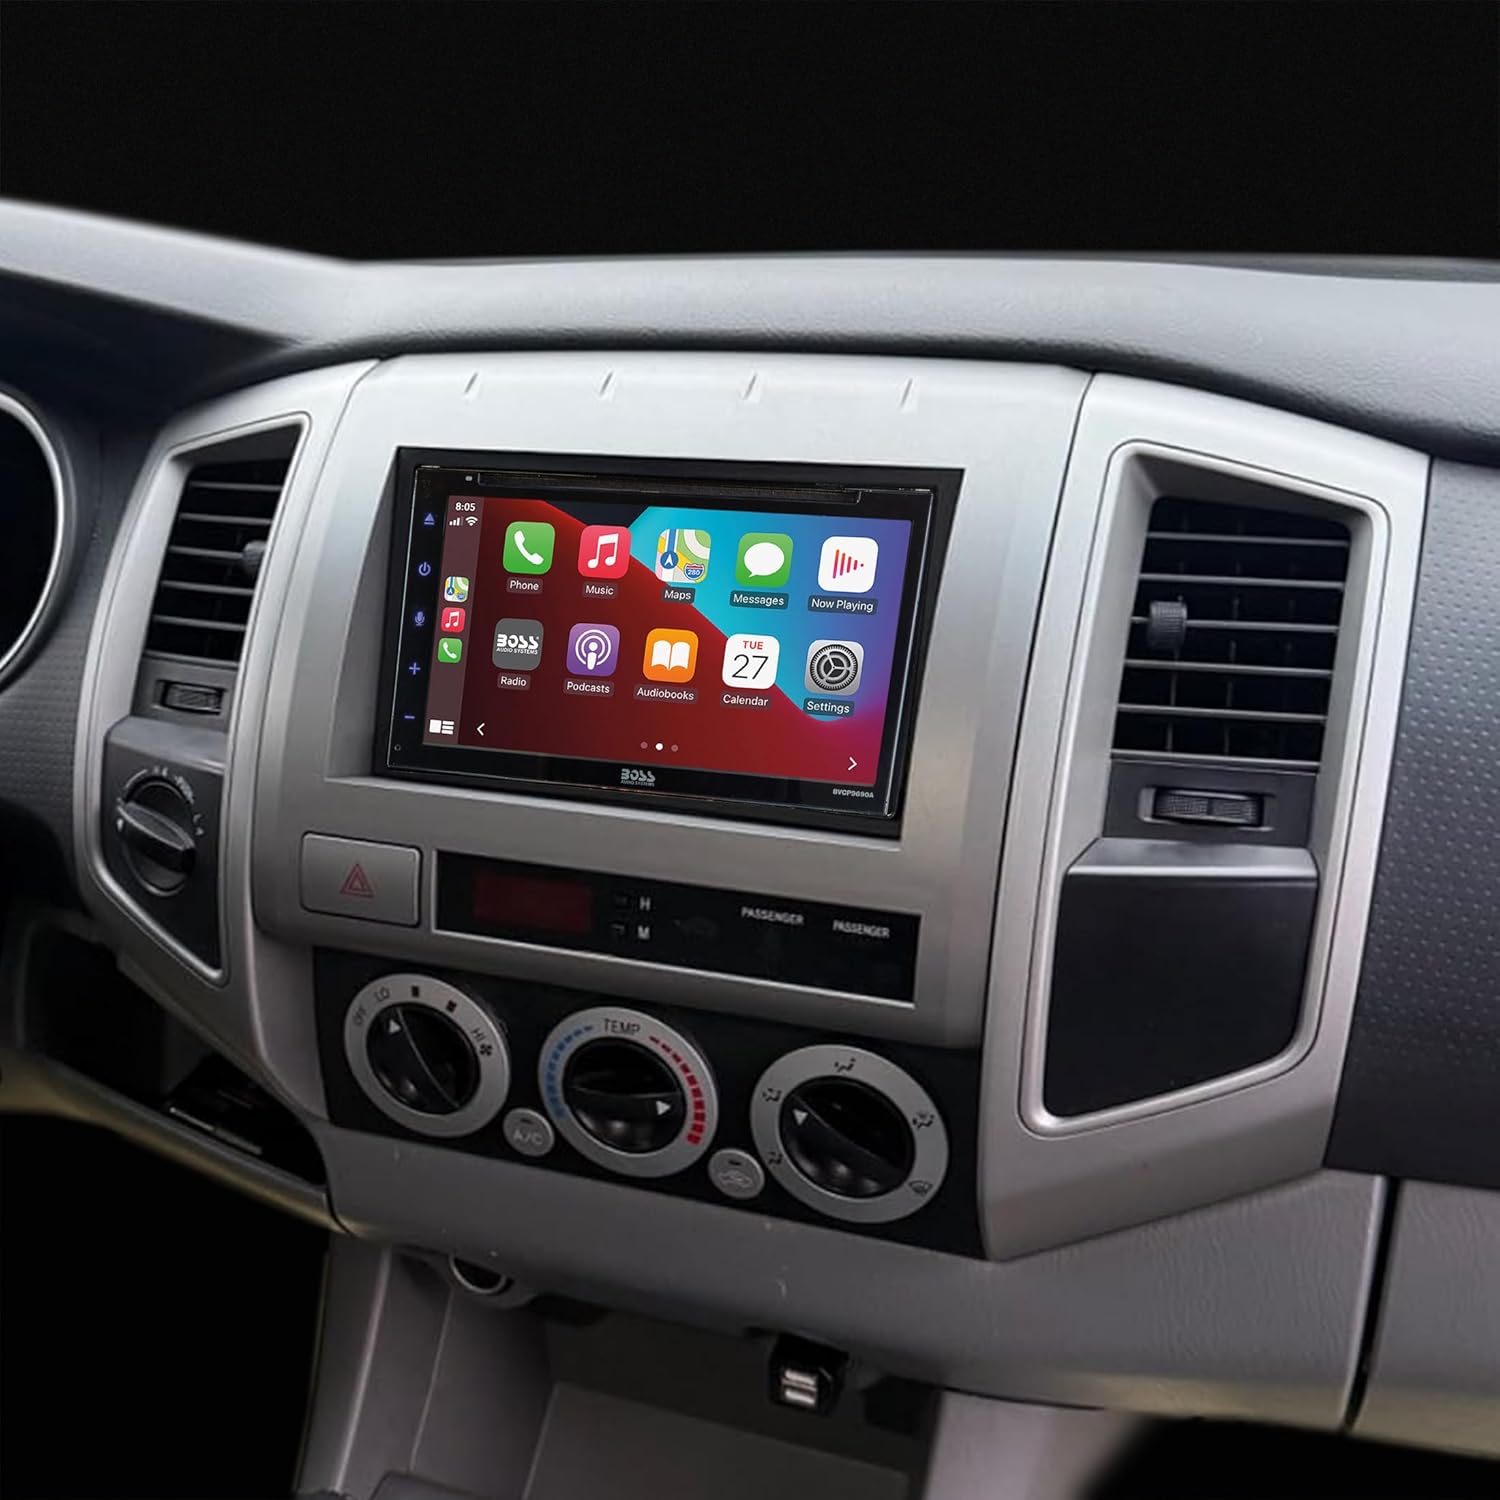
Image: Dashboard with the factory stereo removed, revealing the wiring harnesses and mounting area.
Step 5: Connect Wiring
Connect the vehicle's wiring harness to the appropriate radio harness (sold separately). Ensure all connections are secure. If using an antenna adapter or steering wheel control interface (sold separately), connect them at this stage.

Image: Illustration of wiring harnesses and adapters for connecting an aftermarket stereo.
Step 6: Install New Stereo Assembly
Carefully slide the new aftermarket stereo assembly (with the dash kit attached) into the dashboard opening. Secure it with screws as per your vehicle's requirements. Reattach any trim panels removed in Step 4.

Image: View of a Toyota Tacoma dashboard with the Scosche dash kit and an aftermarket stereo successfully installed.
Step 7: Reconnect Battery and Test
Reconnect the negative battery terminal. Turn on your vehicle and test the functions of your new stereo to ensure proper operation.
Operating Instructions
This dash kit provides a secure mounting solution for your aftermarket stereo. Refer to your aftermarket stereo's instruction manual for specific operating instructions related to its features and functions.
Maintenance
The Scosche TA2053B dash kit is made from durable, OEM quality materials designed for longevity. To maintain its appearance, clean with a soft, damp cloth. Avoid abrasive cleaners or solvents that may damage the finish.
Troubleshooting
- Stereo does not fit: Verify your aftermarket stereo's dimensions against the kit's maximum opening (96.8mm x 173mm). Minor trimming of the kit may be necessary for oversized units.
- Loose fitment: Ensure all mounting screws are tightened and the dash kit is properly seated in the vehicle's dashboard.
- No power to stereo: Double-check all wiring connections, especially the main power and ground wires. Ensure the vehicle's battery is properly reconnected.
For further assistance, contact Scosche customer support.
Specifications
| Model Number | TA2053B |
| Product Dimensions | 10 x 5 x 8.8 inches |
| Item Weight | 10.8 ounces |
| Color | Silver |
| Material | OEM quality materials (ABS plastic) |
| Compatibility | Select 2005-2008 Toyota Tacoma |
Warranty and Support
The Scosche TA2053B Dash Kit is backed by Scosche's Limited Lifetime Warranty. For technical assistance or warranty claims, please contact Scosche customer support. Lifetime Tech Support is available.
Visit the official Scosche website for more information and contact details: www.scosche.com


