
Introduction
This manual provides detailed instructions for the setup, operation, maintenance, and troubleshooting of your Sony DPF-V900 9-Inch Digital Photo Frame. Please read this manual thoroughly to ensure proper use and to maximize your enjoyment of the product.
The DPF-V900 is designed to display your digital photos in brilliant, high-contrast color on its 9-inch LCD screen. It supports direct input from various memory cards and offers features such as slideshow viewing, clock/calendar modes, and HDMI output for connecting to compatible HDTVs.
Setup
1. Unpacking and Placement
Carefully remove all components from the packaging. Place the digital photo frame on a stable, flat surface. The frame includes a stand for horizontal or vertical orientation. The auto orientation sensor will detect the frame's position and automatically rotate images.

Image: Front view of the Sony DPF-V900 Digital Photo Frame, showcasing its display with a vibrant image.
2. Power Connection
Connect the supplied AC adapter to the DC IN port on the back of the frame, then plug the adapter into a standard electrical outlet. The frame will power on automatically or can be powered on using the power button.
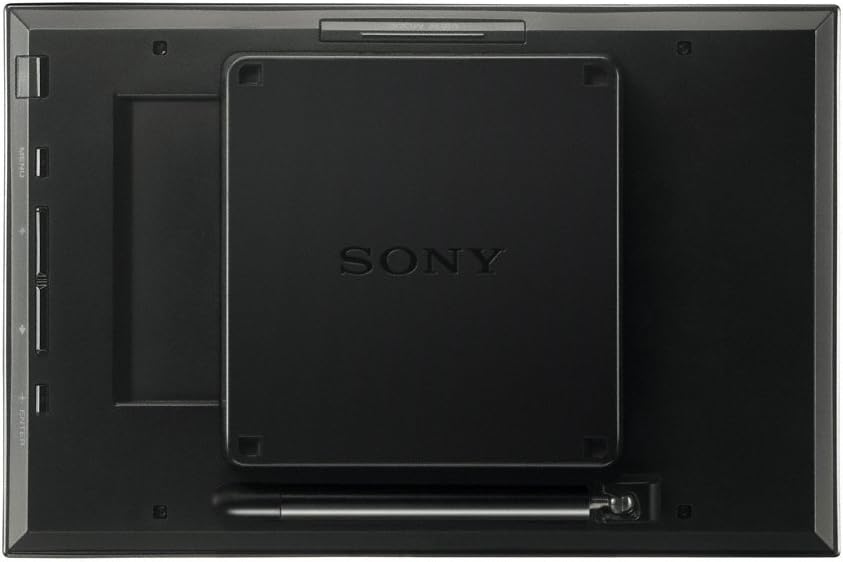
Image: Rear view of the Sony DPF-V900, highlighting the power input and adjustable stand.
3. Inserting Memory Cards
The DPF-V900 supports various memory card formats. Locate the memory card slots on the side of the frame. Insert your memory card firmly until it clicks into place. The frame will automatically detect the card and begin reading its contents.
- Supported card types include Memory Stick PRO, SD Card, and CompactFlash.

Image: Side profile of the Sony DPF-V900, detailing the memory card slots and integrated control buttons.
4. Image File Compatibility
The frame decodes and displays images up to 48-Megapixel and 100MB, including JPEG, TIFF, BMP, and RAW file types. For optimal performance and compatibility, ensure image files are in DCF (Design rule for Camera File system) format. Renaming files from their original camera-generated names may affect compatibility.
- JPEG: DCF 2.0 compatible, EXIF 2.21 compatible, JFIF
- TIFF: EXIF 2.21 compatible
- BMP: 1, 4, 8, 16, 24, 32 bit Window format
- RAW files: Work as thumbnail previews only in SRF, SR2, ARW at 2.0 or lower
When editing photos, use the "Save As" function in image editing software to preserve EXIF data and ensure compatibility. Avoid "Save for Web & Devices" as it may strip necessary metadata. For best display, consider resizing images to 800x480 pixels or maintaining common aspect ratios like 3:2, 16:9, or 4:3.
Operating Instructions
1. Using the Remote Control
The supplied remote control (RMT-DPF1) provides full functionality for navigating menus and controlling playback. Ensure the remote has working batteries and is pointed towards the frame's sensor.

Image: The Sony RMT-DPF1 remote control, detailing its button layout for easy operation.
- Power Button: Turns the frame on or off.
- Navigation Arrows (Up, Down, Left, Right): Used to navigate menus and select options.
- Enter Button: Confirms selections.
- Menu Button: Accesses the main menu.
- Back/Cancel Button: Returns to the previous screen or cancels an operation.
- View Select Button: Changes the display mode (e.g., slideshow, single image, clock/calendar).
- My Favorite Button: Accesses favorite photos.
- Zoom In/Out: Adjusts image magnification.

Image: A user's hand operating the remote control in front of the digital photo frame.
2. Slideshow and Display Modes
The DPF-V900 offers nine slideshow styles. You can select your preferred style and transition effects through the menu. Additionally, the frame supports clock and calendar modes, which can be accessed via the View Select button.
- Auto Image Correction: The frame can automatically improve photos with features like red-eye correction.
- Image Display Setting: Options include "Fit to screen" or "Full Image."
3. HDMI Output
Connect the DPF-V900 to a compatible HDTV using an HDMI cable (not supplied) to view your photos on a larger screen. This feature is ideal for sharing photo slideshows with a group.
4. Bluetooth Connectivity (Optional Accessory)
With an optional Bluetooth USB adapter (e.g., Sony DPPA-BT1), you can wirelessly transfer photos from Bluetooth-enabled devices such as cameras and mobile phones directly to the frame.
Maintenance
1. Cleaning the Screen and Frame
To clean the LCD screen, gently wipe it with a soft, lint-free cloth. For stubborn smudges, slightly dampen the cloth with water or a screen-cleaning solution designed for electronics. Avoid using harsh chemicals or abrasive materials. Clean the frame's exterior with a dry, soft cloth.
2. Software Updates
Periodically check the Sony support website for any available firmware updates for your DPF-V900 model. Updates can improve performance, add features, or resolve known issues. Follow the instructions provided with the update package carefully.
Troubleshooting
If you encounter issues with your digital photo frame, refer to the following common problems and solutions:
- Frame does not power on:
- Ensure the AC adapter is securely connected to both the frame and a working power outlet.
- Verify the power outlet is functional.
- Images are not displayed or show a question mark:
- Check if the memory card is inserted correctly and fully.
- Confirm that the image files are in a supported format (JPEG, TIFF, BMP, RAW).
- Ensure image file names comply with DCF standards (e.g., original names from camera).
- If images were edited, verify they were saved using "Save As" to retain necessary metadata. Avoid "Save for Web & Devices."
- Image file size should not exceed 100MB. Very large files may take longer to load.
- Remote control is not working:
- Check and replace the batteries in the remote control.
- Ensure there are no obstructions between the remote and the frame's sensor.
- Point the remote directly at the frame.
- Images appear cropped or with black bars:
- This can occur due to differences in aspect ratio between your photos and the frame's 15:9 display.
- Adjust the "Image display setting" in the menu (Fit to screen/Full Image).
- For perfect fit, consider cropping or resizing images to 800x480 pixels before loading.
For further assistance, consult the official Sony support resources.
Specifications
| Feature | Detail |
|---|---|
| Model Number | DPF-V900 |
| Screen Size | 9 Inches |
| Resolution | 800 x 480 pixels |
| Aspect Ratio | 15:9 |
| Internal Memory | 512MB (with optional image resizing) |
| Supported File Types | JPEG (DCF 2.0, EXIF 2.21, JFIF), TIFF (EXIF 2.21), BMP (1, 4, 8, 16, 24, 32 bit), RAW (thumbnail previews for SRF, SR2, ARW 2.0 or lower) |
| Max Image Resolution | Up to 48-Megapixel (8000x6000 pixels) |
| Max Image File Size | 100MB |
| Connectivity | Memory Card Slots (Memory Stick PRO, SD Card, CompactFlash), HDMI Output, USB (for optional Bluetooth adapter) |
| Dimensions (W x H x D) | 9.65 x 6.38 x 1.52 inches (245x162x38.5mm) / 9.65 x 6.38 x 5.71 inches (245x162x145mm) including stand |
| Weight | 1.76 pounds (800 grams without AC adapter) |
| Operating System Compatibility | Microsoft Windows Vista 10, Windows XP Professional, Windows XP Home Edition, Windows 2000 Professional (SP3+), Macintosh Mac OS X (10.4+) |
Warranty and Support
Warranty Information
Your Sony DPF-V900 Digital Photo Frame is covered by a limited warranty. Please refer to the warranty card included with your product for specific terms, conditions, and duration. Retain your proof of purchase for warranty claims.
Customer Support
For technical assistance, product registration, or to download the latest drivers and firmware, please visit the official Sony support website. You can find contact information for customer service in your region on the website.
Sony Support Website: www.sony.com/electronics/support