
Introduction
This manual provides essential instructions for the proper use and care of your Sony HDR-HC9 MiniDV High Definition Handycam Camcorder. Please read this manual thoroughly before operating the camcorder and retain it for future reference. The HDR-HC9 is designed to capture high-definition video on MiniDV tapes and high-resolution still images.

Figure 1: Front view of the Sony HDR-HC9 Camcorder, showcasing the lens and main body.
Getting Started
1. Charging the Battery
Before first use, fully charge the supplied battery pack. Connect the AC power adapter to the camcorder and a wall outlet. The CHARGE lamp will illuminate during charging and turn off when complete.
2. Installing the Battery Pack
Align the battery pack with the battery compartment on the rear of the camcorder and slide it in until it clicks into place. To remove, slide the BATT RELEASE lever and pull the battery out.

Figure 2: Side view of the camcorder with the LCD screen open, revealing the battery compartment and various ports.
3. Inserting a MiniDV Tape
- Open the tape compartment cover.
- Insert a MiniDV cassette with the window facing outwards, ensuring the tape is correctly oriented.
- Close the tape compartment cover until it latches securely.
4. Inserting a Memory Card (for Still Images)
The camcorder supports Memory Stick, Memory Stick Duo, and SD cards. Open the memory card slot cover, insert the card until it clicks, and close the cover. Ensure the card is inserted in the correct direction.
Basic Operations
1. Powering On/Off
Slide the POWER switch to the 'ON' position to power on the camcorder. To power off, slide the switch to 'OFF'.
2. Recording Video
- Open the LCD panel or pull out the viewfinder.
- Set the MODE dial to 'CAMERA' (tape icon).
- Press the START/STOP button to begin recording. Press it again to stop.
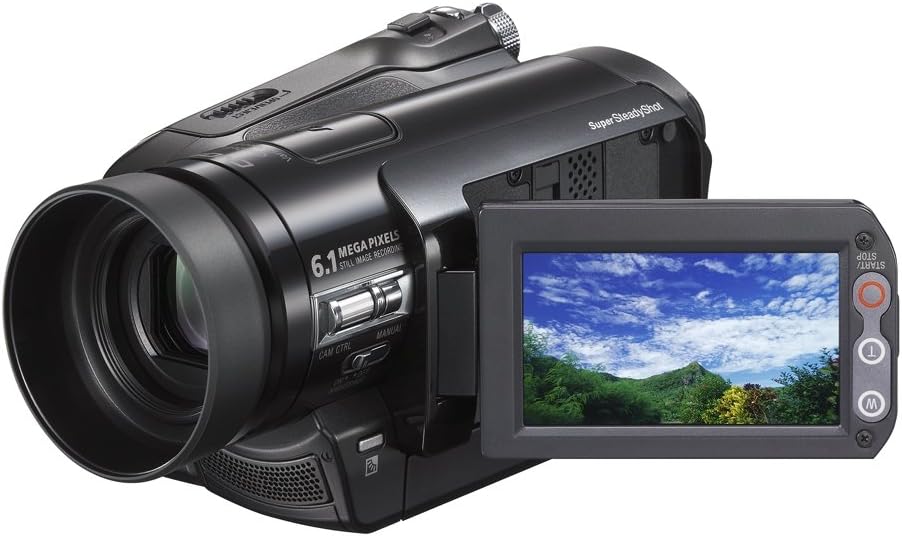
Figure 3: The camcorder with its LCD screen open and displaying a live view, ready for recording.
3. Taking Still Images
- Ensure a memory card is inserted.
- Set the MODE dial to 'MEMORY' (camera icon).
- Press the PHOTO button to capture a still image.
4. Zoom Operation
Use the W (Wide) and T (Telephoto) levers located near the top of the camcorder to zoom in and out. The camcorder features a 10x optical zoom and 20x digital zoom.
5. Playback
- Set the MODE dial to 'VCR/PLAY' (playback icon).
- Use the playback controls on the LCD panel or camcorder body to play, pause, fast forward, or rewind your recordings.
Advanced Connections
1. Connecting to a TV (HDMI)
Use an HDMI cable to connect the camcorder's HDMI OUT terminal to an HDMI input on your television. Select the corresponding HDMI input on your TV to view your recordings in high definition.
2. Connecting to a Computer (USB)
Connect the camcorder to your computer using a USB cable. This allows for transferring still images from the memory card. For video transfer, specialized software and an i.LINK (FireWire/IEEE 1394) connection may be required for MiniDV tapes.
Maintenance
Cleaning the Camcorder
- Use a soft, dry cloth to clean the camcorder body.
- For the lens, use a lens cleaning brush or a soft cloth specifically designed for optical lenses. Avoid touching the lens surface with your fingers.
- Clean the LCD screen with a soft, lint-free cloth.
Battery Care
- Store batteries in a cool, dry place when not in use.
- Avoid fully discharging the battery frequently to prolong its lifespan.
- Do not expose batteries to extreme temperatures.
Tape Care
- Store MiniDV tapes away from strong magnetic fields.
- Avoid exposing tapes to direct sunlight or high humidity.
- Rewind tapes fully before storing them.
Troubleshooting
No Power
- Ensure the battery is fully charged and correctly installed.
- Verify the AC adapter is securely connected if operating on external power.
Cannot Record
- Check if a MiniDV tape is inserted and not write-protected.
- Ensure the camcorder is in 'CAMERA' mode.
- Verify there is sufficient tape remaining.
Poor Picture Quality
- Clean the camcorder lens.
- Check lighting conditions; ensure adequate illumination for recording.
- If using digital zoom, picture quality may degrade. Use optical zoom primarily.
Still Images Not Saving
- Ensure a compatible memory card is inserted.
- Check if the memory card has sufficient free space.
- Verify the camcorder is in 'MEMORY' mode.
Specifications
| Feature | Specification |
|---|---|
| Model Number | HDR-HC9 |
| Video Capture Resolution | 6 MP (still images) |
| Photo Sensor Technology | CMOS |
| Optical Zoom | 10x |
| Digital Zoom | 20x |
| Maximum Aperture | 1.8 f |
| Screen Size | 2.7 Inches |
| Connectivity Technology | HDMI, USB |
| Flash Memory Type | Memory Stick, Memory Stick Duo, SD |
| Item Weight | 3.31 pounds |
| Product Dimensions | 1 x 3.2 x 3.2 inches |
Warranty and Support
This product comes with a 30-day warranty. Please note that there is no return policy for video cassette recorders/players. For technical support or service inquiries, please refer to the official Sony support channels or visit their website.