
Jet JTAS-10XL30-5/1DX
Contents
JET 10-Inch Deluxe XACTA Table Saw Instruction Manual
Model: JTAS-10XL30-5/1DX
1. Important Safety Information
Always read and understand all safety warnings and instructions before operating the JET 10-Inch Deluxe XACTA Table Saw. Failure to follow these instructions may result in serious injury or death.
- Wear appropriate personal protective equipment (PPE), including safety glasses, hearing protection, and a dust mask.
- Ensure the work area is clean, well-lit, and free of obstructions.
- Never operate the saw under the influence of drugs, alcohol, or medication.
- Always keep hands clear of the blade. Use a push stick or push block when cutting small pieces.
- Ensure the quick-release riving knife and blade guard are properly installed and adjusted before each use.
- Disconnect power before performing any maintenance, adjustments, or blade changes.
- The rail-mounted magnetic switch provides overload protection; familiarize yourself with its location and function.
2. Product Overview
The JET 10-Inch Deluxe XACTA Table Saw is designed for precision woodworking tasks, offering robust construction and advanced features for safety and efficiency.

Figure 2.1: Overall view of the JET 10-Inch Deluxe XACTA Table Saw.

Figure 2.2: Key features including 11-inch cast iron wings, 30-inch XACTA Fence II with T-square design, rail-mounted magnetic switch, chip-resistant powder coat paint, and onboard storage.
Key Features:
- Exclusive 30-inch Commercial XACTA Fence II: Features a T-square design for precise and repeatable cuts.
- Poly-V Drive Belt System: Delivers quiet operation and optimal power transfer for smooth cutting.
- 11-inch Cast Iron Extension Wings: Provides an expansive and stable work surface.
- Push-Button Arbor Lock: Facilitates quick and easy blade changes.
- Quick-Release Riving Knife: Significantly reduces the risk of binding and kickback.
- Rail-Mounted Magnetic Switch: Easily accessible and provides essential overload protection.
- Independent Leaf Safety Guard: Protects the operator from the blade, even during angled cuts.
- Fully-Shrouded Blade: Enhances dust collection efficiency.
- Precision-Ground Cast Iron Tables: Ensures a flat and accurate work surface.
- Chrome-Plated Heavy-Duty Handwheels: Durable and provide smooth adjustments.
3. Setup and Assembly
The JET 10-Inch Deluxe XACTA Table Saw requires assembly. It is recommended to have assistance during the assembly process due to the weight and size of the components. Allow approximately 3 hours for complete assembly.
3.1 Unpacking and Inspection
- Carefully remove all components from the packaging.
- Verify all parts listed in the packing list are present.
- Inspect all components for any shipping damage. Report any damage immediately to the carrier and your dealer.
3.2 Electrical Connection
This table saw operates on 230 Volts, 1 Phase, and requires a 25 Amp circuit. Consult a qualified electrician for proper wiring and connection to your power supply. Ensure the power source matches the saw's requirements.
3.3 Assembling the Table and Wings
Attach the 11-inch cast iron extension wings to the main table. Ensure all fasteners are securely tightened to provide a stable and level work surface.
3.4 Installing the Fence and Rails
Mount the 30-inch Commercial XACTA Fence II and its rail system. Once installed, calibrate the fence for accuracy. The fence should be parallel to the blade and provide precise measurements for rip cuts.
3.5 Blade Installation and Riving Knife
The saw blades and dado insert are not included and must be purchased separately.
- Ensure the saw is disconnected from power.
- Use the push-button arbor lock to secure the arbor.
- Install the appropriate 10-inch saw blade.
- Install the quick-release riving knife. This component is crucial for preventing kickback and must always be used.

Figure 3.1: Proper installation of the quick-release riving knife.
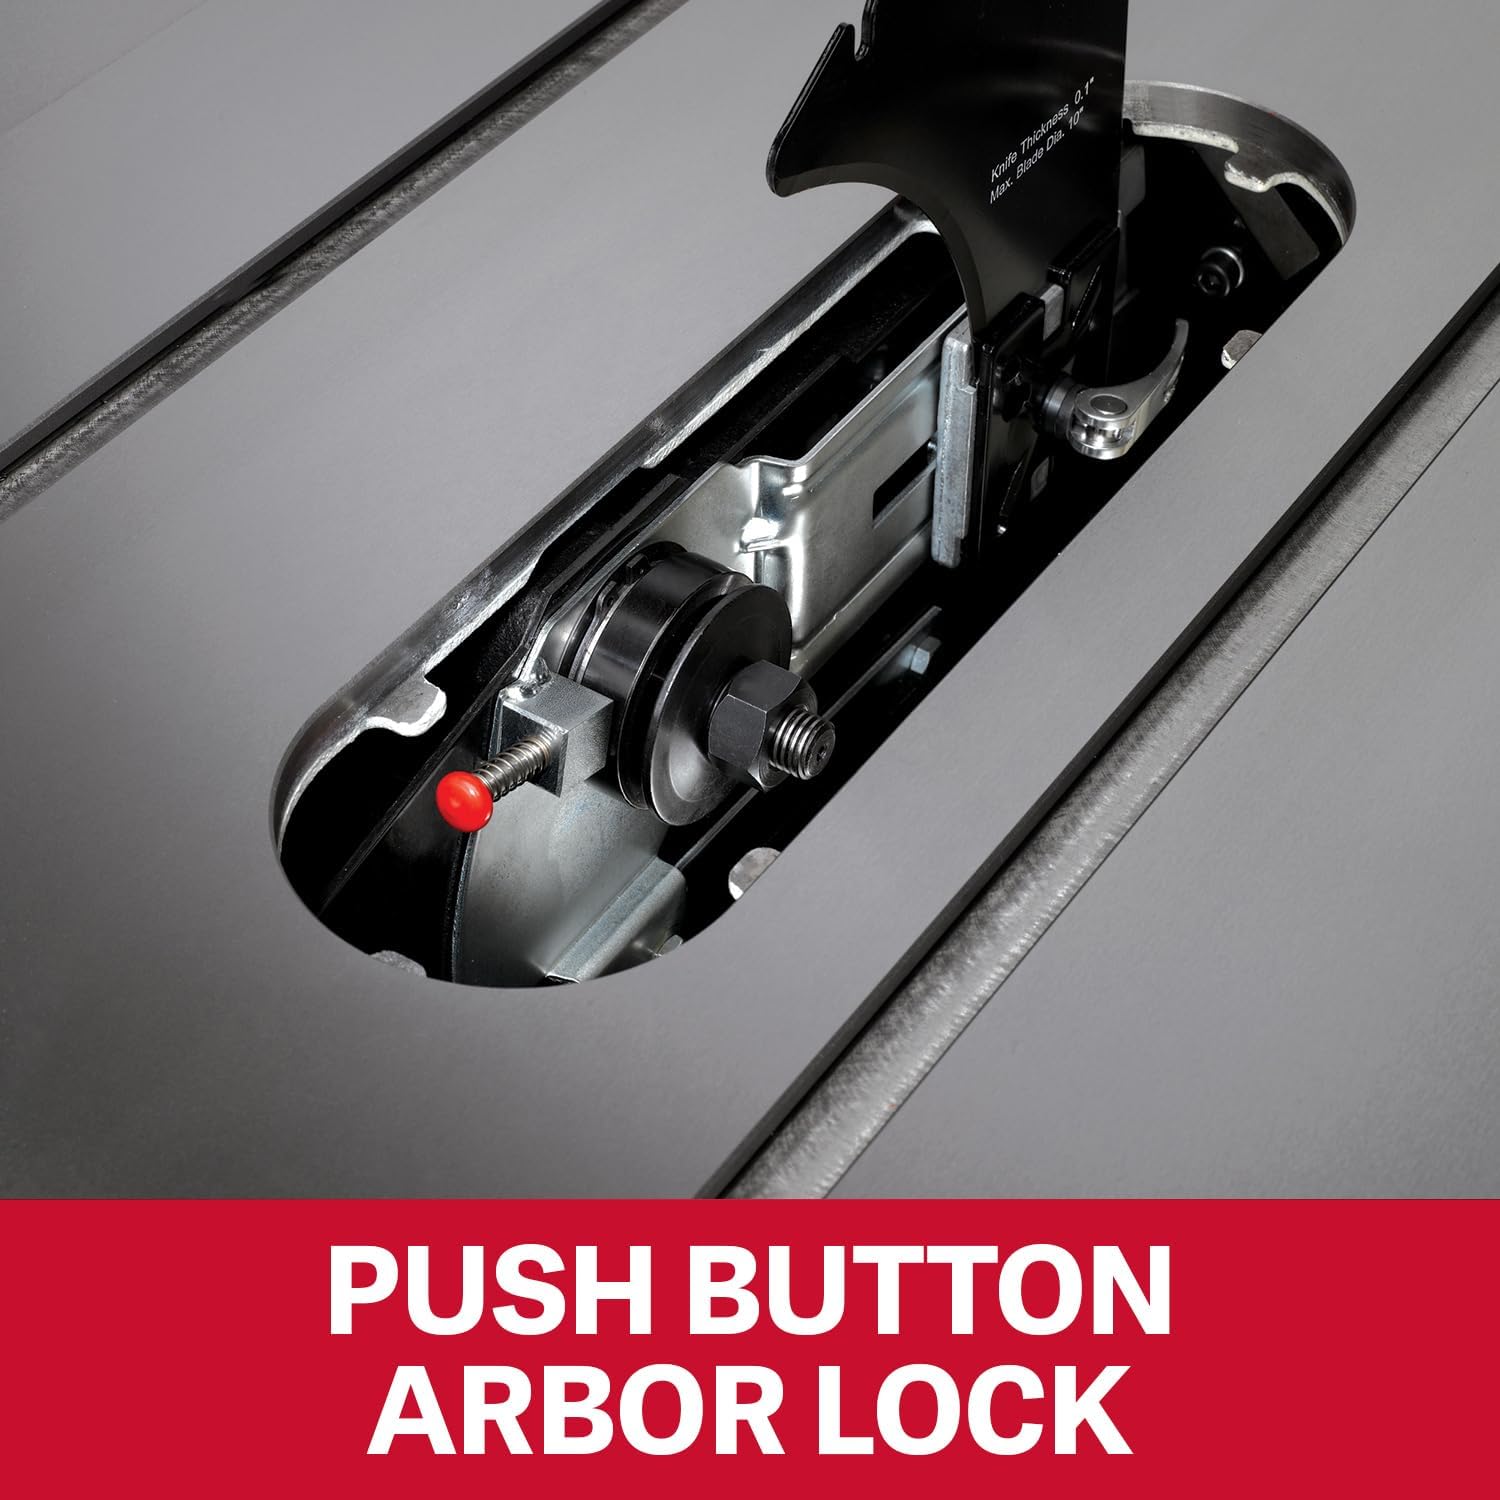
Figure 3.2: Location of the push button arbor lock for blade changes.
4. Operating Instructions
4.1 Powering On/Off
To power on the saw, press the green "ON" button on the rail-mounted magnetic switch. To power off, press the red "OFF" button. In case of power interruption or overload, the magnetic switch will automatically shut off the saw.
4.2 Adjusting Blade Height and Angle
Use the chrome-plated heavy-duty handwheels to adjust the blade height and tilt angle. The front handwheel controls the blade height, and the side handwheel controls the blade tilt up to 45 degrees. Ensure the desired settings are locked before cutting.

Figure 4.1: Handwheels for adjusting blade height and angle.

Figure 4.2: The precision-ground cast iron table provides a stable work surface.
4.3 Making Cuts
- Rip Cuts: Use the XACTA Fence II to guide the workpiece. Ensure the fence is locked securely at the desired measurement.
- Cross Cuts: Use a miter gauge or crosscut sled (not included) for accurate crosscuts. The saw includes onboard miter gauge storage.
- Always feed the workpiece smoothly and consistently. Avoid forcing the material through the blade.
- Ensure the independent leaf safety guard is in place to protect from the blade.
5. Maintenance
Regular maintenance ensures the longevity and safe operation of your JET table saw.
5.1 Cleaning and Dust Collection
- After each use, disconnect power and clean sawdust and debris from the table, fence, and blade area.
- The fully-shrouded blade design aids in efficient dust collection. Connect the saw to a suitable dust collection system for optimal performance and to maintain a clean workshop environment.
- Periodically clean the interior of the saw cabinet to prevent dust buildup, which can affect motor cooling and performance.
5.2 Blade Care
- Inspect the saw blade regularly for sharpness, damage, or missing teeth. Replace dull or damaged blades promptly.
- Clean resin and pitch buildup from the blade using a suitable blade cleaner.
5.3 General Inspection
- Check all nuts, bolts, and fasteners regularly and tighten as necessary.
- Inspect the power cord for any damage.
- Ensure all safety features, including the blade guard and riving knife, are functioning correctly.
6. Troubleshooting
This section addresses common issues you might encounter with your table saw. For problems not listed here, contact JET customer support.
| Problem | Possible Cause | Solution |
|---|---|---|
| Saw does not start. | No power, tripped circuit breaker, magnetic switch tripped. | Check power connection, reset circuit breaker, press the "ON" button on the magnetic switch. |
| Excessive dust. | Dust collection system not connected or inadequate, dust port clogged. | Ensure dust collector is connected and operating, clear any clogs in the dust port. |
| Blade binding or kickback. | Riving knife not aligned or installed, dull blade, improper feeding. | Check riving knife alignment, replace or sharpen blade, ensure smooth and consistent feeding. |
| Inaccurate cuts. | Fence not calibrated, blade not square to table. | Calibrate the XACTA fence, adjust blade squareness to the table. |
7. Specifications
| Attribute | Detail |
|---|---|
| Brand | Jet |
| Model Number | JTAS-10XL30-5/1DX |
| Style | 30" Rip Fence |
| Power Source | Corded Electric |
| Voltage | 230 Volts |
| Current Rating | 25 Amps |
| Horsepower | 5 HP |
| Blade Length | 10 Inches |
| Speed | 4300 RPM |
| Product Dimensions (L x W x H) | 65" x 36" x 34" |
| Item Weight | 330 Pounds |
| Material | Cast Iron, Steel |
| Included Components | Saw, Fence, Rails, Miter Gauge, Riving Knife, Blade Guard, Push Stick, Extension Table, Cast Iron Wings (x2), Hardware |
| UPC | 662755941061 |
8. Warranty Information
The JET 10-Inch Deluxe XACTA Table Saw comes with a comprehensive warranty.

This product is covered by a 5-Year Limited Warranty for residential use. If the product is used for commercial or industrial purposes, the warranty defaults to a 2-Year Warranty. Please retain your proof of purchase for warranty claims. For full warranty terms and conditions, refer to the official JET warranty documentation or contact customer support.
9. Customer Support
For technical assistance, parts, or service inquiries, please contact JET customer support. Have your model number (JTAS-10XL30-5/1DX) and serial number ready when contacting support.
You can find more information and contact details on the official JET website or through your authorized JET dealer.
Visit the JET Store on Amazon for additional products and resources.
Ask a question about this manual
Ask about setup, troubleshooting, compatibility, parts, safety, or missing instructions. Manuals+ will review the question and use this page’s manual context to help answer it.