1. Introduction
This manual provides detailed instructions for the installation, operation, and maintenance of the Fisher 2000-0002 Lever Handle Repair Kit. This kit is designed to replace or repair existing lever handles on 1/2" and 3/4" faucets, ensuring continued functionality and performance. Please read this manual thoroughly before proceeding with installation or use.
2. Safety Information
Always observe the following safety precautions to prevent injury or damage to property:
- Ensure the water supply to the faucet is turned off before beginning any repair or installation work.
- Wear appropriate personal protective equipment, such as safety glasses and gloves, during installation.
- Use only the tools recommended for the task.
- If you are unsure about any step, consult a qualified plumber.
- Keep small parts away from children to prevent choking hazards.
3. Package Contents
Verify that all components are present in your Fisher 2000-0002 Lever Handle Repair Kit:
- Lever Handle
- Screw
- Red Button (for hot water indication)
- Blue Button (for cold water indication)

Figure 1: Components of the Fisher 2000-0002 Lever Handle Repair Kit, including the lever handle, screw, red button, and blue button.
4. Setup and Installation
Follow these steps to install the Fisher 2000-0002 Lever Handle Repair Kit:
- Turn off Water Supply: Locate the main water shut-off valve for the faucet or the entire water supply and turn it off. Open the faucet to drain any remaining water.
- Remove Old Handle (if applicable): If replacing an existing handle, carefully remove any decorative caps (often marked hot/cold) to expose the handle screw. Unscrew and remove the old handle.
- Clean Faucet Stem: Clean any debris or mineral buildup from the faucet stem where the new handle will be attached.
- Attach New Handle: Place the new Fisher lever handle onto the faucet stem, ensuring it seats properly.
- Secure Handle: Insert the provided screw into the handle and tighten it securely with a screwdriver. Do not overtighten.
- Install Buttons: Press the red button into the designated hot water indicator slot and the blue button into the cold water indicator slot on the handle.
- Restore Water Supply: Slowly turn the water supply back on. Check for any leaks around the newly installed handle.
- Test Operation: Operate the handle to ensure smooth movement and proper water flow.
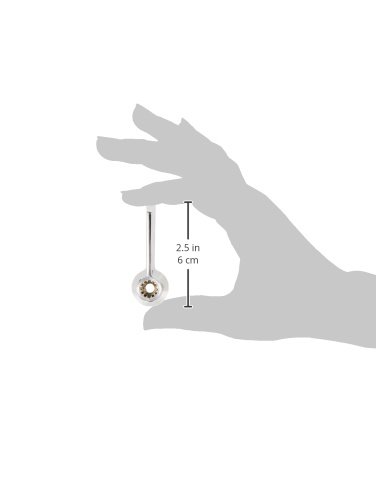
Figure 2: The Fisher 2000-0002 Lever Handle shown in hand, illustrating its compact size and design for easy installation.
5. Operating the Lever Handle
The Fisher 2000-0002 Lever Handle operates by rotating it to control water flow and temperature. For single-handle faucets, typically rotating the handle left or right adjusts temperature, while lifting or pushing down controls flow. For two-handle faucets, each handle controls either hot or cold water flow independently.
- Water Flow: Lift the handle to increase water flow; push down to decrease or stop flow.
- Temperature Control: Rotate the handle towards the red indicator for hotter water and towards the blue indicator for colder water (if applicable to your faucet type).
6. Maintenance
Regular maintenance ensures the longevity and optimal performance of your lever handle:
- Cleaning: Clean the handle regularly with a soft cloth and mild soap. Avoid abrasive cleaners, harsh chemicals, or scouring pads, as these can damage the finish.
- Inspection: Periodically check the handle for any signs of looseness or wear. Tighten the screw if the handle feels wobbly.
- Mineral Buildup: If mineral buildup occurs around the base of the handle, gently remove it using a soft brush and a vinegar solution, then rinse thoroughly.
7. Troubleshooting
Refer to the following table for common issues and their potential solutions:
| Problem | Possible Cause | Solution |
|---|---|---|
| Handle is loose or wobbly. | Mounting screw is loose. | Tighten the mounting screw. |
| Water still drips after turning off. | Internal faucet cartridge issue (not handle). | This kit addresses the handle only. If dripping persists, the faucet's internal cartridge may need replacement. Consult a plumber. |
| Handle does not fit faucet stem. | Incorrect handle type or size. | Verify that the faucet stem type and size are compatible with the Fisher 2000-0002 kit, designed for 1/2" and 3/4" faucets. |
8. Specifications
| Feature | Detail |
|---|---|
| Model Number | 2000-0002 |
| Brand | Fisher |
| Compatibility | 1/2" and 3/4" faucets |
| Components Included | Lever Handle, Screw, Red Button, Blue Button |
| Manufacturer | Fisher Manufacturing |
| Date First Available | March 31, 2009 |
9. Warranty and Support
Specific warranty details for the Fisher 2000-0002 Lever Handle Repair Kit are not provided in this manual. For warranty information, technical support, or to inquire about replacement parts, please contact Fisher Manufacturing directly through their official website or customer service channels. Always refer to the manufacturer's official documentation for the most accurate and up-to-date warranty terms and conditions.
Manufacturer: Fisher Manufacturing
Website: www.fisher-mfg.com (Example link, verify actual manufacturer website)


