Product Overview
The Body-Solid Powerline Leg Extension and Curl Machine (PLCE165X) is designed to enhance lower-body strength. This machine facilitates both leg extensions and leg curls in traditional upright and prone positions. It focuses on muscle engagement while minimizing stress on joints. Leg extensions target the quadriceps, and leg curls target the hamstrings. This dual functionality supports building and toning the lower body for improved balance, speed, and coordination. The machine features hold-down grips on both back and thigh pads for support and stability, along with extra-thick, double-stitched padding for comfort. Its 1-inch weight posts and wide base design ensure a stable and smooth workout experience.
What's in the Box
Please ensure all components are present before beginning assembly:
- Main Body Frame
- Front Foot
- Rear Foot
- Leg Swing Assembly
- Front Pad
- Rear Pad
- Leg Pad Tubes (2)
- Weight Plate Rod (1-inch standard)
- Olympic Plate Adapters (for 2-inch plates, if applicable)
- Rubber Shoes (4)
- Mushroom Caps (4)
- Handle
- Hardware Pack (bolts, washers, locknuts, Allen key, combination wrench)
Setup and Assembly
Follow these steps to assemble your Body-Solid Powerline Leg Curl and Extension Machine. Refer to the assembly video for visual guidance.
- Attach Rubber Shoes to Feet: Install the four rubber shoes onto the front and rear feet. Ensure the long side of the shoe that touches the floor is correctly oriented.
- Connect Feet to Body Frame: Attach the front and rear feet to the main body frame using the provided 12mm x 76mm bolts, washers, and locknuts. Hand-tighten initially, then fully tighten with a 19mm wrench once all bolts are in place.
- Install Mount and Handle: Secure the mount (L) to the body frame using the remaining 12mm x 76mm bolts. The top bolt threads into a welded nut, while the bottom bolt requires an additional washer and locknut. Attach the handle (H) to the main body frame using the 10mm carriage bolts, washers, and locknuts. Ensure the handles face towards the back of the bench.
- Attach Front and Rear Pads: Install the front pad (B) and rear pad (C) to the main body frame using the 10mm x 25mm bolts and washers. Gently lift the pads to align holes and start threading bolts. Only tighten a few turns until all bolts are in, then snug them with a 17mm wrench. Do not overtighten to avoid damaging the T-nuts in the plywood.
- Prepare Leg Swing Assembly: Insert the slide adjustment tubes (E) into the leg swing (G). Position the slide tubes so the large hole is visible through the slot. Tighten the Q-knobs onto the welded nuts to secure the slides. Remove the twist-tie holding the bushings in the top of the tube, ensuring they do not fall out.
- Attach Leg Swing to Main Body: Connect the leg swing assembly to the main body using the largest 12mm x 90mm bolt, two washers, and one locknut. Thread the bolt through one washer, then through the leg swing, through the flange on the main body, through the bushings in the swing, and finally through the other flange. Slip on a washer and then thread on the locknut.
- Install Weight Plate Rod: Slide the 1-inch weight plate rod (J) through the non-adjustable hole in the leg swing. Thread the smallest 8mm x 40mm bolt with a washer into the rod to keep it in place.
- Attach Leg Pad Tubes and Mushroom Caps: Thread the leg pad tubes (I) through the holes in the adjustment tubes. Push a foam roller onto each side of both leg pad tubes until the tube is visible from the other side. Tap the mushroom caps (X) into place using a dead blow hammer or a small dumbbell if careful.
- Final Tightening: Snug up the swing assembly. The bolt should be loose enough for the swing to move freely but tight enough to remove any sideways play.
- Install Weight Plate Bumpers (Optional): If using standard 1-inch plates, install the small 1-inch rubber bumpers. If using Olympic plates, install the Olympic adapters over the weight rod and tighten them down with a 5mm Allen key, then install the 2-inch rubber bumpers before adding plates.
Video: Assembly instructions for the Powerline Leg Extension and Curl Machine (PLCE165X).
Operating Instructions
The Body-Solid Powerline Leg Curl and Extension Machine allows for two primary exercises:
Leg Extensions
To perform leg extensions:
- Sit upright on the machine with your back against the backrest.
- Position your shins under the leg pads.
- Adjust the leg pads to a comfortable working position using the tight-down knob.
- Hold the side grips for stability.
- Extend your legs fully, contracting your quadriceps.
- Slowly return to the starting position.

Image: Proper form for leg extensions.
Leg Curls
To perform leg curls:
- Lie prone (face down) on the machine, ensuring your knees are at the edge of the bench.
- Position your ankles under the leg pads.
- Adjust the leg pads to a comfortable working position using the tight-down knob.
- Hold the front grips for stability.
- Curl your legs upwards, contracting your hamstrings.
- Slowly return to the starting position.
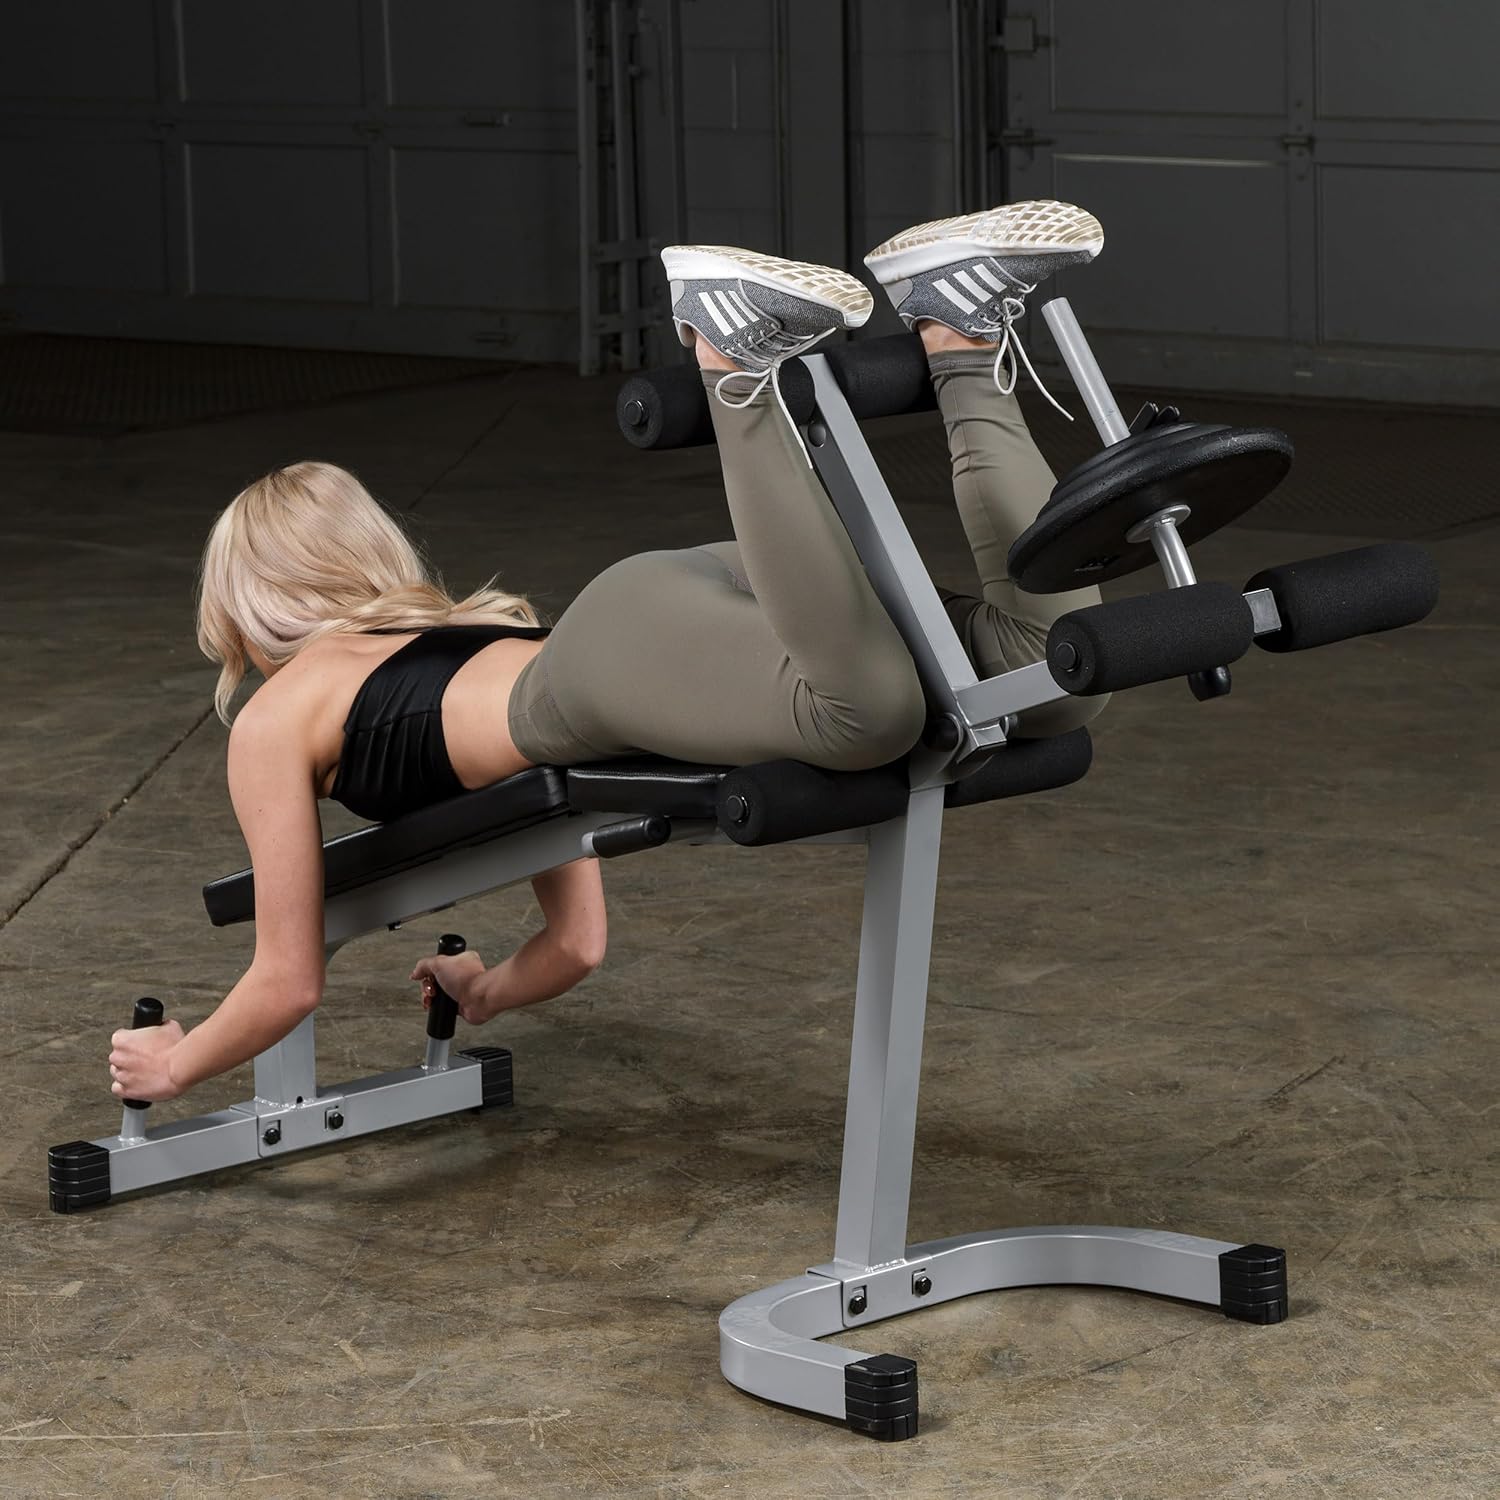
Image: Proper form for leg curls.
Maintenance
Regular maintenance ensures the longevity and safe operation of your machine:
- Cleaning: Wipe down the pads and frame with a damp cloth after each use to remove sweat and dirt. Avoid abrasive cleaners.
- Hardware Check: Periodically inspect all bolts, nuts, and connections to ensure they are tight. Re-tighten as necessary.
- Pad Inspection: Check the upholstery for any signs of wear, tears, or damage.
- Roller Pads: Ensure foam roller pads are securely in place and not excessively worn.
Troubleshooting
If you encounter any issues with your machine, consider the following:
- Wobbling/Instability: Ensure all assembly bolts are securely tightened. Check that the rubber shoes on the feet are properly installed and provide a stable base.
- Difficulty Adjusting Leg Pads: Loosen the tight-down knob sufficiently before attempting to adjust the leg pads. Ensure no obstructions are present.
- Squeaking Noises: Apply a small amount of silicone-based lubricant to moving parts or pivot points if squeaking occurs. Avoid oil-based lubricants.
Specifications
| Feature | Detail |
|---|---|
| Model Name | PLCE165X |
| Dimensions (L x W x H) | 62 x 25 x 27 inches |
| Assembled Weight | 44 lbs |
| Material | Alloy Steel |
| Weight Post Size | 1-inch standard (Olympic adapter available) |
| Padding | Extra-thick, double-stitched |
| Color | Black |

Image: Key dimensions of the machine.
Warranty
This product comes with a 10-Year Limited Warranty on the frame and a 1-Year Warranty on parts. For specific details regarding warranty coverage and claims, please refer to the warranty documentation included with your purchase or contact Body-Solid customer support.
Support
For further assistance, technical support, or to order replacement parts, please contact Body-Solid customer service. Refer to the product packaging or the official Body-Solid website for contact information.


