
1. Product Overview
The WENKO Curved Telescopic Shower Rod is designed for corner showers, providing a practical solution for hanging shower curtains. This rod helps contain water splashes within the shower area, keeping your bathroom floor dry. Its robust construction from high-quality chrome-finished aluminum ensures stability and durability.
The rod is adaptable and can be configured for two standard corner shower dimensions: 80 x 80 cm or 90 x 90 cm. Its 2.5 cm diameter provides strength and rigidity. Mounting hardware is included for a straightforward wall installation.
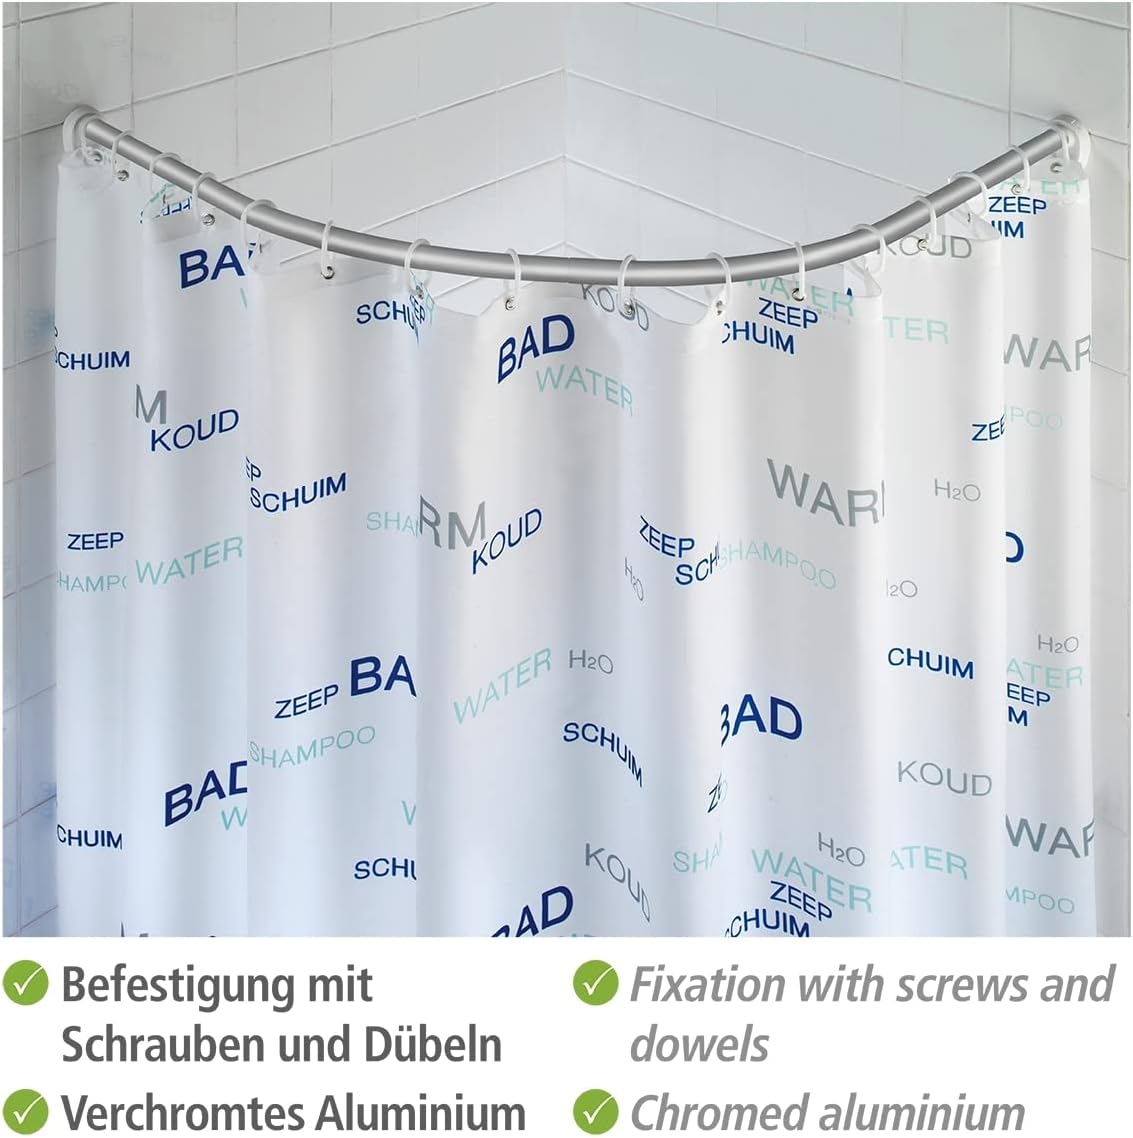
Image 1.1: The WENKO Curved Telescopic Shower Rod installed in a corner shower, demonstrating its function with a shower curtain.
2. Components Included
Before beginning installation, ensure all components are present:
- Curved aluminum rod sections
- Wall mounting brackets (plastic)
- Screws and dowels for installation

Image 2.1: Overview of all parts included in the package.
3. Setup and Installation
The shower rod is designed for drill-in wall mounting. Follow these steps for proper installation:
- Determine Desired Size: The rod can be assembled for either an 80 x 80 cm or 90 x 90 cm corner configuration. Choose the appropriate size for your shower area.
- Assemble Rod Sections: Connect the curved aluminum rod sections according to your chosen dimensions. The ends of the rods can be slightly shortened by sawing if minor adjustments are needed for a perfect fit.
- Mark Drilling Points: Hold the assembled rod in place against the corner walls where it will be installed. Use a pencil to mark the positions for the wall mounting brackets. Ensure the rod is level.
- Drill Holes: Using an appropriate drill bit for your wall type, drill holes at the marked points. Insert the provided dowels into the drilled holes.
- Attach Wall Brackets: Secure the plastic wall mounting brackets to the wall using the provided screws.

Image 3.1: Wall mounting bracket secured to the wall.
- Attach Rod to Brackets: Once the brackets are firmly in place, attach the assembled shower rod to the brackets. Ensure it clicks securely into position.

Image 3.2: Shower rod attached to the wall bracket.
Refer to the diagrams below for visual guidance on dimensions and assembly options.

Image 3.3: Dimension options for the shower rod.
4. Operation
Once installed, the WENKO Curved Telescopic Shower Rod is ready for use. Simply hang your shower curtain onto the rod using appropriate shower curtain rings or hooks. The curved design ensures the curtain encloses the shower area effectively, preventing water from splashing outside.
5. Maintenance
To maintain the appearance and longevity of your WENKO shower rod, follow these simple care instructions:
- Cleaning: Wipe the chrome-finished aluminum rod with a soft, damp cloth. For stubborn spots, use a mild, non-abrasive cleaner specifically designed for chrome or aluminum surfaces.
- Avoid Harsh Chemicals: Do not use abrasive cleaners, scouring pads, or strong chemical detergents, as these can damage the chrome finish and the aluminum material.
- Drying: After cleaning, dry the rod thoroughly with a soft, dry cloth to prevent water spots and maintain its shine.
6. Troubleshooting
If you encounter issues during or after installation, consider the following:
- Rod Does Not Fit Corner: Ensure you have correctly assembled the rod for either the 80x80 cm or 90x90 cm configuration. If the corner is not a perfect 90-degree angle, minor adjustments by sawing the rod ends might be necessary.
- Rod Feels Unstable: Verify that the wall mounting brackets are securely fastened to the wall and that the screws and dowels are appropriate for your wall material. Ensure the rod sections are fully engaged in the brackets.
- Difficulty Drilling: If you encounter very hard material (e.g., flint behind tiles), ensure you are using the correct drill bit and technique for masonry. You may need to adjust the depth of the dowels and screws if the wall material is exceptionally dense.
7. Specifications
| Brand | WENKO |
| Model Number | 19220100 |
| Material (Rod) | Aluminum |
| Material (Wall Mount) | Plastic |
| Color | Chrome/White |
| Dimensions (L x W) | Adjustable to 80 x 80 cm or 90 x 90 cm |
| Rod Diameter | 2.5 cm |
| Item Weight | 386 Grams |
| Mounting Type | Wall Mount (Drill-in) |
| Maximum Recommended Load | 20 pounds |
8. Warranty and Support
This product comes with a 5-year warranty from the date of purchase. The warranty covers all material and manufacturing defects that impair proper function. Damages resulting from incorrect use or natural wear and tear are excluded. This warranty does not restrict your statutory warranty rights.
In case of a warranty claim, please return the item, accompanied by the purchase receipt and properly packaged for transport, to the following address:
Wenko-Wenselaar GmbH & Co. KGAbteilung « Retouren »
Im Hülsenfeld 17
40721 Hilden, Germany
For further support or inquiries, you may contact:
- Email: service@wenko.de
- Website: www.wenko.de

Image 8.1: WENKO 5-Year Warranty Certificate.

