
Stylophone DU05151
Stylophone The Original Pocket Electronic Synthesizer User Manual
Brand: Stylophone
Model: DU05151
1. Introduction
Welcome to the user manual for your Stylophone Original Pocket Electronic Synthesizer. This iconic mini synth, first released in 1968, is known for its compact design and unique retro sound. It's designed to be fun and easy to play, making it suitable for both beginners and experienced musicians. This manual provides essential information on setting up, operating, and maintaining your Stylophone to ensure optimal performance and enjoyment.
2. What's in the Box
Upon unboxing your Stylophone, please ensure all components are present:
- Stylophone Unit
- Attached Stylus
- Instruction Manual
Note: 3x AA batteries are required for operation and are not included.
3. Setup
3.1 Battery Installation
The Stylophone requires 3 AA batteries. To install them:
- Locate the battery compartment on the underside of the Stylophone.
- Unscrew the small screw to open the battery cover.
- Insert 3 AA batteries, ensuring correct polarity (+/-).
- Replace the battery cover and secure it with the screw.
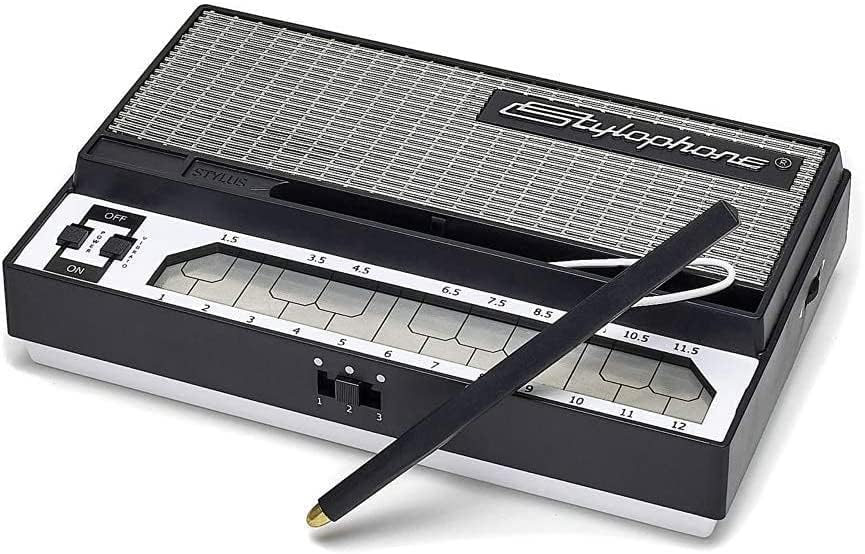
Image: The underside of the Stylophone, highlighting the battery compartment requiring 3 AA batteries.
3.2 Stylus Connection
The Stylophone's unique sound is produced by touching its metal surface with the attached stylus. The stylus is permanently connected to the unit by a wire.

Image: A hand holding the Stylophone's stylus, ready to play notes on the metal keyboard.
4. Operating Instructions
4.1 Power On/Off
To power on your Stylophone, slide the switch located on the left side of the unit to the "ON" position. To turn it off, slide the switch to "OFF".

Image: Top view of the Stylophone, clearly showing the ON/OFF power switch on the left side.
4.2 Playing Notes
The Stylophone features a touch-sensitive metal surface with marked notes. To play a note, simply tap the stylus on the desired metal segment. You can also slide the stylus across the surface to create glissando effects. The Stylophone offers 3 octaves of notes.

Image: A hand using the stylus to play notes on the Stylophone's metal keyboard, demonstrating its unique playing style.
4.3 Sound Modes and Tones
Your Stylophone comes with different sound modes or tones. These can be selected using the small switches located near the keyboard. Experiment with these switches to discover various sonic textures.

Image: A close-up view of the Stylophone's control panel, highlighting the switches used to select different sound modes and tones.
4.4 Vibrato Effect
An optional vibrato effect can be engaged to add a wavering pitch modulation to your notes. This switch is typically found alongside the sound mode selectors.
4.5 Volume Control
Adjust the overall volume of the Stylophone using the volume slider located on the side of the unit. This allows you to control the output level for comfortable listening or integration with other equipment.

Image: Side view of the Stylophone, showing the volume slider and the audio output jack.
4.6 Tuning Your Stylophone
The Stylophone features a tuning wheel on its underside, allowing you to fine-tune its pitch. This is particularly useful when playing along with other instruments or ensuring it's in standard concert pitch.
Video: Official guide on how to tune your Stylophone using the tuning wheel on the back.
4.7 Connectivity
The Stylophone includes a 3.5mm audio output jack, allowing you to connect it to external amplifiers, recording devices, or headphones. This expands its versatility for live performance, recording, or private practice.

Image: The Stylophone connected via its audio output to external equipment, demonstrating its integration capabilities.
5. Maintenance
To ensure the longevity and optimal performance of your Stylophone, follow these simple maintenance guidelines:
- Cleaning: Use a soft, dry cloth to wipe down the unit. Avoid abrasive cleaners or excessive moisture, especially on the metal keyboard surface.
- Storage: Store your Stylophone in a cool, dry place away from direct sunlight and extreme temperatures.
- Battery Replacement: If the sound becomes distorted or the unit fails to power on, replace the AA batteries. Always use fresh batteries and dispose of old ones responsibly.
6. Troubleshooting
| Problem | Possible Cause | Solution |
|---|---|---|
| No sound when powered on. | Dead batteries, volume too low, stylus not making proper contact. | Replace batteries, increase volume, ensure firm contact with stylus. |
| Sound is distorted or out of tune. | Low batteries, unit needs tuning. | Replace batteries. Refer to Section 4.6 Tuning Your Stylophone. |
| Stylus not responding consistently. | Dirty metal surface, damaged stylus wire. | Clean the metal surface. If wire is damaged, contact support. |
7. Specifications
| Feature | Detail |
|---|---|
| Model Number | DU05151 |
| Dimensions (L x W x H) | 2.05 x 3.41 x 1.86 inches |
| Item Weight | 8.8 ounces |
| Power Source | 3 AA Batteries (not included) |
| Body Material | Metal |
| Number of Keyboard Keys | 35 |
| Connectivity | 3.5mm Audio Out |
| Manufacturer | Dubreq Studios |
8. Warranty and Support
For warranty information or technical support regarding your Stylophone, please contact the manufacturer, Dubreq Studios. Refer to the packaging or the official Stylophone website for the most up-to-date contact details.
You can also visit the official Stylophone store on Amazon for more information: Stylophone Store
Ask a question about this manual
Ask about setup, troubleshooting, compatibility, parts, safety, or missing instructions. Manuals+ will review the question and use this page’s manual context to help answer it.