1. Introduction
The Mitsubishi HC1500 is a high-definition 720p DLP home theater projector designed to deliver clear and vibrant images. This manual provides essential information for the proper setup, operation, and maintenance of your projector, ensuring optimal performance and longevity.
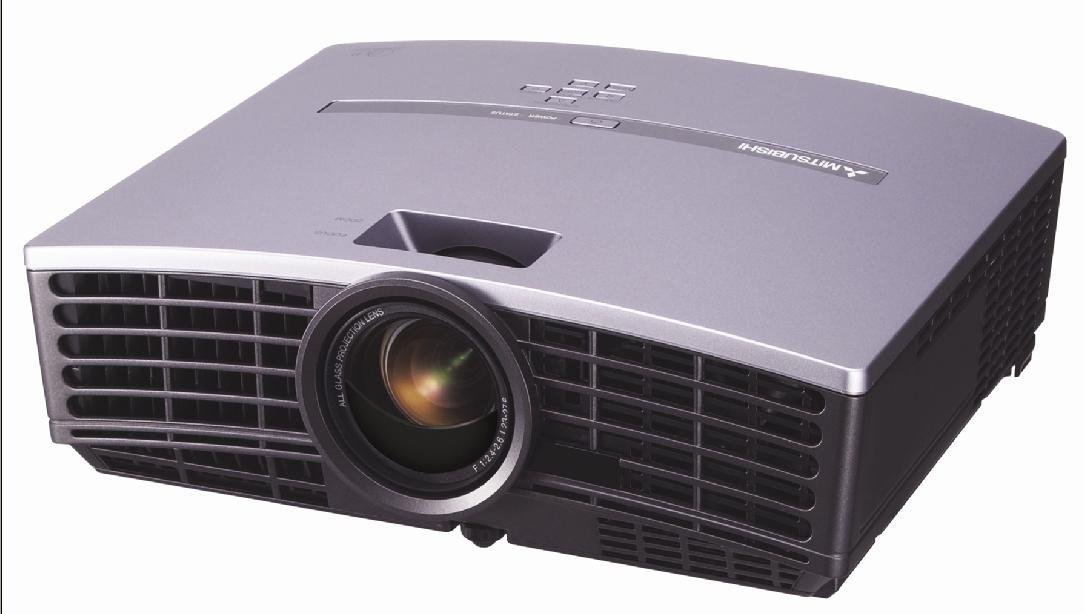
Figure 1: Front view of the Mitsubishi HC1500 projector. This image displays the projector's front panel, featuring the central projection lens and the prominent ventilation grilles on both sides, designed for efficient heat dissipation.
2. Safety Information
Please read all safety instructions before operating the projector. Failure to follow these instructions may result in electric shock, fire, or damage to the projector.
- Do not block ventilation openings. Ensure adequate space around the projector for proper airflow.
- Do not look directly into the projector lens when the lamp is on, as the bright light can cause eye damage.
- Do not place the projector on an unstable cart, stand, or table.
- Unplug the projector from the power outlet before cleaning or when not in use for an extended period.
- Refer all servicing to qualified service personnel.
3. What's in the Box
Verify that all items listed below are included in your package:
- Mitsubishi HC1500 Projector
- AC Power Cable
- RGB Cable
- RS-232C Cable
- Remote Unit with Battery
- Light Shade Cover
- Quick Start Card
- User's Manual (this document)
- Safety Manual
4. Setup
4.1 Placement
Position the projector on a stable surface or mount it to the ceiling. Ensure the projector is placed at an appropriate distance from the screen to achieve the desired image size. The HC1500 can project an image from 40 inches to 275 inches diagonally. Maintain clear space around the projector for ventilation.
4.2 Connections
Connect your video sources to the projector using the appropriate cables.
- HDMI: For high-definition digital video and audio signals. Use an HDMI 1.2 compatible cable for optimal performance.
- Component: For high-definition analog video signals.
- RS-232C: For projector control via a computer or control system.
- 12-Volt Trigger: To control a compatible motorized screen.
4.3 Power On/Off
- Connect the AC power cable to the projector and a power outlet.
- Press the power button on the projector or the remote control to turn on the unit. The power indicator light will illuminate.
- To turn off the projector, press the power button again. Confirm shutdown if prompted. The projector will enter a cooling cycle before fully powering down.
5. Operating the Projector
5.1 Remote Control
The included remote control allows for convenient operation of all projector functions, including power, input selection, menu navigation, and image adjustments. The remote features backlit buttons for use in dark environments.
5.2 Input Selection
Press the 'Input' or 'Source' button on the remote control or projector control panel to cycle through available input sources (e.g., HDMI, Component, RGB). Select the input corresponding to your connected device.
5.3 Image Adjustment
- Focus Ring: Rotate the focus ring on the projector lens to sharpen the image.
- Zoom Ring: Adjust the zoom ring to change the image size without moving the projector.
- Keystone Correction: Use the digital keystone correction feature (vertical and horizontal) via the on-screen menu to correct trapezoidal image distortion if the projector is not perfectly perpendicular to the screen.
5.4 Lamp Modes
The projector offers different lamp modes to balance brightness and lamp life:
- Bright Mode: Provides maximum brightness (1600 ANSI lumens) for well-lit environments. Lamp life is approximately 2000 hours.
- Low Mode: Reduces brightness for darker environments, extending lamp life to approximately 3000 hours and reducing fan noise (25dBA).
6. Maintenance
6.1 Lamp Replacement
The projector features a convenient side-loading lamp design for easy replacement. When the lamp life is nearing its end, a warning message will appear on the screen. Always use a genuine Mitsubishi replacement lamp. Refer to the detailed instructions in the full user manual for the lamp replacement procedure.
6.2 Cleaning
- Exterior: Wipe the projector casing with a soft, dry cloth. For stubborn dirt, use a slightly damp cloth with a mild detergent, then wipe dry.
- Lens: Use a lens cleaning cloth and lens cleaning solution specifically designed for optical surfaces. Do not use abrasive cleaners.
- Ventilation: Ensure the ventilation grilles are free from dust and obstructions. Use a soft brush or compressed air to gently clean the grilles.
7. Troubleshooting
If you encounter issues with your projector, refer to the following common problems and solutions:
| Problem | Possible Cause | Solution |
|---|---|---|
| No image displayed | Power cable disconnected; incorrect input source selected; source device not powered on. | Check power connections; select correct input source; ensure source device is on. |
| Image is blurry | Lens out of focus; projector too close/far from screen. | Adjust the focus ring on the lens; reposition the projector or adjust the zoom. |
| Image is trapezoidal | Projector not perpendicular to the screen. | Use keystone correction in the projector menu or adjust projector angle. |
| No sound | No internal speaker; external audio system not connected or muted. | The HC1500 does not have an internal speaker. Connect an external audio system to your source device. |
| Projector overheats or shuts down | Blocked ventilation; high ambient temperature. | Ensure ventilation openings are clear; operate in a well-ventilated area. |
8. Specifications
- Model: HC1500
- Display Technology: DLP (Digital Light Processing)
- Native Resolution: 1280 x 720 (720p)
- Brightness: 1600 ANSI Lumens
- Contrast Ratio: 2500:1
- Lamp Life: Up to 3000 hours (Low Mode), 2000 hours (Bright Mode)
- Noise Level: 25dBA (Low Mode)
- Connectivity: HDMI, Component, RS-232C, 12-Volt Trigger
- Projection Size: 40 to 275 inches (diagonal)
- Keystone Correction: Vertical and Horizontal Digital
- Dimensions: Approximately 16.3 x 13.9 x 14 inches
- Weight: Approximately 6.39 pounds
9. Warranty and Support
9.1 Warranty Information
The Mitsubishi HC1500 projector is backed by a 1-year limited parts and labor warranty. The projector lamp is covered by a separate 90-day lamp warranty. Please retain your proof of purchase for warranty claims.
9.2 Customer Support
For technical assistance, troubleshooting beyond this manual, or warranty service, please contact Mitsubishi customer support. Refer to the official Mitsubishi website or the quick start guide for current contact information.


