
MXL USM-002
MXL USM-002 Low Profile Universal Basket Shockmount User Manual
Model: USM-002
Introduction
The MXL USM-002 is a low-profile universal basket shockmount designed to isolate your microphone from vibrations and mechanical noise. This essential audio accessory helps to prevent unwanted low-frequency rumble and handling noise from being transmitted through the microphone stand into your recordings. It is specifically engineered to accommodate most large diaphragm MXL microphones, providing a secure and stable mounting solution.

Image: The MXL USM-002 shockmount, showcasing its basket design and integrated stand adapter. This view provides a general overview of the product's appearance and structure.
Safety Information
- Ensure the shockmount is securely attached to a stable microphone stand before mounting any microphone.
- Do not overtighten screws or knobs, as this may damage the shockmount or microphone.
- Keep the shockmount away from excessive moisture or extreme temperatures.
- Handle with care to avoid bending or damaging the elastic suspension bands.
Package Contents
Verify that all items are present in your package:
- 1 x MXL USM-002 Low Profile Universal Basket Shockmount
- Replacement elastic suspension bands (typically two are included)
Setup
- Attach to Microphone Stand: Locate the threaded insert at the base of the shockmount. Screw the shockmount onto the 5/8"-27 threaded stud of your microphone stand. Turn clockwise until it is finger-tight and secure.
- Insert Microphone: Carefully slide your compatible large diaphragm MXL microphone into the basket of the shockmount. Ensure the microphone is centered and rests securely within the elastic suspension bands.
- Adjust Angle: Use the large knob on the side of the shockmount's base to adjust the angle of the microphone. Loosen the knob, position the microphone to your desired angle, and then tighten the knob firmly to secure it.

Image: A detailed view of the shockmount's base, showing the threaded connection point for a microphone stand and the adjustment knob for angle positioning.

Image: A close-up of the shockmount's inner ring, highlighting the threaded area where the microphone is secured. This shows the basket design that cradles the microphone.
Operating
The MXL USM-002 shockmount operates passively by suspending the microphone within elastic bands, thereby isolating it from external vibrations. Once the microphone is securely mounted and positioned, no further operational steps are required for the shockmount itself. Its function is to provide mechanical isolation during recording or live sound applications.
Maintenance
- Cleaning: Wipe the shockmount with a soft, dry cloth to remove dust or fingerprints. Do not use abrasive cleaners or solvents.
- Elastic Bands: Periodically inspect the elastic suspension bands for signs of wear, stretching, or breakage. If the bands appear compromised, replace them with the provided spares or genuine MXL replacement parts to maintain optimal shock absorption.
- Storage: When not in use, store the shockmount in a clean, dry environment, preferably in its original packaging or a protective case, to prevent damage.
Troubleshooting
Microphone Not Fitting Securely
Issue: The microphone feels loose or does not fit properly in the shockmount.
Solution: Ensure your microphone is a compatible large diaphragm MXL model. The USM-002 is designed for specific microphone dimensions. Verify that the elastic bands are correctly installed and not stretched or broken. If the microphone is too small, it may not be suitable for this shockmount.
Excessive Noise/Vibration
Issue: Despite using the shockmount, unwanted low-frequency rumble or vibrations are still present in recordings.
Solution: Check the elastic suspension bands for wear or damage; replace them if necessary. Ensure the shockmount is tightly secured to the microphone stand and the microphone is firmly seated within the shockmount. Also, inspect the microphone stand itself for stability and tighten any loose joints. Consider using a heavier or more stable microphone stand if the issue persists.
Shockmount Tipping Over
Issue: The microphone and shockmount combination causes the microphone stand to become unstable or tip.
Solution: This can occur if the microphone is heavy and the stand is lightweight or has a small base. Ensure you are using a robust and stable microphone stand appropriate for the weight of your microphone and shockmount. Adjust the stand's legs for maximum stability and position the microphone directly over one of the stand's legs if possible to improve balance.
Specifications
| Model Number | MXLUSM002 |
| Item Weight | 14.4 ounces (0.41 kg) |
| Product Dimensions | 6.9 x 5.1 x 3 inches (17.5 x 13 x 7.6 cm) |
| Color | Black |
| Compatibility | Most large diaphragm MXL microphones |
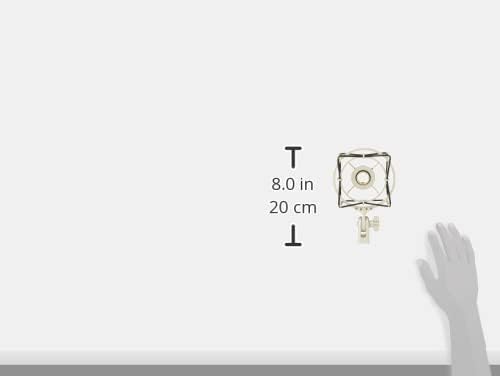
Image: A diagram illustrating the approximate dimensions of the MXL USM-002 shockmount, showing its height and width for reference.
Warranty and Support
For warranty information and technical support regarding your MXL USM-002 shockmount, please refer to the official MXL website or contact MXL customer service directly. Keep your proof of purchase for any warranty claims.
MXL Customer Service: Please visit the MXL official website for the most current contact information and support resources.
Ask a question about this manual
Ask about setup, troubleshooting, compatibility, parts, safety, or missing instructions. Manuals+ will review the question and use this page’s manual context to help answer it.