Product Overview
The Gardner Bender GDT-311 Digital Multimeter is a versatile and durable tool designed for testing most household appliances and electrical systems. It features an easy-to-read 3.5-inch digital display and offers three primary testing functions: AC Voltage, DC Voltage, and Resistance. Its manual ranging capability with an 11-position smooth rotary dial ensures precise readings. Built for durability, the housing is drop-resistant up to 3 feet and crush-rated to 150 lbs. This tester is rated CAT III 600V and complies with UL 61010-1 standards, certified to CAN/CSA C22.2, ensuring safety and reliability.
Key Features
- 11-Position Smooth Rotary Dial: Ensures easy and precise selection of measurement functions.
- Durable, Drop-Resistant Housing: Designed to withstand drops up to 3 feet and crush forces up to 150 lbs.
- 3.5-inch Digital Display: Provides clear and easy-to-read measurement results.
- Secure Fitting Input Jacks: Ensures reliable connection of test leads.
- Replaceable 26-inch Electrical Positive and Negative Test Leads: Long and flexible leads for various testing applications.
- Low Battery Indicator: Alerts the user when the 9V battery needs replacement to ensure accurate readings.
Product Visuals

Figure 1: Front view of the Gardner Bender GDT-311 Digital Multimeter, showcasing its compact design and included test leads.
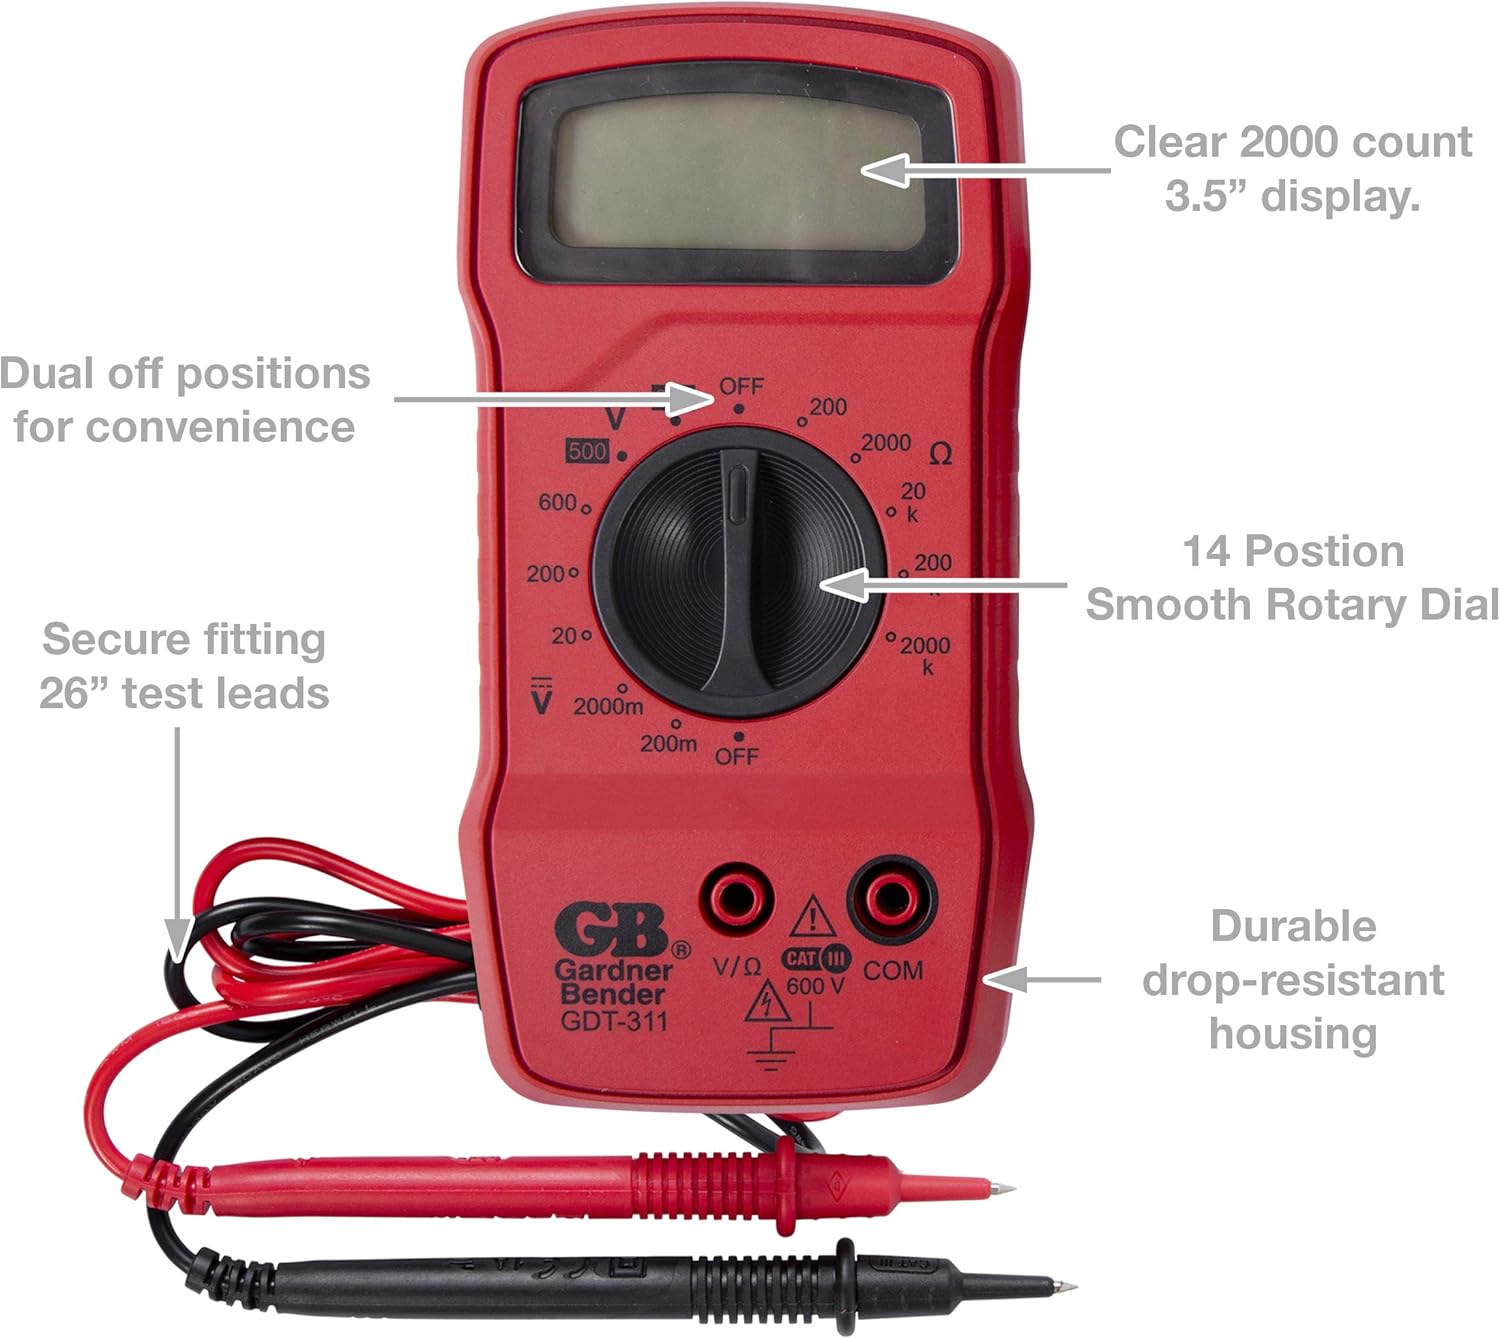
Figure 2: A detailed view of the GDT-311 Multimeter with key features labeled, including the 3.5-inch display, rotary dial, test lead inputs, and durable housing.
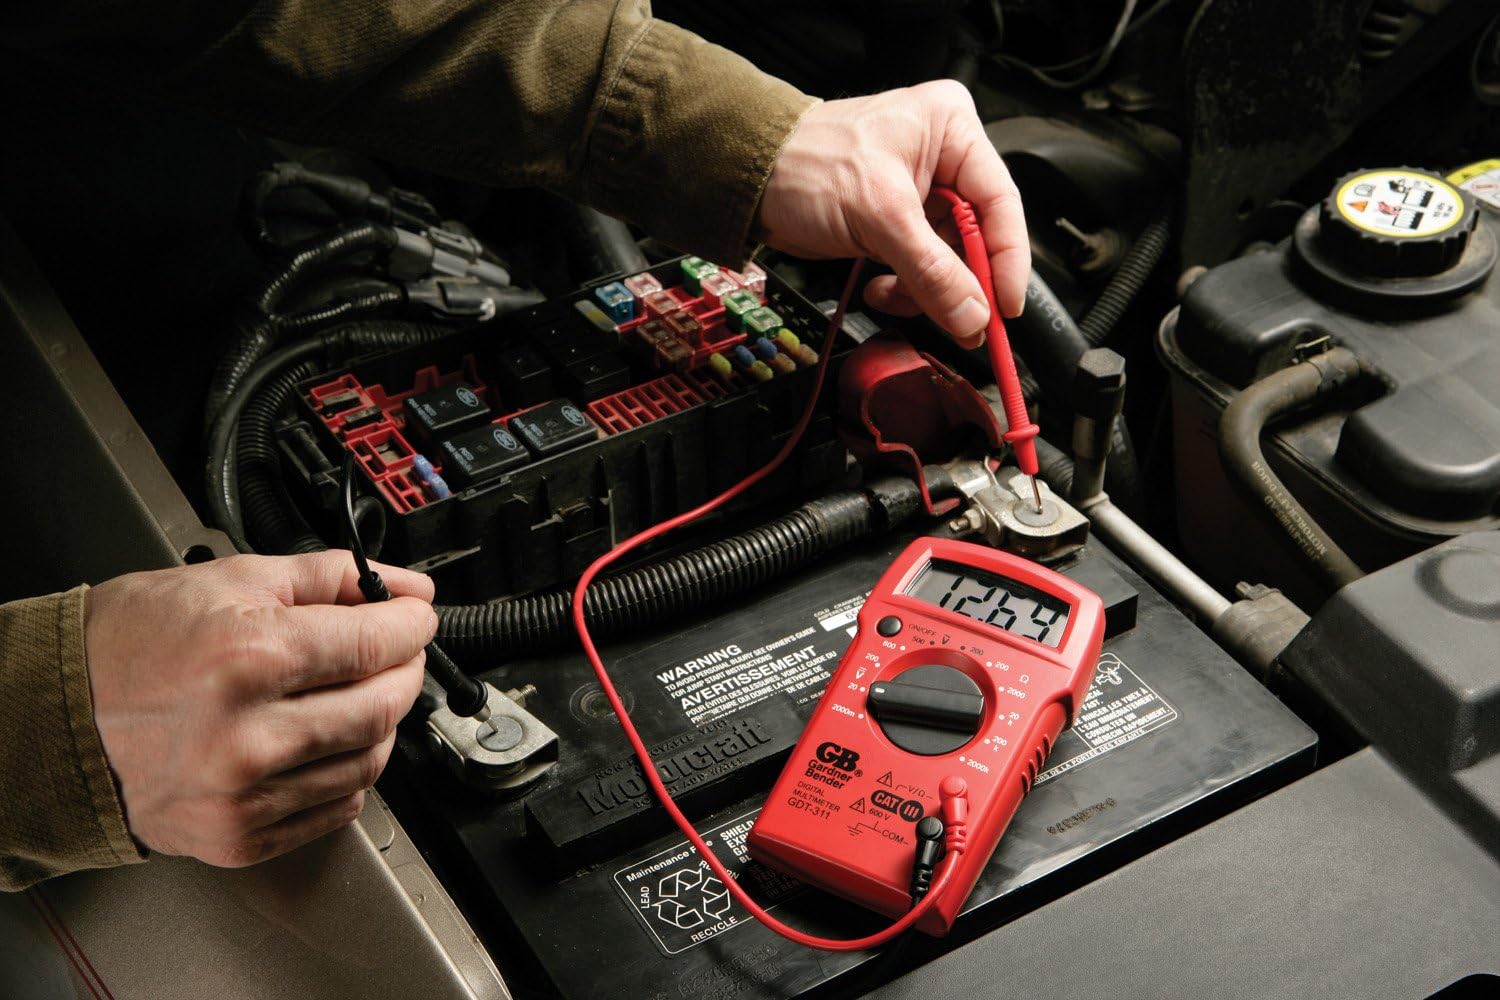
Figure 3: The GDT-311 Multimeter in use, measuring the voltage of a car battery. The digital display clearly shows the reading.
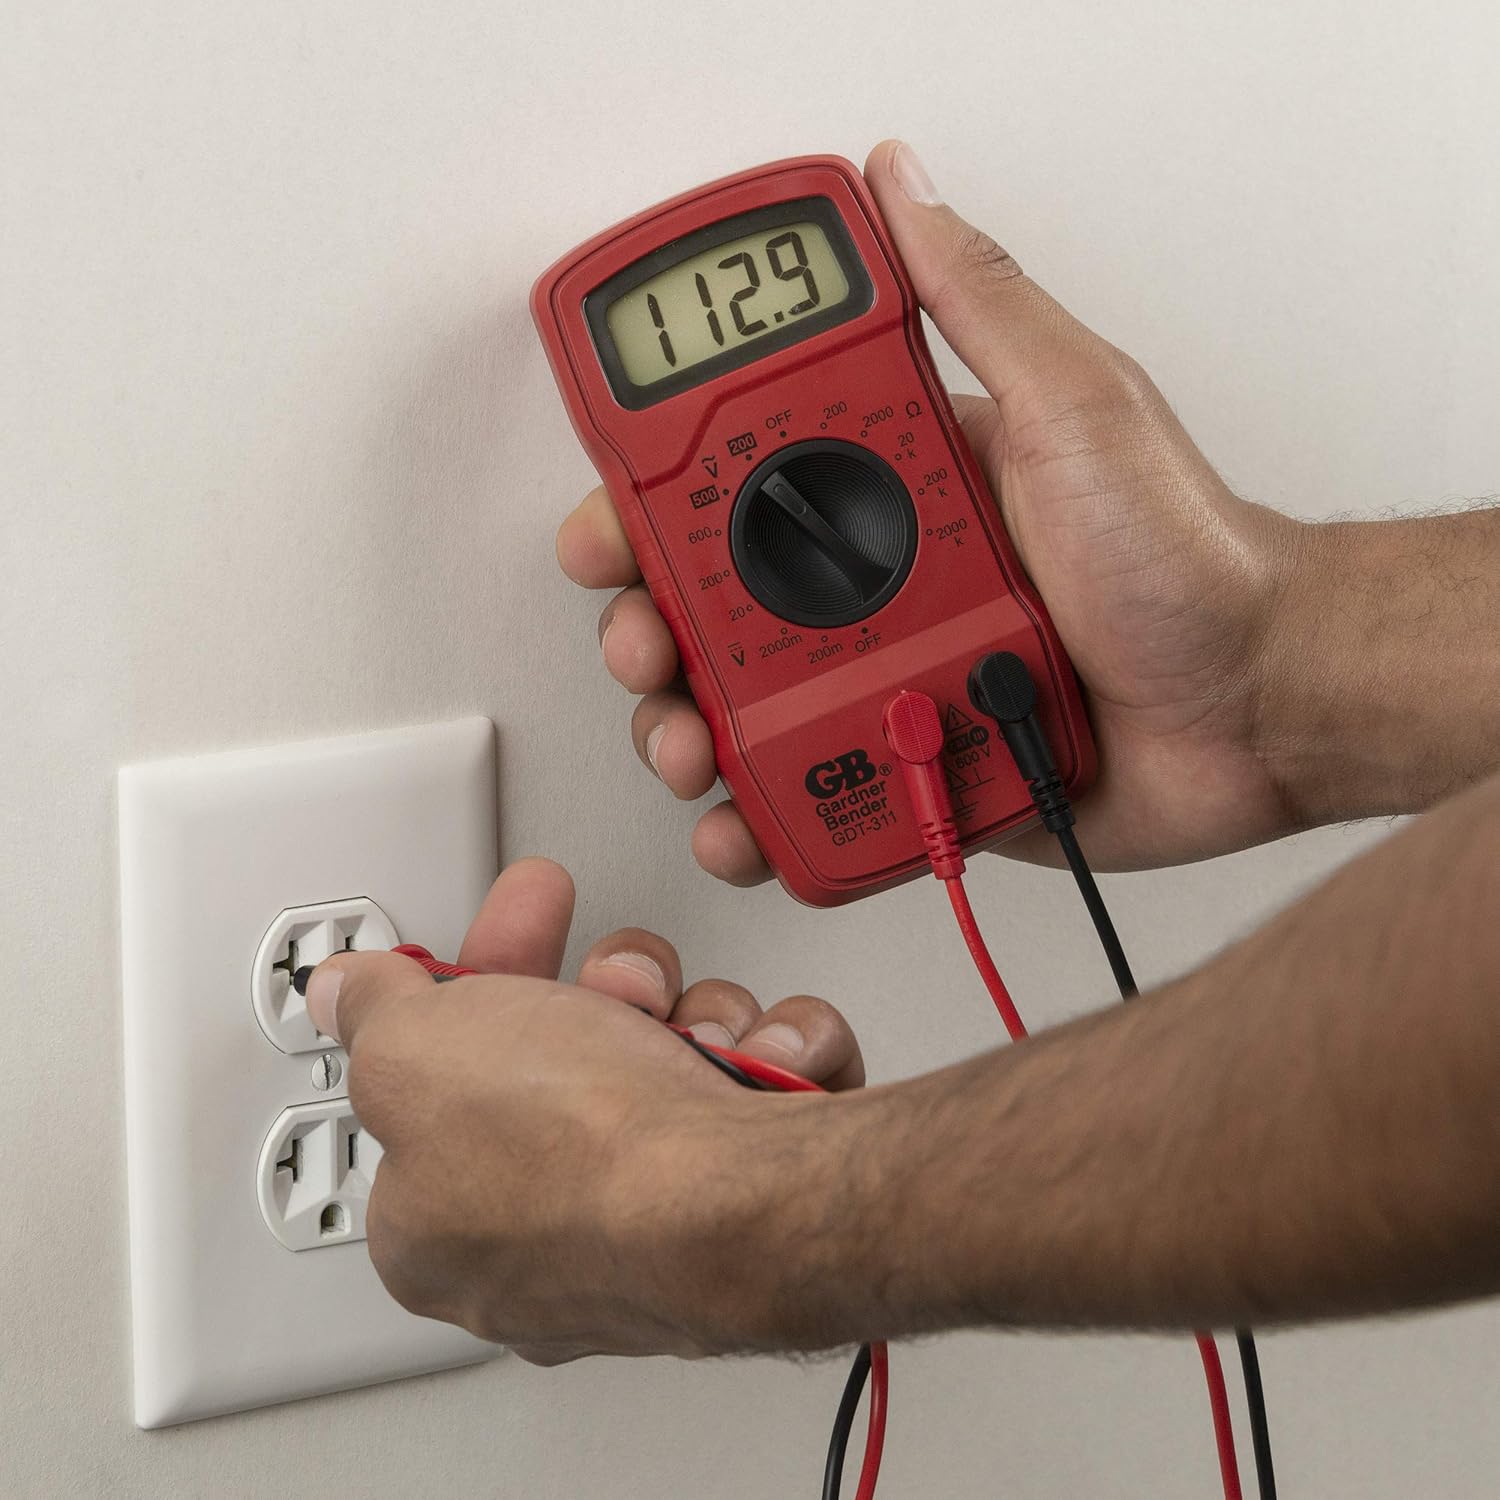
Figure 4: The GDT-311 Multimeter being used to test an AC wall outlet, demonstrating its capability to measure alternating current voltage.

Figure 5: The GDT-311 Multimeter in action, testing a circuit breaker panel. The display shows the measured voltage, indicating its utility for electrical diagnostics.
Setup
Battery Installation
The Gardner Bender GDT-311 Digital Multimeter requires a 9V battery (not included) for operation. To install or replace the battery:
- Ensure the multimeter is turned OFF.
- Locate the battery compartment cover on the back of the unit.
- Use a small Phillips head screwdriver to remove the two screws securing the battery cover.
- Carefully lift off the battery cover.
- Insert a new 9V battery, ensuring correct polarity (+ and - terminals).
- Replace the battery cover and secure it with the two screws.
The multimeter is now ready for use. The low battery indicator on the display will alert you when the battery needs to be replaced again.
Operating Instructions
Before using the multimeter, ensure the test leads are securely plugged into the correct input jacks. The black lead typically connects to the "COM" (common) jack, and the red lead connects to the "V/Ω" (Voltage/Ohms) jack for most measurements.
Measuring DC Voltage (DCV)
- Turn the rotary dial to the desired DC Voltage range (e.g., 20V, 200V, 600V). Select a range higher than the expected voltage.
- Connect the red test lead to the positive (+) terminal of the circuit or component, and the black test lead to the negative (-) terminal.
- Read the voltage value on the digital display. If a negative sign appears, the polarity of the connection is reversed.
Measuring AC Voltage (ACV)
- Turn the rotary dial to the desired AC Voltage range (e.g., 200V, 500V). Select a range higher than the expected voltage.
- Connect the test leads across the AC voltage source (e.g., wall outlet). Polarity does not matter for AC voltage.
- Read the voltage value on the digital display.
Measuring Resistance (Ω)
- Ensure the circuit or component is de-energized before measuring resistance.
- Turn the rotary dial to the desired Resistance range (e.g., 200Ω, 2kΩ, 2MΩ).
- Connect the test leads across the component whose resistance you want to measure.
- Read the resistance value on the digital display. An "OL" or "1" reading indicates an open circuit or resistance higher than the selected range.
Continuity Test
The continuity test is useful for checking if a circuit is complete or if a wire is broken.
- Ensure the circuit or component is de-energized.
- Turn the rotary dial to the continuity setting (often indicated by a diode symbol or a speaker icon).
- Touch the test leads together; the multimeter should beep and display a very low resistance reading (close to 0).
- Connect the test leads across the wire or component you wish to test. If the multimeter beeps and shows a low resistance, there is continuity. If it shows "OL" or "1" and does not beep, there is no continuity (open circuit).
Maintenance
- Cleaning: Wipe the multimeter with a dry, soft cloth. Do not use abrasive cleaners or solvents.
- Storage: Store the multimeter in a cool, dry place away from direct sunlight and extreme temperatures.
- Battery Replacement: Replace the 9V battery when the low battery indicator appears on the display to ensure accurate readings.
- Test Leads: Inspect test leads regularly for any signs of damage, such as cracks or frayed insulation. Replace damaged leads immediately to prevent electrical hazards.
Troubleshooting
- No Display/Faint Display: Check the 9V battery. Replace it if it is low or depleted.
- "OL" or "1" Reading: This typically indicates an open circuit, a measurement exceeding the selected range, or incorrect range selection. Try a higher range or check for breaks in the circuit.
- Inaccurate Readings: Ensure test leads are securely connected. Check the battery level. Verify the correct function and range are selected for the measurement.
- No Continuity Beep: Ensure the multimeter is set to the continuity test function. Check if the circuit is truly closed.
Specifications
| Attribute | Detail |
|---|---|
| Brand | Gardner Bender |
| Model Number | GDT-311 |
| Measurement Type | Digital Multimeter |
| Functions | AC Voltage, DC Voltage, Resistance |
| AC Voltage Range | Up to 500V |
| DC Voltage Range | Up to 600V |
| Resistance Range | Up to 2 Megohms |
| Display | 3.5-inch Digital Display |
| Power Source | 9V Battery (not included) |
| Safety Rating | CAT III 600V, UL 61010-1, CAN/CSA C22.2 |
| Dimensions (L x W x H) | 3 x 5 x 10 inches |
| Item Weight | 0.3 Pounds (approx. 4.8 ounces) |
Warranty and Support
The Gardner Bender GDT-311 Digital Multimeter comes with a 1-Year Limited Warranty from the date of purchase. This warranty covers defects in materials and workmanship under normal use.
For technical support, warranty claims, or additional product information, please visit the official Gardner Bender Store on Amazon: Gardner Bender Store.


