
1. Product Overview
The Lutron Diva DVSCELV-300P-BI is a 300-watt single pole electronic low-voltage dimmer designed to control lighting from one location. It features a large paddle switch for on/off control and a linear slider for precise dimming adjustments. This dimmer is specifically for use with electronic low-voltage lighting applications. It allows users to adjust light levels, contributing to energy savings and creating desired room atmospheres. Wallplates are sold separately.
2. Safety Information
- WARNING: SHOCK HAZARD. May result in serious injury or death. Turn OFF power at the circuit breaker or fuse box before installing.
- Install in accordance with all national and local electrical codes.
- If you are unsure about any part of these instructions, consult a qualified electrician.
- Do not use with standard incandescent, magnetic low-voltage, or fluorescent lighting. This dimmer is for electronic low-voltage applications only.
- Ensure the total wattage of the connected lighting does not exceed 300 watts.
3. Package Contents
- Lutron Diva DVSCELV-300P-BI Dimmer
- Wire connectors (various colors, typically yellow and blue)
- Installation Guide
Note: Wallplate is not included and must be purchased separately.
4. Specifications
| Feature | Detail |
|---|---|
| Model Number | DVSCELV-300P-BI |
| Wattage | 300 Watts |
| Operating Voltage | 120 Volts |
| Circuit Type | Single Pole (1-way) |
| Application | Electronic Low-Voltage (ELV) |
| Dimensions (L x W x H) | 1.75 x 2.2 x 4.25 inches |
| Color | Biscuit |
| Control Method | Paddle Switch with Linear Slider |
| Material | Copper (Contact Material) |
5. Installation
Before beginning installation, ensure you have turned off power at the circuit breaker. This dimmer is designed for single-pole applications where the light is controlled from one switch. A neutral wire connection is typically required for proper operation.
5.1. Preparation
- Turn off power: Locate your circuit breaker panel and turn off the power to the light switch you are replacing.
- Verify power is off: Flip the existing switch on and off to confirm the power is disconnected.
- Remove existing wallplate and switch: Unscrew the wallplate and then the mounting screws holding the old switch in place. Carefully pull the switch out from the wall box.
- Identify wires: Note the connections of the existing wires. Typically, a single-pole switch will have two load/line wires and a ground wire. Some dimmers may require a neutral wire (usually white).
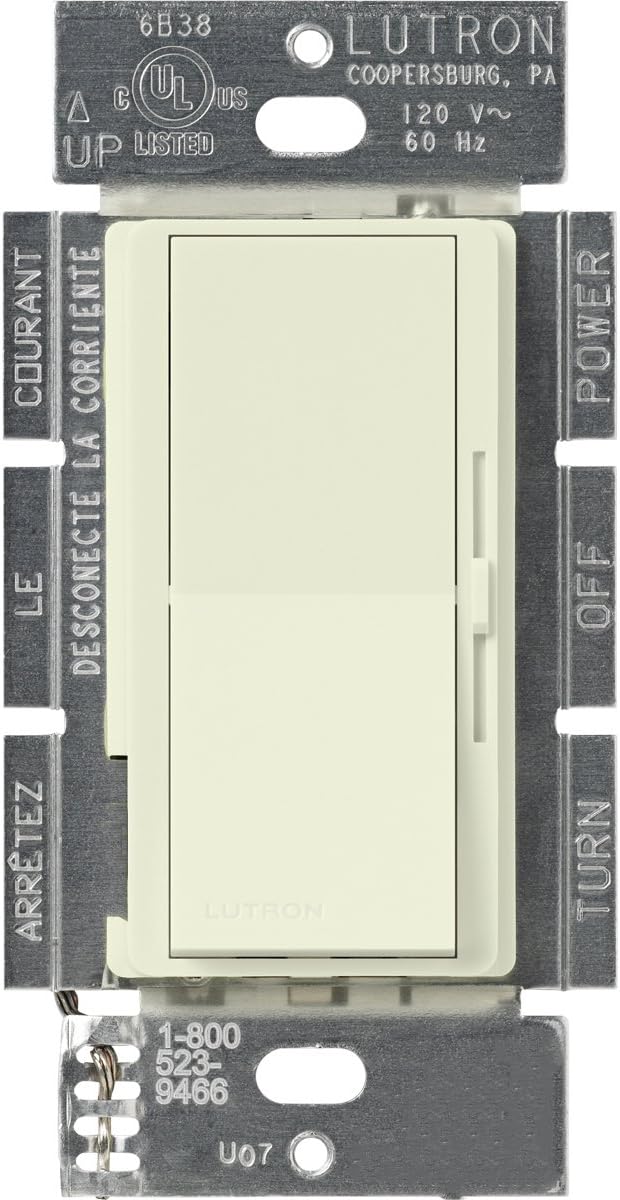
Image: Front view of the Lutron Diva DVSCELV-300P-BI Electronic Low-Voltage Dimmer, showing the paddle switch and linear slider.

Image: Side view of the Lutron Diva DVSCELV-300P-BI Dimmer, illustrating the pre-stripped wires for connection.
5.2. Wiring the Dimmer
The Lutron Diva DVSCELV-300P-BI dimmer typically has three wires: a green wire (ground), a black wire (hot/line), and a yellow wire (load). Some models may also include a white wire (neutral).
- Ground Wire: Connect the green wire from the dimmer to the bare copper or green ground wire in the wall box using a wire connector.
- Hot/Line Wire: Connect the black wire from the dimmer to the incoming hot/line wire from the circuit breaker (often black or red) using a wire connector.
- Load Wire: Connect the yellow wire from the dimmer to the load wire that goes to the light fixture (often black or red) using a wire connector.
- Neutral Wire (if applicable): If your dimmer has a white wire and your wall box has a neutral wire bundle (usually white wires twisted together), connect the white dimmer wire to the neutral bundle using a wire connector. If no neutral wire is present in the wall box, cap off the white wire from the dimmer with a wire connector.
Video: This video demonstrates the wiring process for a single-pole dimmer with one black, one yellow, and one white wire, which is applicable to the Lutron Diva DVSCELV-300P-BI. It covers connecting the ground, hot, load, and neutral wires.
5.3. Finishing Installation
- Secure the dimmer: Carefully push all wires back into the wall box. Mount the dimmer to the wall box using the provided screws.
- Attach wallplate: Install the coordinating wallplate (sold separately) over the dimmer.
- Restore power: Return to your circuit breaker panel and turn the power back on.

Image: The Lutron Diva DVSCELV-300P-BI Dimmer installed in a wall, ready for use.
6. Operation
- Turning Lights On/Off: Press the large paddle switch to turn the connected lights on or off.
- Adjusting Brightness: Use the linear slider located next to the paddle switch to adjust the light level. Slide up for brighter lights and down for dimmer lights.
- Preset Dimming: The dimmer will return to the previously set light level when turned back on.

Image: A hand demonstrating the operation of the Lutron Diva DVSCELV-300P-BI Dimmer, highlighting the paddle switch and linear slider.
7. Maintenance
- Cleaning: Clean the dimmer and wallplate with a soft, damp cloth. Do not use abrasive cleaners or solvents.
- No User-Serviceable Parts: There are no user-serviceable parts inside the dimmer. Do not attempt to open or repair the unit.
8. Troubleshooting
| Problem | Possible Cause / Solution |
|---|---|
| Lights do not turn on. |
|
| Lights flicker or buzz. |
|
| Dimmer does not dim properly. |
|
9. Warranty and Support
For warranty information, technical support, or further assistance, please visit the official Lutron website or contact Lutron customer service. Keep your purchase receipt for warranty claims.
Lutron Support: Lutron.com/support


