1. Introduction
This instruction manual provides essential information for the safe and effective installation and use of your Rubbermaid FastTrack 48-Inch Wall Mounted Storage Rail. This durable steel rail is designed to help organize various spaces, including garages, closets, and basements, by providing a secure mounting point for compatible FastTrack accessories (sold separately). Please read this manual thoroughly before installation and retain it for future reference.
2. Safety Information
- Always wear appropriate safety gear, including eye protection, during installation.
- Ensure the mounting surface is structurally sound and capable of supporting the rail's weight plus the maximum load capacity (1750 lbs).
- Locate wall studs accurately for secure mounting. Do not rely solely on drywall anchors for heavy loads.
- Use appropriate fasteners for your wall type. Deck screws are recommended for superior holding power.
- Do not overload the rail or any attached accessories beyond their specified weight limits.
- Keep children and pets away from the installation area.
- Periodically inspect the rail and accessories for signs of wear, damage, or loose connections.
3. Package Contents
Your package should contain the following item:
- 1x Rubbermaid FastTrack 48-Inch Rail
Note: All FastTrack accessories, such as hooks, shelves, and baskets, are sold separately. Mounting hardware is not included with the rail.
4. Installation Instructions
The FastTrack rail is designed for quick and easy installation, often by one person. Follow these steps for secure mounting:
- Gather Tools: You will need a drill/impact driver, a level, a stud finder, and appropriate fasteners (e.g., deck screws). Pilot holes (1/8 inch) are recommended.
- Determine Mounting Height: Decide on the desired height for your rail. Common recommendations are 4 feet or 7 feet 3 inches from the floor, but adjust based on the items you plan to hang.
- Locate Studs: Use a stud finder to locate wall studs. The FastTrack system is compatible with standard 16-inch or 24-inch stud spacing. Mark the stud locations along your desired mounting line. If studs do not align with all holes, consider adding 2x4 blocking behind the drywall for additional support, or use heavy-duty wall anchors for non-stud locations (for lighter items).
- Prepare the Rail: The metal track and the plastic cover are not symmetrical. The upper flange of the metal track is slightly longer than the lower flange. Ensure the longer edge is oriented upwards when mounting. The plastic cover also has a specific orientation, indicated by the "Rubbermaid" logo, which should be right-side up.
- Mount the Rail:
a. Hold the rail against the wall at your marked height, aligning it with at least one stud.
b. Secure the rail with one screw into a stud. Do not fully tighten.
c. Use a level to ensure the rail is perfectly horizontal. Adjust as needed.
d. Once level, insert screws into all available stud locations. For optimal security, use deck screws instead of any provided hardware, as they offer better grip.
e. If mounting to drywall without studs, use appropriate heavy-duty drywall anchors (sold separately) for lighter loads. Drill pilot holes as required by your chosen anchors.
- Attach the Cover: Once the metal rail is securely mounted, align the plastic cover. Hook the top edge of the cover over the top flange of the metal rail, then firmly press or tap the bottom edge until it snaps securely into place. The "Rubbermaid" logo on the cover should be visible and right-side up.
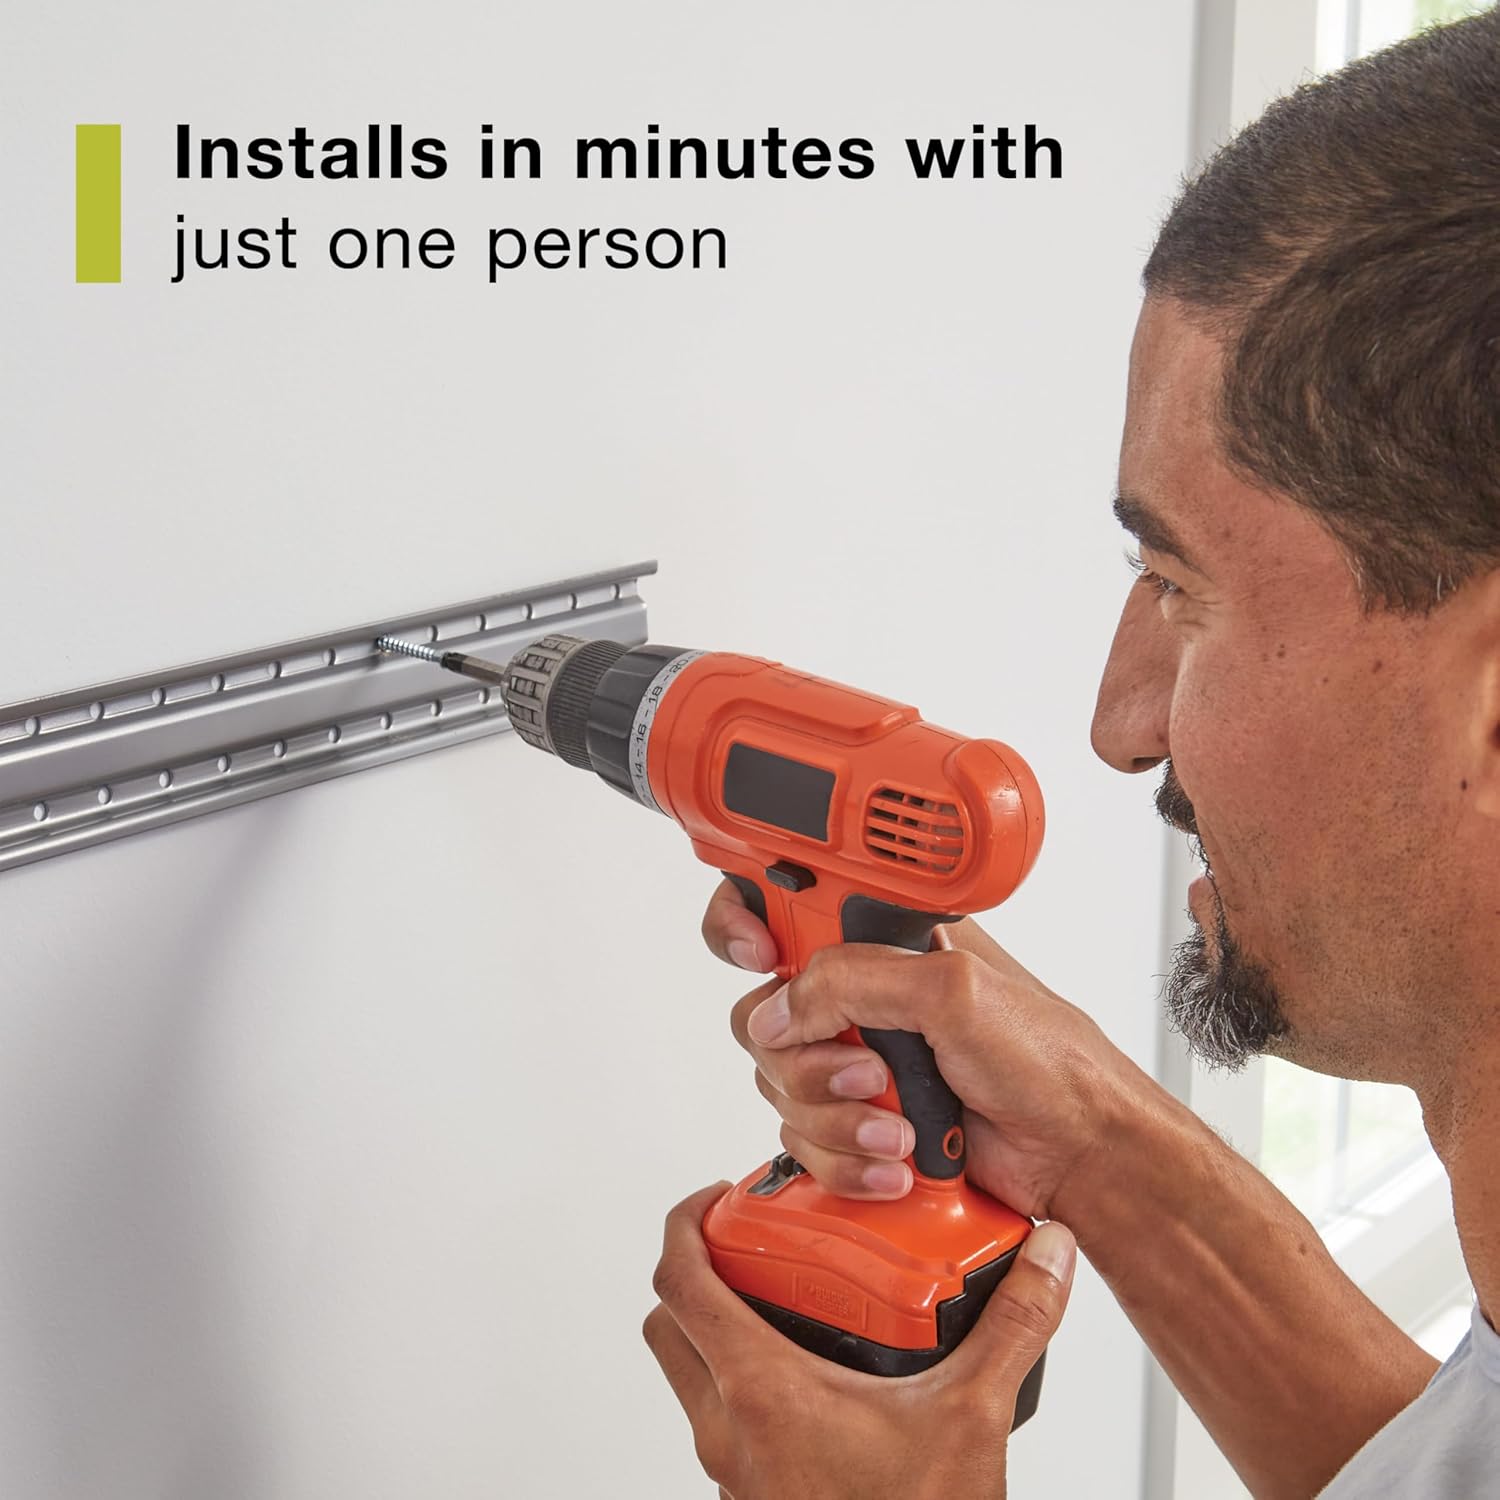
Image: A man using a drill to install the FastTrack rail onto a wall, demonstrating the ease of installation.

Image: A man snapping the plastic cover onto the installed FastTrack metal rail, showing the final step of installation.
Installation Video
Video: An official product video demonstrating the installation process of the FastTrack rail and attachment of accessories.
5. Operating and Usage
The FastTrack rail system is designed for versatility and ease of use. Once the rail is installed, you can attach various FastTrack accessories (sold separately) to customize your storage solution.
Attaching and Relocating Accessories:
- FastTrack accessories are designed to snap quickly and securely onto the rail.
- To attach an accessory, align its top clips with the top edge of the rail and press firmly until it clicks into place.
- To relocate an accessory, simply press the release tab (if present) or lift the accessory slightly and slide it along the rail to the desired position.
- The intuitive design allows for easy rearrangement as your storage needs evolve.
Weight Capacity:
The FastTrack 48-inch rail, when properly installed into studs, can support up to 1,750 pounds. Always distribute weight evenly and adhere to the individual weight limits of each accessory.

Image: A man attaching a bike hook to the FastTrack rail, demonstrating accessory placement.

Image: An example of a garage wall organized with multiple FastTrack rails and various accessories holding tools and sports equipment.
Usage Video
Video: A user demonstrating how to attach and remove accessories from the FastTrack rail, highlighting its modularity.
6. Maintenance
- Cleaning: Wipe the rail and accessories with a damp cloth to remove dust and dirt. Avoid abrasive cleaners that could damage the finish.
- Inspection: Periodically check all mounting screws to ensure they remain tight. Inspect the rail and all attached accessories for any signs of damage, cracks, or deformation. Replace any damaged components immediately.
- Lubrication: No lubrication is required for the rail or accessories.
7. Troubleshooting
| Problem | Possible Cause | Solution |
|---|---|---|
| Difficulty attaching plastic cover | Rail or cover is upside down. | Ensure the metal rail's longer flange is up and the plastic cover's "Rubbermaid" logo is right-side up. |
| Rail feels loose after installation | Screws are not fully tightened or not secured into studs. | Retighten all screws. If not in studs, consider relocating or adding blocking for better support. Use recommended fasteners. |
| Accessories do not snap securely | Incorrect accessory type or debris in the rail channel. | Ensure you are using genuine FastTrack accessories. Clear any obstructions from the rail channel. |
8. Specifications
| Feature | Detail |
|---|---|
| Model Number | 1784415 |
| Brand | Rubbermaid |
| Material | Alloy Steel |
| Color | Satin Nickel/Black |
| Dimensions (L x W x H) | 48 x 2.31 x 0.63 inches |
| Item Weight | 2.2 pounds |
| Weight Limit | 1750 pounds |
| Mounting Type | Wall Mount |
| Stud Spacing Compatibility | 16" or 24" |
9. Warranty & Support
Warranty Information:
This Rubbermaid FastTrack rail is backed by a Limited Lifetime Warranty. For specific terms and conditions, please refer to the warranty documentation included with your purchase or visit the official Rubbermaid website.
Customer Support:
For technical assistance, missing parts, or warranty claims, please contact Rubbermaid Customer Service:
- Website: www.rubbermaid.com
- Phone: Refer to the contact information on the product packaging or the official website for your region.


