
IDEAL 89-206
IDEAL INDUSTRIES INC. 89-206 6 Pole Terminal Strip User Manual
Model: 89-206 | Brand: IDEAL
Introduction
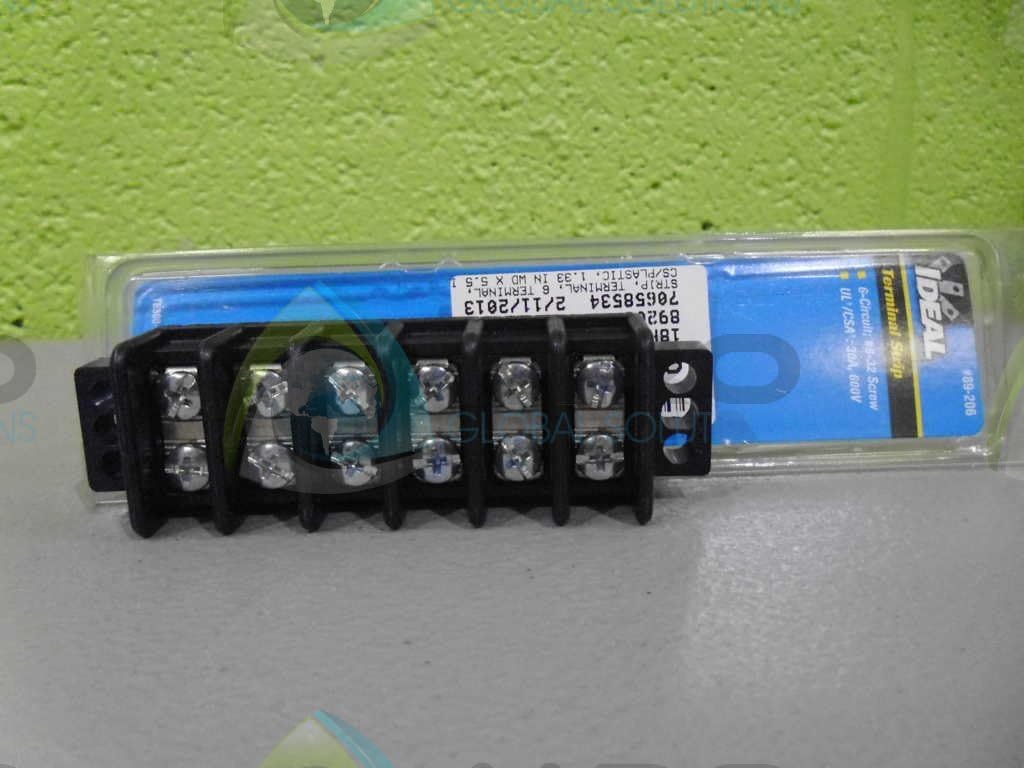
The IDEAL 89-206 6 Pole Terminal Strip is engineered for robust and reliable electrical connections. Featuring a durable thermoplastic base and corrosion-resistant hardware, this terminal strip is designed for extended service life in various applications. Its versatile design accommodates a wide range of circuit configurations and electrical ratings, making it suitable for diverse industrial and home improvement needs.
Key Features
- Centre Spacing: 0.562 inches (14.82mm) for organized wiring.
- Wire Compatibility: Accepts wire sizes from 10 through 22 AWG Cu, offering broad application flexibility.
- Terminal Screws: Equipped with #8-32 Phil slot, zinc-plated steel terminal screws for secure connections.
- Certifications: UL Recognized (E82048) and CSA Certified (LR15364), ensuring compliance with safety standards.
- Base Material: Constructed with a rugged polyester thermoplastic base (UL Rated 94V-0) for enhanced durability and safety.
Specifications
| Attribute | Value |
|---|---|
| Manufacturer | IDEAL INDUSTRIES |
| Part Number | 89-206 |
| Item Weight | 0.16 ounces |
| Product Dimensions | 3 x 1 x 2 inches |
| Item Model Number | 89-206 |
| Material | Metal |
| Voltage Rating | 120 Volts |
| Item Package Quantity | 1 |
| Measurement System | Imperial, Metric |
| Mounting Type | Surface |
| Certification | CSA, UL |
| Date First Available | February 17, 2007 |
Setup and Installation
Proper installation is crucial for the safe and effective operation of the terminal strip. Always ensure power is disconnected before beginning any wiring work.
- Safety First: Turn off all power to the circuit where the terminal strip will be installed. Verify with a voltage tester that the power is off.
- Mounting: Secure the terminal strip to a stable surface using appropriate fasteners through the mounting holes provided at each end. Ensure it is mounted in a location that is dry, protected, and accessible for future maintenance.
- Wire Preparation: Strip approximately 0.5 inches (12.7mm) of insulation from the ends of the wires to be connected. Ensure the wire strands are twisted tightly if using stranded wire.
- Connecting Wires: Loosen the terminal screws using a Phillips head screwdriver. Insert the prepared wire ends into the appropriate terminal openings. Ensure the wire is fully inserted and no bare wire is exposed outside the terminal.
- Tightening Connections: Tighten the terminal screws firmly to secure the wires. Do not overtighten, as this can damage the screw or the wire. Gently tug on each wire to confirm it is securely fastened.
- Verification: Double-check all connections for proper polarity and secure fastening before restoring power.
Operating Instructions
Once installed and wired correctly, the terminal strip operates passively as a connection point for electrical circuits. There are no active controls or user interfaces on the terminal strip itself.
- Function: The terminal strip serves to organize and secure multiple electrical connections, allowing for easy distribution or termination of wires within a circuit.
- Circuit Integrity: Ensure that the total current and voltage passing through the terminal strip do not exceed its rated capacity (e.g., 30A, 600V as per UL/CSA ratings for similar models). Overloading can lead to overheating and potential hazards.
- Environmental Conditions: Operate the terminal strip within its specified environmental conditions (e.g., temperature, humidity) to ensure optimal performance and longevity.

Maintenance
The IDEAL 89-206 Terminal Strip requires minimal maintenance, but periodic checks can ensure continued reliability and safety.
- Power Disconnection: Always disconnect power to the circuit before performing any maintenance.
- Visual Inspection: Periodically inspect the terminal strip for any signs of damage, corrosion, discoloration, or loose connections. Look for frayed wires or cracked insulation.
- Tightness Check: Over time, vibrations or temperature changes can cause screws to loosen. Gently re-tighten terminal screws if necessary, ensuring not to overtighten.
- Cleaning: If dust or debris accumulates, carefully clean the terminal strip with a dry, non-conductive brush or compressed air. Avoid using liquids.
- Replacement: If any part of the terminal strip shows significant wear, damage, or signs of overheating, it should be replaced immediately by a qualified professional.

Troubleshooting
While terminal strips are generally passive components, issues can arise from improper installation or external factors. Always disconnect power before troubleshooting.
- No Power Through Terminal:
- Check if power is supplied to the input side of the terminal strip.
- Verify that all terminal screws are tightened securely and wires are making good contact.
- Inspect wires for breaks or damage.
- Overheating/Discoloration:
- This indicates an overload or loose connection. Immediately disconnect power.
- Ensure the current draw does not exceed the terminal strip's rating.
- Re-tighten all connections. If discoloration persists or damage is visible, replace the terminal strip.
- Loose Wires:
- If wires pull out easily, the terminal screws were not tightened sufficiently or the wire gauge is too small for the terminal.
- Re-strip and re-insert the wire, ensuring proper tightening. Use appropriate wire gauge.
Warranty and Support
For specific warranty information and technical support regarding your IDEAL 89-206 6 Pole Terminal Strip, please refer to the documentation provided with your purchase or visit the official IDEAL INDUSTRIES website. General product support and frequently asked questions may also be available through their online resources.
For further assistance, please contact IDEAL INDUSTRIES customer service directly. Contact details are typically available on the manufacturer's website or product packaging.
Ask a question about this manual
Ask about setup, troubleshooting, compatibility, parts, safety, or missing instructions. Manuals+ will review the question and use this page’s manual context to help answer it.