1. Important Safety Information
Please read this instruction manual carefully before using the ritter E 16 Duo Plus electric universal slicer. Keep this manual for future reference. Failure to follow these instructions may result in electric shock, fire, or serious injury.
- Sharp Blades: The slicer is equipped with very sharp blades. Always handle blades with extreme care. Keep fingers away from the blade during operation and cleaning.
- Electrical Safety: Ensure the appliance is unplugged before assembly, disassembly, or cleaning. Do not immerse the motor unit in water or other liquids. Do not operate with wet hands.
- Children and Supervision: This appliance is not intended for use by children or persons with reduced physical, sensory, or mental capabilities unless they have been given supervision or instruction concerning use of the appliance by a person responsible for their safety.
- Stable Surface: Always operate the slicer on a stable, flat, and dry surface.
- Intended Use: This appliance is designed for slicing food items in a household environment. Do not use it for any other purpose.
- Maximum Continuous Operation: The appliance is designed for a maximum continuous operation time of 5 minutes. Allow it to cool down before further use to prevent overheating.
2. Product Overview
The ritter E 16 Duo Plus is a high-quality electric universal slicer designed for efficient and precise slicing of various food items. Its inclined metal construction and powerful ECO motor ensure optimal performance.

Image 2.1: Front view of the ritter E 16 Duo Plus electric universal slicer, showcasing its silver metallic finish, the circular blade, and the slice thickness adjustment knob.
Key Components:
- Circular Blade: The slicer comes with two interchangeable circular blades: one serrated blade for bread and harder items, and one smooth blade for ham, cheese, and delicate items.
- Slice Thickness Adjustment: A rotary knob allows precise adjustment of slice thickness from very thin up to approximately 20 mm.
- Food Carriage: The removable food carriage holds the food item securely during slicing and has an approximate travel distance of 18 cm.
- Food Tray: A collection tray is positioned beneath the blade to catch sliced food.
- Safety Switch: Features both momentary and continuous operation modes for enhanced safety and convenience.
- ECO Motor: An energy-efficient 65-watt motor provides sufficient power for various slicing tasks.
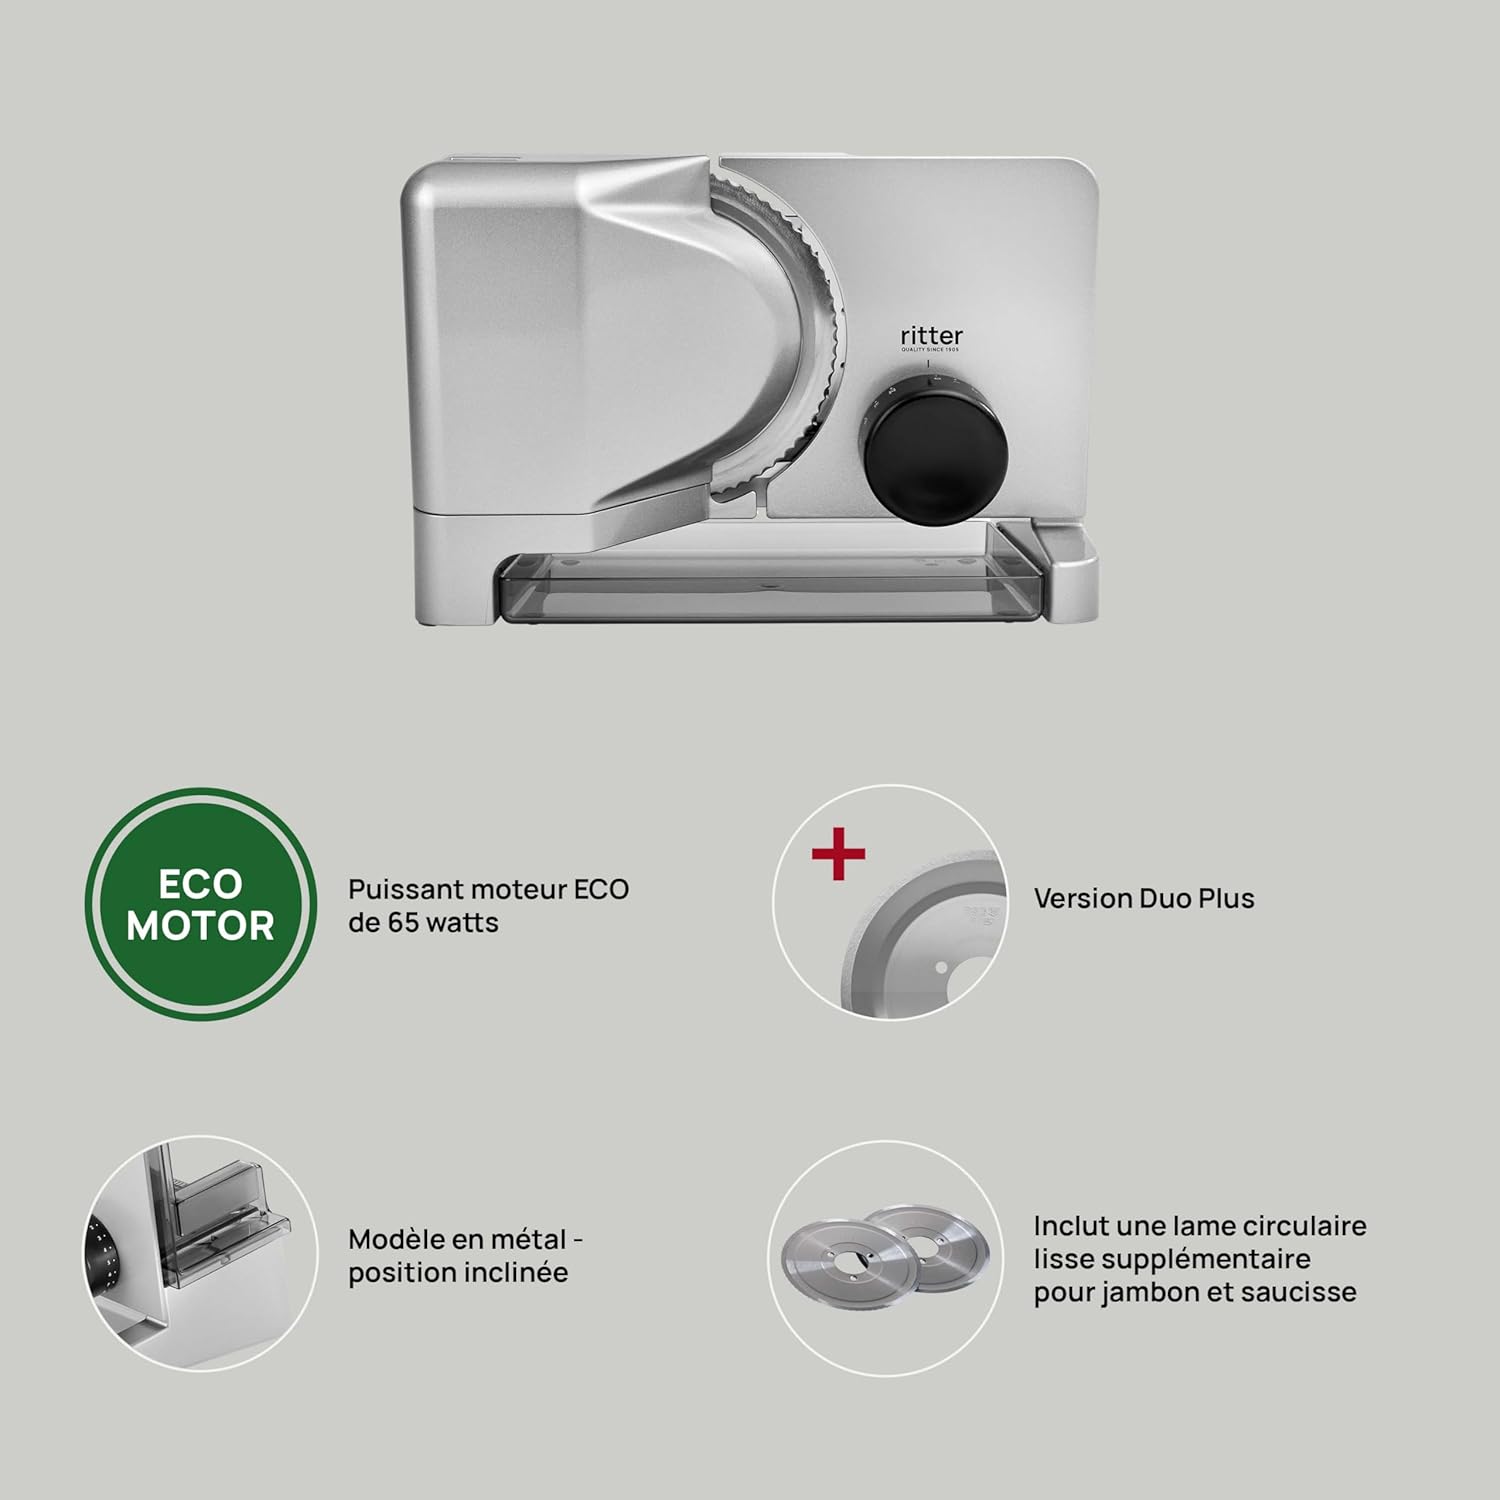
Image 2.2: This diagram highlights the key features of the E 16 Duo Plus, including the 65-watt ECO motor, the Duo Plus version with an additional smooth blade, the metal inclined model, and the inclusion of a supplementary smooth circular blade for ham and sausage.
3. Setup
Follow these steps to set up your slicer for first use:
- Unpack: Carefully remove all packaging materials and ensure all components are present.
- Placement: Place the slicer on a clean, stable, and non-slip surface. Ensure there is enough space around the appliance for safe operation.
- Blade Installation: If not already installed, carefully attach the desired blade (serrated or smooth) according to the instructions in the cleaning section (reverse of removal). Ensure it is securely fastened.
- Food Carriage and Tray: Position the food carriage onto its rails and place the food collection tray under the blade.
- Power Connection: Plug the power cord into a suitable electrical outlet (230V).

Image 3.1: The ritter E 16 Duo Plus slicer is shown positioned on a kitchen counter, ready for use. This illustrates a typical setup environment.
4. Operation
Operating your ritter E 16 Duo Plus slicer is straightforward:
- Select Blade: Choose the appropriate blade for your food item. Use the serrated blade for bread, hard cheeses, or vegetables. Use the smooth blade for ham, cold cuts, or softer cheeses.
- Adjust Slice Thickness: Turn the slice thickness adjustment knob to your desired thickness, from very thin to approximately 20 mm.
- Position Food: Place the food item firmly against the food carriage and the slice thickness guide. Use the food holder to secure smaller items and protect your fingers.
- Activate Slicer: Use the safety switch to turn on the slicer. You can choose between:
- Momentary Operation: Press and hold the switch for continuous slicing as long as it's held.
- Continuous Operation: Engage the switch for continuous operation without holding. Remember the 5-minute maximum continuous operation time.
- Slice Food: Gently push the food carriage towards the rotating blade. The inclined design helps guide the sliced food onto the collection tray.
- Deactivate Slicer: Once slicing is complete, release or disengage the safety switch and wait for the blade to stop completely before removing food or cleaning.

Image 4.1: The slicer is shown in operation, cutting slices from a loaf of bread. The removable food carriage and the inclined design, which aids in collecting sliced food, are clearly visible.
5. Cleaning and Maintenance
Regular cleaning and maintenance ensure the longevity and hygienic operation of your slicer.
- Unplug: Always unplug the appliance from the power outlet before cleaning.
- Remove Components: Carefully remove the food carriage, food holder, and the food collection tray.
- Remove Blade: To remove the blade, turn the slicer to the side. Locate the blade locking mechanism (usually a central screw or lever). Turn it counter-clockwise to unlock and carefully remove the blade. Always hold the blade by its center, avoiding the sharp edges.
- Clean Components: Wash the food carriage, food holder, food tray, and blades with warm soapy water. Rinse thoroughly and dry immediately.
- Clean Main Unit: Wipe the main unit with a damp cloth. Do not use abrasive cleaning agents, rough sponges, or hard brushes, as these can damage the surface. Ensure no water enters the motor housing.
- Reassemble: Once all parts are clean and dry, carefully reattach the blade by aligning it and turning the locking mechanism clockwise until secure. Reinsert the food carriage and place the food tray.
6. Troubleshooting
If you encounter issues with your ritter E 16 Duo Plus slicer, refer to the following common problems and solutions:
- Slicer does not turn on:
- Check if the power cord is securely plugged into a working outlet.
- Ensure the safety switch is correctly engaged for either momentary or continuous operation.
- Uneven slices:
- Ensure the food item is firmly pressed against the food carriage and the slice thickness guide.
- Verify that the blade is clean and free from food residue.
- Check if the slice thickness adjustment is set correctly and has not shifted during operation.
- Slicer motor sounds strained or stops:
- You might be applying too much pressure to the food item. Reduce pressure.
- The appliance may have reached its 5-minute continuous operation limit. Allow it to cool down.
- Ensure the blade is clean and rotates freely.
For issues not covered here or for further assistance, please contact ritter customer support.
7. Technical Specifications
| Specification | Detail |
|---|---|
| Brand | ritter |
| Model | E 16 Duo Plus (515.001) |
| Power | 65 Watts (ECO Motor) |
| Voltage | 230V |
| Material | Metal |
| Dimensions (L x W x H) | 33.5 x 22.5 x 23 cm |
| Weight | 3 Kilograms |
| Blade Diameter | 18 Centimeters |
| Max Slice Thickness | Approx. 20 mm |
| Special Features | Serrated blade, smooth blade, inclined design, safety switch (momentary/continuous), ECO motor |
| Maximum Continuous Operation Time | 5 minutes |

Image 7.1: A visual representation of the ritter E 16 Duo Plus slicer with its key dimensions (length, width, height) indicated in centimeters.
8. Warranty and Customer Support
ritter products are manufactured to high-quality standards. For information regarding warranty terms and conditions, please refer to the documentation provided with your purchase or visit the official ritter website.
If you require technical assistance, have questions about your product, or need to order spare parts, please contact ritter customer support. Contact details can typically be found on the official ritter website or in your product packaging.
Please have your model number (E 16 Duo Plus, Type 515.001) and purchase date available when contacting support.


