
Product Overview
The CURT 117213 Class 1 Trailer Hitch is designed to provide a reliable towing solution for select Mercedes-Benz 190D and 190E models. This custom-fit hitch integrates with the vehicle's frame, offering a 1-1/4-inch x 1-1/4-inch receiver. It is suitable for towing small trailers or attaching hitch-mounted accessories such as cargo carriers and bike racks. The hitch is constructed from strong, welded steel and features a dual-coat finish for enhanced rust resistance.

Image: The CURT 117213 Class 1 Trailer Hitch, showcasing its robust construction and receiver tube.
Safety Information
Adherence to safety guidelines is paramount when installing and operating a trailer hitch. Failure to follow these instructions can result in serious injury or property damage.
- Weight Capacity: Never exceed the lowest-rated towing component. This Class 1 hitch is rated for 1,500 lbs. Gross Trailer Weight (GTW) and 150 lbs. Tongue Weight (TW). Always verify your vehicle's towing capacity.
- Proper Installation: Ensure the hitch is securely installed according to the manufacturer's instructions. Professional installation is recommended.
- Regular Inspection: Before each use, inspect the hitch, ball mount, trailer ball, and safety chains for any signs of wear, damage, or corrosion. Ensure all fasteners are tight.
- Safety Chains: Always use safety chains between the tow vehicle and the trailer. Cross the chains under the trailer tongue to prevent the tongue from dropping to the road if the hitch disconnects.
- Trailer Ball: Use a trailer ball with the correct diameter and weight rating for your application. The included ball mount has a 3/4-inch trailer ball hole.
- Proposition 65 Warning: This product may expose you to chemicals known to the State of California to cause cancer and birth defects or other reproductive harm. Wash hands after handling.
Parts List
The CURT 117213 Class 1 Trailer Hitch package includes the following components:
- Class 1 Trailer Hitch (with 1-1/4-inch receiver)
- Ball Mount (with 3/4-inch trailer ball hole)
- Hitch Pin and Clip
- Installation Hardware (bolts, washers, nuts as required for vehicle-specific fit)

Image: The included ball mount, hitch pin, and clip. A trailer ball is sold separately.
Setup and Installation
The CURT 117213 trailer hitch is designed for a custom, vehicle-specific fit on select Mercedes-Benz 190D and 190E models. While the installation is designed to be straightforward, it requires proper tools and adherence to specific steps. For detailed, step-by-step instructions, please refer to the official Installation Manual (PDF).
General Installation Overview:
- Preparation: Park the vehicle on a level surface and engage the parking brake. If necessary, raise the vehicle using a hoist or jack stands for safe access to the undercarriage.
- Clearance: Remove any components that obstruct the hitch mounting points, such as exhaust hangers or underbody panels, as specified in the detailed manual.
- Positioning: Carefully position the hitch assembly against the vehicle's frame, aligning the mounting holes.
- Fastening: Secure the hitch using the provided hardware. Ensure all bolts are tightened to the torque specifications outlined in the installation manual.
- Final Check: Double-check all connections and ensure the hitch is firmly attached and does not interfere with any vehicle components.

Image: A technician performing an under-vehicle installation of a trailer hitch.
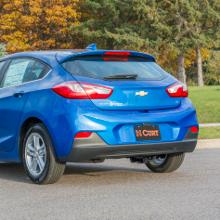
Image: A CURT trailer hitch discreetly installed on the rear of a vehicle.
Operating Instructions
Once the trailer hitch is securely installed, it can be used for towing or carrying hitch-mounted accessories.
Connecting a Trailer:
- Insert Ball Mount: Slide the ball mount into the 1-1/4-inch receiver tube. Align the pin holes.
- Secure Ball Mount: Insert the hitch pin through the aligned holes and secure it with the clip.
- Attach Trailer Ball: If not already installed, attach the appropriate trailer ball to the ball mount.
- Connect Trailer: Lower the trailer coupler onto the trailer ball and secure the coupler latch.
- Safety Chains: Connect the trailer's safety chains to the designated chain loops on the hitch receiver. Cross the chains under the trailer tongue.
- Wiring (if applicable): Connect any trailer wiring for lights and brakes.
- Final Check: Verify all connections are secure and that the trailer lights are functioning correctly before driving.

Image: A close-up of the hitch receiver with a ball mount, pin, and safety chains properly connected.
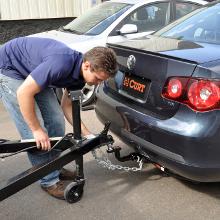
Image: A person demonstrating the connection of a trailer to a vehicle's hitch.
Using Hitch-Mounted Accessories:
For bike racks, cargo carriers, or other accessories, slide the accessory shank into the receiver tube, align the pin holes, and secure with a hitch pin and clip. Always ensure the accessory is rated for the hitch's capacity and is securely fastened.
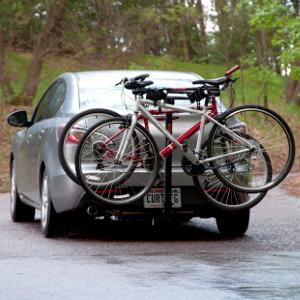
Image: A vehicle equipped with a hitch-mounted bike rack, demonstrating accessory usage.
Maintenance
Proper maintenance will extend the life and ensure the safe operation of your CURT trailer hitch.
- Cleaning: The hitch features an open-back receiver for easy cleaning. Regularly clean the receiver tube and exterior surfaces to remove dirt, salt, and debris.
- Corrosion Protection: The hitch is protected with a dual-coat finish (liquid A-coat and black powder coat) for industry-leading rust, chip, and UV resistance. However, regular inspection for any chips or scratches in the finish is recommended. Touch up any damaged areas to prevent rust.
- Fastener Checks: Periodically check all mounting bolts and nuts for tightness. Re-torque to specifications if necessary.
- Lubrication: Apply a thin layer of grease to the trailer ball and inside the receiver tube to prevent rust and ease connection/disconnection.

Image: CURT trailer hitches immersed in a liquid A-coat bath, part of the dual-coat finishing process for superior rust protection.
Troubleshooting
This section addresses common issues that may arise during the use of your trailer hitch.
- Hitch Rattling: Ensure the ball mount is fully inserted and secured with the hitch pin and clip. If rattling persists, consider using an anti-rattle device (sold separately).
- Difficulty Inserting Ball Mount: Check the receiver tube for debris or corrosion. Clean and lubricate if necessary. Ensure the ball mount shank is the correct size (1-1/4 inch).
- Rust Formation: While the hitch has a protective coating, prolonged exposure to harsh elements or damage to the finish can lead to rust. Clean affected areas and apply rust-inhibiting paint or coating.
- Loose Connections: Regularly inspect all bolts and nuts. If any are loose, re-torque them to the specifications provided in the installation manual. Do not use a hitch with loose components.
Specifications
Key specifications for the CURT 117213 Class 1 Trailer Hitch:
| Specification | Detail |
|---|---|
| Model Number | 117213 |
| Hitch Class | Class 1 |
| Receiver Size | 1-1/4 inch x 1-1/4 inch |
| Gross Trailer Weight (GTW) | 1,500 lbs |
| Tongue Weight (TW) | 150 lbs |
| Material | Carbon Steel |
| Finish Type | Gloss Black Powder Coat (Dual-Coat) |
| Item Weight | 29 pounds |
| Product Dimensions | 47 x 13 x 14 inches |
| Vehicle Service Type | Trailer |
| Compatible Vehicles | Select Mercedes-Benz 190D, 190E |

Image: Visual representation of the 1-1/4 inch receiver tube size.
Warranty and Support
For specific warranty information regarding your CURT trailer hitch, please refer to the documentation included with your product or visit the official CURT manufacturing website. For technical assistance, installation questions, or any other support needs, please contact CURT customer service directly.
Additional resources:


