Introduction
Thank you for choosing the Rapid 106E Electronic Stapler. This manual provides essential information for the safe and efficient operation, maintenance, and troubleshooting of your device. Please read it thoroughly before use and keep it for future reference.
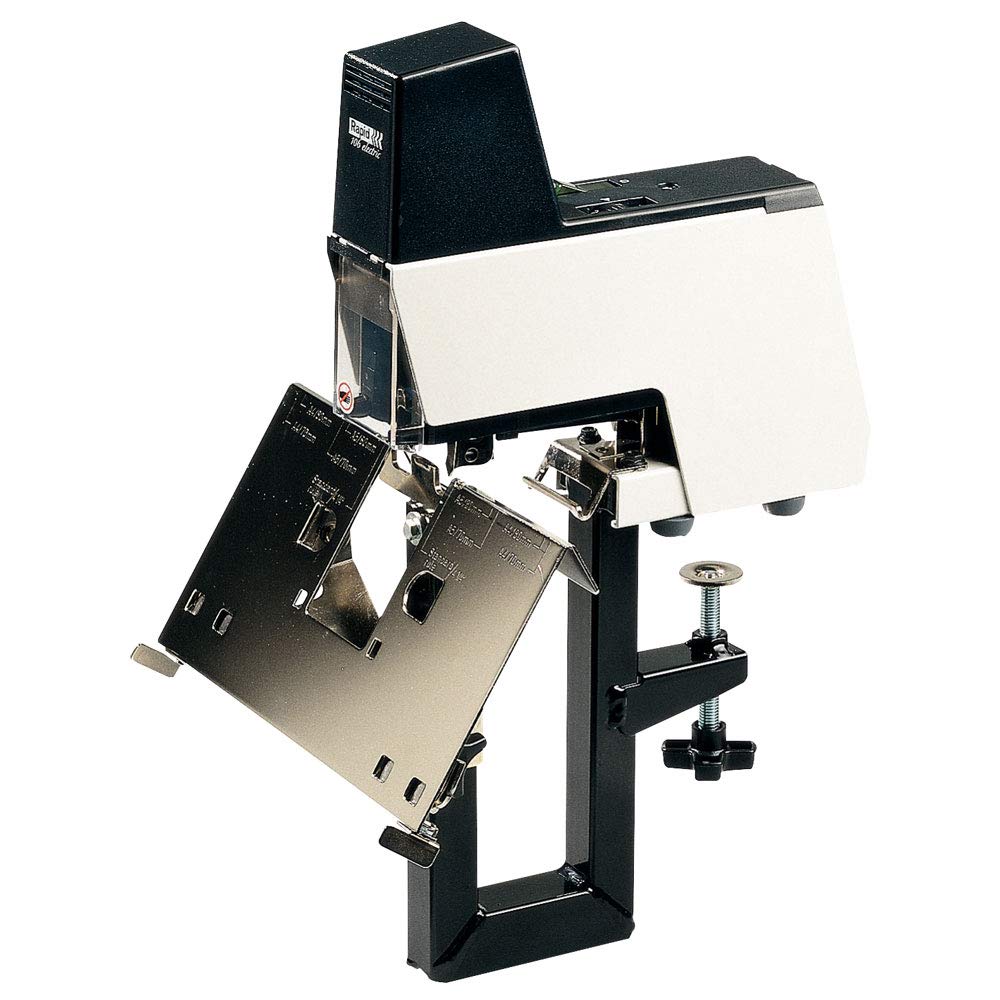
Image: The Rapid 106E Electronic Stapler, showcasing its black and grey design. This image illustrates the overall appearance of the stapler.
Important Safety Instructions
- Always disconnect the stapler from the power source before performing any maintenance or when not in use.
- Do not operate the stapler with a damaged power cord or plug.
- Keep hands and loose clothing away from the stapling mechanism during operation.
- Use only Rapid brand staples recommended for this model to ensure optimal performance and prevent damage.
- This device is intended for office use. Do not use it for purposes other than stapling paper.
- Keep out of reach of children.
Setup
Unpacking: Carefully remove the stapler and all accessories from the packaging. Verify that all components are present: Rapid 106E Electronic Stapler, power cable, foot pedal, and stapling plate for saddle stapling.
Placement: Place the stapler on a stable, flat surface. Ensure adequate space around the unit for operation and ventilation.
Power Connection: Connect the power cable to the stapler's power input and then plug it into a standard electrical outlet.
Loading Staples: The stapler features easy front-loading. Open the staple magazine cover, insert a strip of Rapid staples, and close the cover securely. Refer to the "Loading Staples" section for detailed instructions.
Optional Accessories:
- Foot Pedal: Connect the foot pedal to the designated port for hands-free operation.
- Saddle Stapling Plate: Attach the saddle stapling plate for stapling booklets or brochures.
- Opto Cable (not included): For connecting multiple units, an Opto cable can be used (purchased separately).
Operating Instructions
Loading Staples
The Rapid 106E features a convenient front-loading mechanism for staples.
- Ensure the stapler is powered off or unplugged for safety.
- Locate the front staple magazine cover.
- Open the cover and slide out the staple tray.
- Insert a full strip of compatible Rapid staples into the tray.
- Slide the staple tray back into the stapler until it clicks into place.
- Close the magazine cover.
Adjusting Stapling Depth
The stapler offers a stapling depth of up to 60 mm. To adjust the depth:
- Locate the depth adjustment mechanism, typically a sliding guide or knob.
- Move the guide to the desired stapling depth. A deeper setting allows stapling further from the paper edge.
Adjusting Stapling Force
The stapling force can be adjusted to accommodate different paper thicknesses.
- Refer to the stapler's controls for the force adjustment dial or lever.
- Increase the force for thicker stacks of paper and decrease it for thinner stacks. Test on scrap paper to find the optimal setting.
Standard Stapling
- Ensure the stapler is powered on.
- Place the papers to be stapled under the stapling head, aligning them with the depth guide.
- The stapler will automatically activate when paper is detected, or you can use the foot pedal if connected.
- The stapler has a capacity of up to 50 sheets for standard stapling.
Saddle Stapling (Pespuntes)
For stapling booklets or brochures, use the included saddle stapling plate.
- Attach the saddle stapling plate to the stapler as instructed in the setup section.
- Fold your booklet and place it over the saddle stapling plate, aligning the spine with the stapling position.
- Activate the stapler. The capacity for saddle stapling is up to 20 sheets.
Mobile Anvil for Stapling and Pinning
The stapler features a mobile anvil, allowing for both permanent stapling and temporary pinning.
- Rotate or slide the anvil to switch between stapling (inward bend) and pinning (outward bend).
- Pinning allows for temporary fastening of documents, which can be easily removed without tearing.
Maintenance
- Cleaning: Regularly wipe the exterior of the stapler with a soft, dry cloth. Do not use abrasive cleaners or solvents.
- Staple Jam Clearing: If a staple jam occurs, unplug the stapler immediately. Carefully open the staple magazine and remove any jammed staples or paper fragments. Do not force the mechanism.
- Lubrication: The stapler is designed for maintenance-free operation. Do not attempt to lubricate internal components unless specifically instructed by Rapid customer support.
- Storage: When not in use for extended periods, store the stapler in a clean, dry environment.
Troubleshooting
| Problem | Possible Cause | Solution |
|---|---|---|
| Stapler does not operate. | No power; power cord loose; stapler not switched on. | Check power connection and outlet. Ensure the stapler is plugged in and powered on. |
| Staples are jamming. | Incorrect staple size/type; overloaded with too many sheets; staple magazine not properly closed; bent staples. | Use only Rapid brand staples. Do not exceed maximum sheet capacity. Ensure staple magazine is securely closed. Clear any jammed staples. |
| Staples do not penetrate paper completely. | Stapling force too low; too many sheets; dull staples. | Increase stapling force. Reduce the number of sheets. Ensure staples are fresh and correct type. |
| Stapler is unusually noisy. | Loose components; internal obstruction. | Unplug the stapler. Inspect for any visible loose parts or obstructions. If the noise persists, contact customer support. |
Specifications
| Feature | Detail |
|---|---|
| Brand | Rapid |
| Model Name | 106E |
| Part Number | 10875310 |
| Operation Mode | Automatic |
| Stapling Depth | Up to 60 mm |
| Sheet Capacity (Standard) | 50 sheets |
| Sheet Capacity (Saddle Stapling) | 20 sheets |
| Staple Loading | Front-loading |
| Adjustable Stapling Force | Yes |
| Anvil Type | Mobile (for stapling and pinning) |
| Material | Aluminum |
| Color | Grey, Black |
| Dimensions (Package) | 49 x 29.6 x 13.2 cm |
| Item Weight | 5 Kilograms (11.02 lbs) |
| Manufacturer | Rapid (Sweden) Limited |
Warranty Information
Specific warranty details are not provided in the product information. Please refer to the warranty card included with your purchase or visit the official Rapid website for the most up-to-date warranty policy.
Customer Support
For technical assistance, spare parts, or further inquiries, please contact Rapid customer support. Contact information can typically be found on the manufacturer's website or on the product packaging.
Manufacturer: Rapid (Sweden) Limited
Website: www.rapid.com (This is a placeholder link, please refer to official documentation for the correct support website.)


