1. Introduction
The Body By Jake Hip & Thigh Sculptor is a compact exercise machine designed to target and strengthen the muscles of the lower body, including the hips, thighs, glutes, and calves. This manual provides essential information for the safe assembly, operation, maintenance, and troubleshooting of your Hip & Thigh Sculptor.
Key Features:
- Combines three exercises to target outer thighs, inner thighs, glutes, and calves.
- Smart resistance technology for tailored workouts.
- Whisper-quiet operation.
- Durable heavy-duty steel construction.

Figure 1: The Body By Jake Hip & Thigh Sculptor, showing its compact design.
2. Important Safety Information
Before using the Hip & Thigh Sculptor, please read and understand all safety precautions. Failure to follow these instructions may result in injury or damage to the equipment.
- Consult a Physician: Always consult with a healthcare professional before starting any new exercise program.
- Read Instructions: Read this entire manual before assembly or use.
- Supervision: Keep children and pets away from the equipment at all times. This equipment is not a toy.
- Proper Placement: Place the Hip & Thigh Sculptor on a stable, level surface. Ensure adequate space around the unit for safe operation.
- Inspect Before Use: Before each use, inspect the equipment for any loose parts, worn components, or signs of damage. Do not use if damaged.
- Proper Attire: Wear appropriate exercise clothing and athletic shoes. Avoid loose clothing that could get caught in moving parts.
- Stop if Unwell: If you experience pain, dizziness, or shortness of breath, stop exercising immediately and consult a physician.
- Weight Limit: Adhere to any stated weight limits for the equipment (not specified in product data, assume standard user weight).
3. Assembly and Setup
The Hip & Thigh Sculptor requires some assembly. Follow these general steps to ensure proper setup. While specific diagrams are not provided here, refer to any included manufacturer's diagrams with your product.
- Unpack Components: Carefully remove all parts from the packaging. Lay them out and identify each component against the parts list (if provided).
- Assemble Frame: Connect the main frame components using the provided hardware. Ensure all bolts, washers, and nuts are correctly aligned and securely tightened.
- Attach Seat and Pedals: Secure the padded seat and footrests/pedals to the main frame. Verify they are firmly attached and do not wobble.
- Install Resistance Mechanisms: Attach the Sculpting Piston and Sculpting Arc mechanisms as per instructions. Ensure they move freely and engage correctly.
- Final Inspection: Once assembled, double-check all connections for tightness. Ensure the unit is stable and does not rock. Place the unit on a flat, stable surface before use.
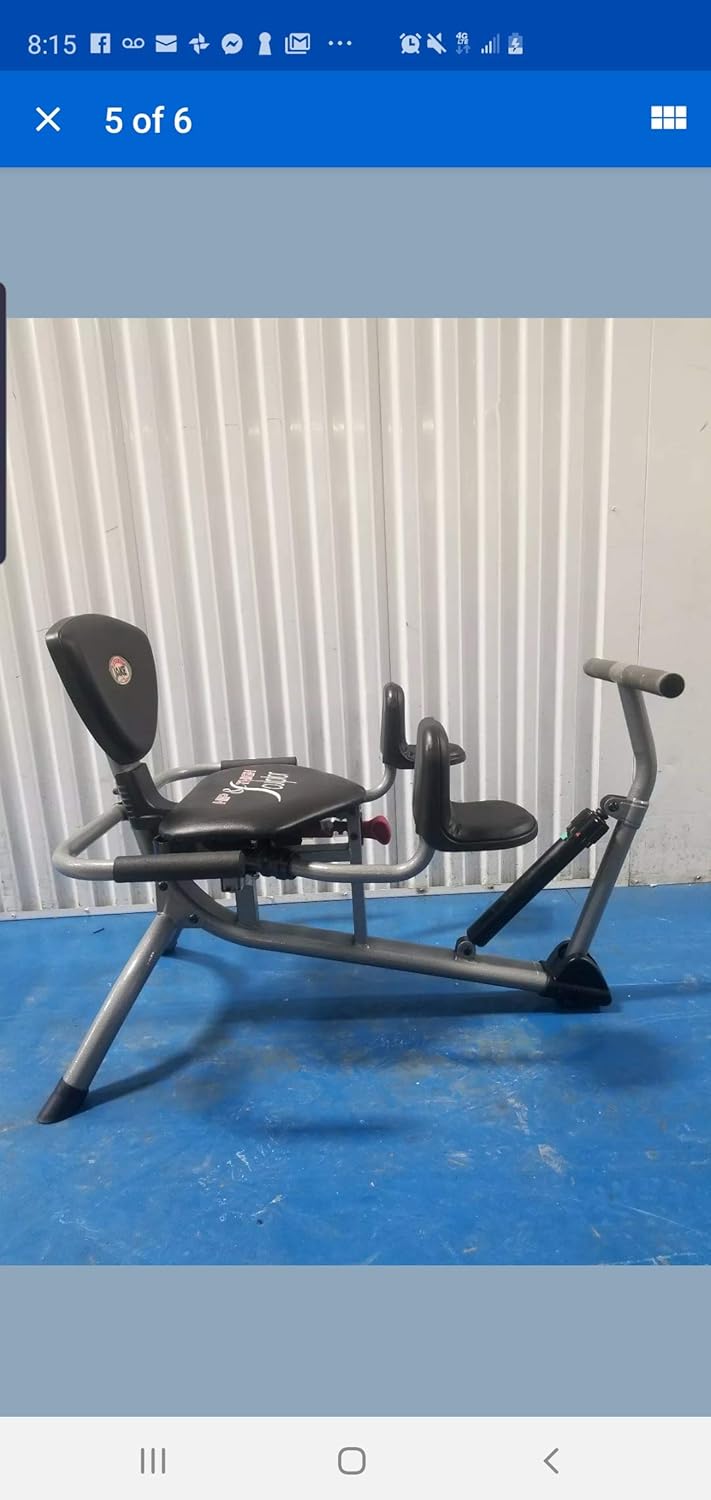
Figure 2: Side view of the assembled Hip & Thigh Sculptor, illustrating its structure.
4. Operating Instructions
The Hip & Thigh Sculptor is designed for ease of use, allowing you to target various lower body muscles from a comfortable seated position.
4.1 Understanding Resistance
- Sculpting Piston: This mechanism primarily sculpts the front and back of your thighs, glutes, and calves. It offers resistance levels from 1 to 6.
- Sculpting Arc: This patented feature targets the inner and outer thigh muscles. It provides resistance levels from 1 (beginners) to 3 (advanced).
4.2 Adjusting Resistance Levels
Resistance levels are typically adjusted using dials or sliding handles located near the respective mechanisms. Start with a lower resistance level (e.g., Level 1) and gradually increase as your strength improves. Ensure the resistance is set evenly on both sides if applicable.

Figure 3: Close-up of the padded seat and control area, where resistance adjustments are made.
4.3 Performing Exercises
Sit comfortably on the padded seat with your back supported. Your feet should be placed firmly on the footrests.
- Outer Thighs and Hips: Engage the Sculpting Arc. Push your legs outwards against the resistance, then slowly return to the starting position. Focus on controlled movements.
- Inner Thighs: Engage the Sculpting Arc. Pull your legs inwards against the resistance, then slowly release. Maintain a steady pace.
- Front and Back Thighs, Glutes, and Calves: Engage the Sculpting Piston. Perform a leg press motion, extending your legs forward, then slowly bending them back. This movement also helps lift glutes and shape calves.
Perform each exercise with proper form and controlled movements. Avoid jerky motions. Aim for 10-minute sessions daily, as suggested by the manufacturer, or as advised by your fitness professional.
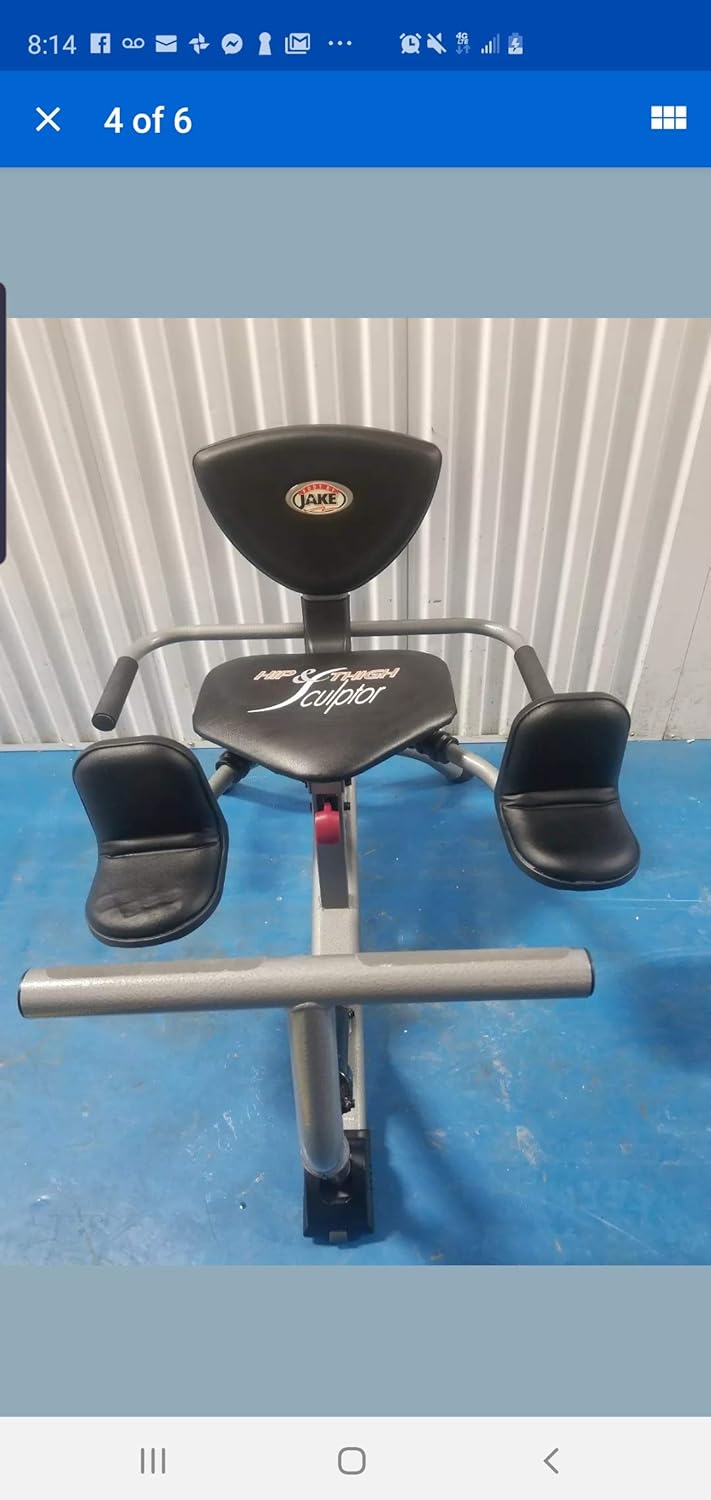
Figure 4: Front view of the Hip & Thigh Sculptor, showing the footrests and general setup for exercises.
5. Maintenance
Regular maintenance ensures the longevity and safe operation of your Hip & Thigh Sculptor.
- Cleaning: Wipe down the equipment regularly with a damp cloth to remove sweat and dust. Avoid abrasive cleaners or solvents.
- Inspection: Periodically check all bolts, nuts, and fasteners to ensure they are tight. Inspect moving parts, cables, and resistance mechanisms for signs of wear or damage.
- Lubrication: If any moving parts begin to squeak or feel stiff, apply a small amount of silicone-based lubricant as recommended for fitness equipment.
- Storage: Store the Hip & Thigh Sculptor in a clean, dry environment away from extreme temperatures and direct sunlight.
6. Troubleshooting
If you encounter issues with your Hip & Thigh Sculptor, refer to the following common troubleshooting steps:
- Noise During Operation:
- Check all bolts and connections for tightness.
- Apply lubricant to moving joints if squeaking persists.
- Resistance Not Adjusting Properly:
- Inspect the Sculpting Piston and Sculpting Arc mechanisms for any obstructions or visible damage.
- Ensure adjustment knobs or levers are fully engaged in their desired setting.
- Unstable Unit:
- Verify the unit is placed on a completely flat and level surface.
- Check that all feet or stabilizers are making firm contact with the floor.
- Damaged or Broken Parts:
- Discontinue use immediately.
- Contact Body by Jake customer support for replacement parts or repair guidance. Do not attempt to repair critical components yourself unless specifically instructed.
7. Specifications
| Brand Name | Body by Jake |
| Model Number | ESHIPTHIGH |
| Item Dimensions (LxWxH) | 35 x 25 x 26 inches |
| Item Weight | 36 Pounds |
| Material | Alloy Steel |
| Color | Black |
| Sport Type | Exercise & Fitness |
| Date First Available | February 21, 2007 |
8. Warranty Information
Specific warranty details for the Body By Jake Hip & Thigh Sculptor are not provided in this manual. For information regarding product warranty, including coverage period and terms, please refer to the documentation included with your purchase or contact Body by Jake customer support directly.
9. Customer Support
For further assistance, technical support, or to inquire about replacement parts, please contact Body by Jake customer service. Contact information can typically be found on the product packaging, the manufacturer's official website, or through your retailer.
Note: No official product videos were available in the provided data for embedding in this manual.


