1. Introduction
This manual provides essential information for the safe and efficient installation, operation, and maintenance of your WAYNE WLS200 2 HP Cast Iron High Volume Lawn Sprinkling Pump. The WLS200 is designed for various high-volume water transfer applications, including operating underground sprinkling systems, drawing water from wells, lakes, or ponds for watering, and pool filling. It features a durable cast iron volute and corrosion-resistant thermoplastic components for long-lasting performance.

Image 1.1: The WAYNE WLS200 2 HP Cast Iron Lawn Sprinkling Pump.
2. Safety Information
Read and understand all safety warnings and instructions before installing or operating this pump. Failure to follow these instructions can result in serious injury or property damage.
General Safety Precautions:
- Always disconnect power before servicing the pump.
- Ensure the pump is properly grounded to prevent electrical shock.
- Do not operate the pump in explosive atmospheres or near flammable liquids.
- Wear appropriate personal protective equipment (PPE) during installation and maintenance.
- Keep children and pets away from the pump during operation.
Electrical Safety:
- The pump is factory set to 230V. Ensure your power supply matches this requirement.
- All electrical wiring must comply with local codes and regulations.
- Use a dedicated circuit with appropriate overcurrent protection.
- Never operate the pump with a damaged power cord or plug.
Water Safety:
- Do not pump flammable or corrosive liquids.
- Ensure adequate ventilation if operating in an enclosed space.
- Protect the pump from freezing temperatures to prevent damage.
3. Key Components
The WAYNE WLS200 pump consists of several key parts that work together to provide efficient water transfer:
- Motor: The 2 HP electric motor provides the power to drive the impeller.
- Volute: A heavy-duty cast iron casing that houses the impeller and directs water flow.
- Impeller: A rotating component that draws water into the pump and forces it out. Made from corrosion-resistant, reinforced thermoplastic.
- Diffuser/Infuser: Works with the impeller to convert velocity energy into pressure. Made from corrosion-resistant, reinforced thermoplastic.
- Suction Port: 2-inch NPT inlet for drawing water into the pump.
- Discharge Port: 1-1/2-inch NPT outlet for expelling water from the pump.
4. Setup and Installation
Proper installation is crucial for the pump's performance and longevity. Follow these steps carefully.
4.1 Site Selection
- Choose a level, stable surface for the pump.
- Protect the pump from direct weather exposure (rain, snow, direct sunlight).
- Ensure adequate ventilation around the motor.
- Position the pump as close as possible to the water source to minimize suction lift.
4.2 Plumbing Connections
- Suction Line: Connect a 2-inch NPT pipe to the suction port. Use rigid piping to prevent collapse under vacuum. Ensure all connections are airtight to prevent air leaks, which can cause the pump to lose prime.
- Discharge Line: Connect a 1-1/2-inch NPT pipe to the discharge port. A check valve may be installed in the discharge line to prevent backflow, especially in systems with significant elevation changes.
- Foot Valve/Strainer: Install a foot valve with a strainer at the end of the suction line in the water source to prevent debris from entering the pump and to maintain prime.

Image 4.1: Example installation of the WAYNE WLS200 pump with PVC piping connections.
4.3 Electrical Connection
- The WLS200 pump requires a 230-volt power supply.
- Consult a qualified electrician for all electrical wiring to ensure compliance with local codes and safety standards.
- Ensure the circuit is properly sized for the pump's 2 HP motor and includes appropriate overcurrent protection.
4.4 Priming the Pump
Before initial operation or after the pump has run dry, it must be primed:
- Remove the priming plug located on the top of the pump volute.
- Fill the volute completely with water until it overflows.
- Replace and tighten the priming plug.
- Ensure the suction line is submerged in the water source.
- Open any valves in the discharge line.
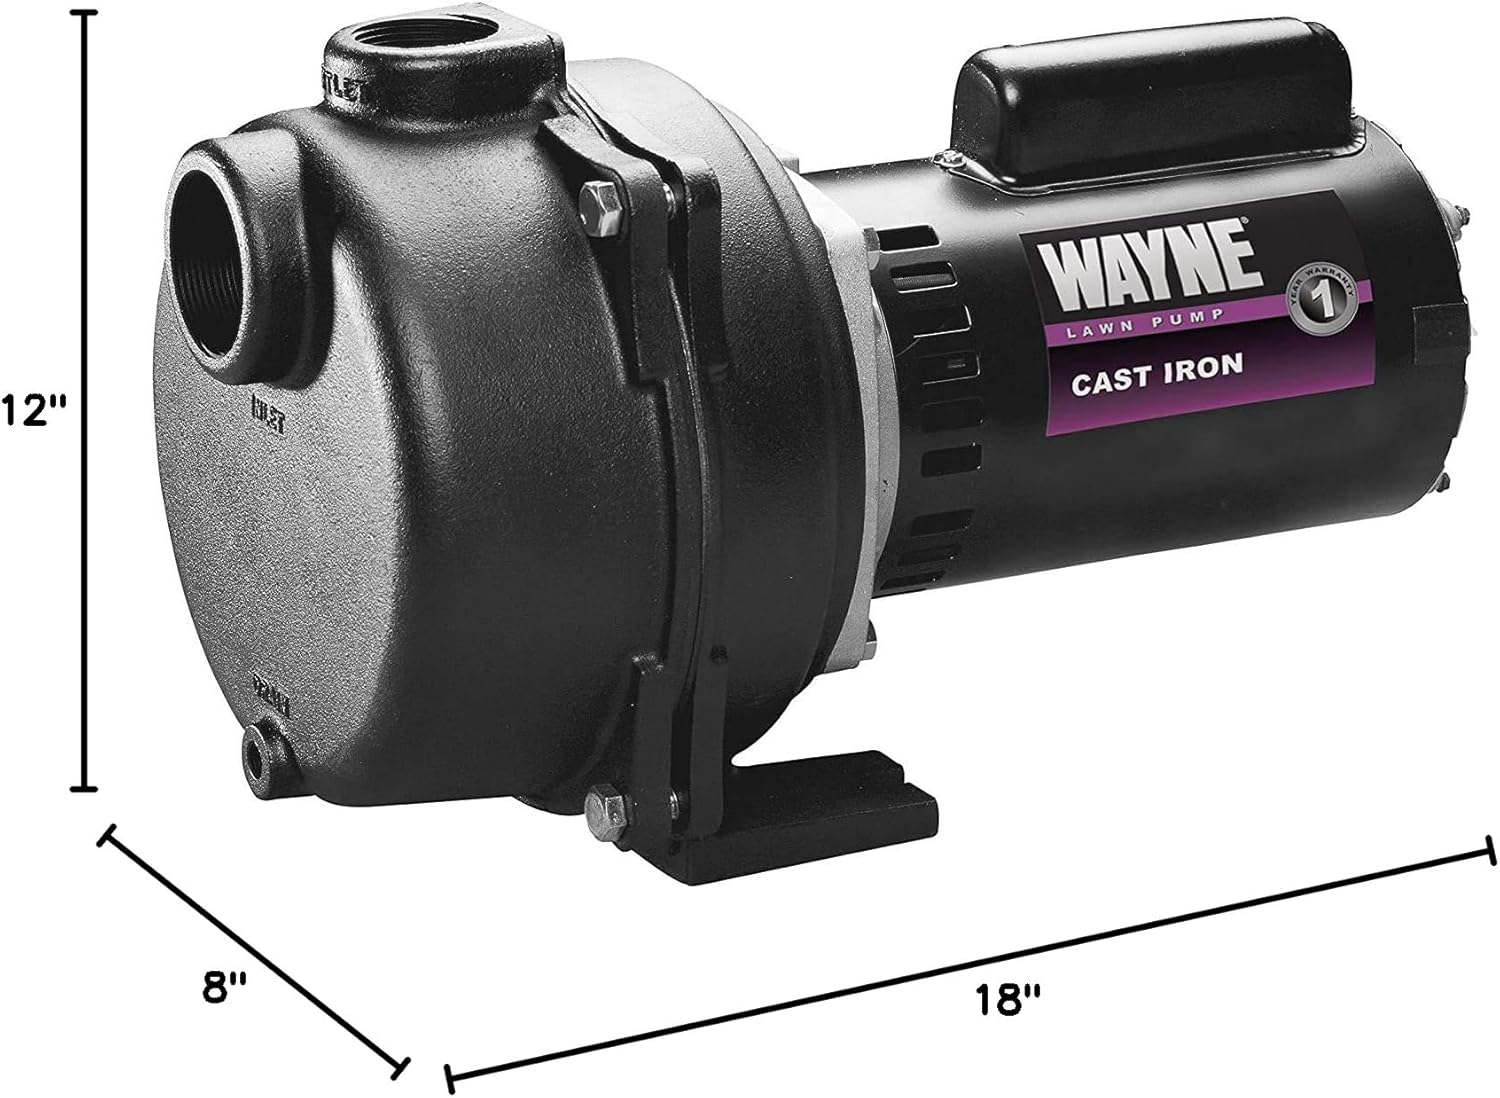
Image 4.2: Dimensions of the WAYNE WLS200 pump, useful for planning installation space.
5. Operating Instructions
Once the pump is installed and primed, it is ready for operation.
5.1 Starting the Pump
- Ensure the pump is properly primed and all connections are secure.
- Verify that the suction line is fully submerged in the water source.
- Turn on the electrical power to the pump. The pump should start immediately.
- Monitor the discharge flow to confirm proper operation.
5.2 Continuous Operation
- Avoid running the pump dry, as this can cause severe damage to the mechanical seal and other components.
- Regularly check for unusual noises or vibrations, which may indicate a problem.
- Ensure the water source remains adequate throughout the pumping cycle.
5.3 Shutting Down the Pump
- Turn off the electrical power to the pump.
- If the pump will not be used for an extended period, especially in freezing conditions, proceed with winterization steps (see Section 6.2).
6. Maintenance
Regular maintenance ensures optimal performance and extends the life of your pump.
6.1 Routine Checks
- Inspect Connections: Periodically check all plumbing and electrical connections for leaks or damage.
- Clean Strainer: If a foot valve with a strainer is used, clean it regularly to prevent clogging and maintain flow.
- Motor Ventilation: Ensure the motor's cooling fins are free from dirt and debris to prevent overheating.
6.2 Winterization
If the pump is exposed to freezing temperatures, it must be properly winterized to prevent damage:
- Disconnect power to the pump.
- Drain all water from the pump casing by removing the drain plug (if present) or by disconnecting the suction and discharge lines.
- Remove the priming plug and ensure all water is drained.
- Store the pump in a warm, dry location, or ensure it is completely drained and protected from freezing.
7. Troubleshooting
This section addresses common issues you might encounter with your WAYNE WLS200 pump.
| Problem | Possible Cause | Solution |
|---|---|---|
| Pump does not start | No power; tripped circuit breaker; faulty wiring; motor issue. | Check power supply; reset breaker; inspect wiring (qualified electrician); contact service. |
| Pump runs but no water flows | Pump not primed; air leak in suction line; clogged suction line/strainer; water source too low. | Re-prime the pump; check all suction connections for leaks; clean strainer; ensure adequate water level. |
| Low flow or pressure | Partially clogged suction/discharge; air leak; worn impeller; incorrect pipe sizing. | Inspect and clear clogs; check for air leaks; inspect impeller for wear; verify pipe diameters. |
| Excessive noise or vibration | Air in pump; cavitation; loose mounting; foreign object in volute; worn bearings. | Re-prime; ensure adequate water supply; tighten mounting bolts; inspect volute; contact service for bearings. |
| Pump leaks | Loose connections; damaged seals; cracked casing. | Tighten connections; replace seals; inspect casing for damage. |
8. Specifications
Technical details for the WAYNE WLS200 2 HP Cast Iron Lawn Sprinkling Pump:
- Model: WLS200
- Horsepower: 2 HP
- Voltage: 230 Volts
- Material: Cast Iron (Volute), Reinforced Thermoplastic (Impeller, Infuser)
- Suction Port: 2-inch NPT
- Discharge Port: 1-1/2-inch NPT
- Maximum Flow Rate: Up to 4,200 Gallons Per Hour (GPH)
- Maximum Lifting Height: 100 Feet
- Product Dimensions: 18"L x 8"W x 12"H
- Item Weight: 60 Pounds
- Power Source: Corded Electric
- Manufacturer: Wayne
- UPC: 040066204851
9. Warranty and Support
9.1 Warranty Information
The WAYNE WLS200 pump is covered by a 1-year limited warranty from the date of purchase, covering defects in materials and workmanship. Please retain your proof of purchase for warranty claims. For full warranty terms and conditions, refer to the documentation included with your product or visit the official Wayne website.
9.2 Customer Support
If you have questions about installation, operation, maintenance, or require technical assistance, please contact Wayne customer service. You can find contact information on the official Wayne website or in the packaging materials.