1. Introduction
This manual provides essential information for the proper installation, operation, and maintenance of your ViewSonic VA703b 17-Inch LCD Monitor. Please read this manual thoroughly before using the product to ensure optimal performance and safety.
The ViewSonic VA703b LCD monitor is designed to deliver clear graphics and smooth, full-motion video. It features a 17-inch display with fast 8ms video response, 280 nits of brightness (typical), and a 600:1 contrast ratio (typical). The OSD power lock feature helps secure your screen settings, and a Kensington security port is included for theft deterrence. Its stylish, slim bezel design allows for easy integration into any desktop environment, saving valuable space. This monitor is suitable for home users, small offices, educational institutions, and government applications.
2. Safety Information
Always follow these safety precautions to prevent damage to the monitor and ensure user safety:
- Do not open the monitor casing. There are no user-serviceable parts inside. Refer all servicing to qualified service personnel.
- Do not expose the monitor to rain or moisture to prevent fire or shock hazards.
- Ensure proper ventilation. Do not block ventilation openings.
- Use only the power cord and adapter supplied with the monitor.
- Place the monitor on a stable, flat surface to prevent it from falling.
- Unplug the monitor from the power outlet before cleaning. Use a soft, dry cloth for cleaning.
3. Setup Guide
3.1. Unpacking the Monitor
Carefully remove the monitor and all accessories from the packaging. Ensure all components are present:
- ViewSonic VA703b LCD Monitor
- Power Cable
- VGA Cable
- HDMI Cable (if included with your model)
- User Manual (this document)

Figure 3.1: Front view of the ViewSonic VA703b monitor.
3.2. Assembling the Stand
Attach the monitor base to the stand column, then secure the column to the back of the monitor. Ensure all screws are tightened securely.

Figure 3.2: Side view of the ViewSonic VA703b monitor, showing its slim profile.
3.3. Connecting the Cables
Connect the video cable (VGA or HDMI) from your computer to the corresponding port on the monitor. Then, connect the power cable to the monitor and a power outlet.

Figure 3.3: Rear view of the monitor, highlighting the video input ports (VGA, HDMI) and power input.
For optimal display, ensure your computer's graphics card is set to the monitor's native resolution of 1280x1024 pixels.
4. Operating Instructions
4.1. Powering On/Off
Press the Power button located on the front or bottom bezel of the monitor to turn it on or off. The power indicator light will illuminate when the monitor is on.
4.2. On-Screen Display (OSD) Menu
The OSD menu allows you to adjust various display settings. Use the physical buttons (Menu, Up, Down, Auto) typically found on the bottom bezel to navigate and select options.
- Menu: Activates the OSD menu or enters a sub-menu.
- Up/Down: Navigates through menu options or adjusts values.
- Auto: Automatically adjusts the screen image for optimal display (primarily for VGA connections).
- Power Lock: This monitor features an OSD power lock to prevent accidental changes to settings. Consult the full user manual for instructions on how to activate or deactivate this feature.
4.3. Adjusting Display Settings
Common adjustable settings include:
- Brightness: Adjusts the overall luminance of the screen.
- Contrast: Adjusts the difference between light and dark areas of the image.
- Color Temperature: Modifies the color balance (e.g., warm, cool, user-defined).
- Input Select: Manually switch between VGA and HDMI inputs.
5. Maintenance
5.1. Cleaning the Monitor
To clean the monitor, first unplug it from the power outlet. Use a soft, lint-free cloth lightly dampened with water or a mild, non-abrasive screen cleaner. Do not spray liquid directly onto the screen or into any openings.
5.2. Storage
When storing the monitor for an extended period, ensure it is powered off and unplugged. Store it in a cool, dry place, ideally in its original packaging to protect it from dust and physical damage.
6. Troubleshooting
| Problem | Possible Cause | Solution |
|---|---|---|
| No image on screen | Power cable not connected; Video cable not connected; Monitor is off. | Check power and video cable connections. Press the Power button to turn on the monitor. |
| Image is blurry or distorted | Incorrect resolution setting; Loose video cable connection. | Set display resolution to 1280x1024. Ensure video cable is securely connected. Use the OSD Auto-Adjust function. |
| Colors are incorrect | Incorrect color settings in OSD. | Adjust color settings in the OSD menu. Reset to factory defaults if necessary. |
| OSD menu is locked | OSD Power Lock feature is active. | Refer to the full user manual for instructions on how to unlock the OSD menu. |
7. Product Specifications
- Model: VA703b
- Device Type: LCD Monitor
- Screen Size: 17 Inches
- Native Resolution: 1280x1024 pixels (SXGA)
- Aspect Ratio: 4:3
- Response Time: 8ms
- Brightness: 280 nits (typical)
- Contrast Ratio: 600:1 (typical)
- Viewing Angle: 178 degrees (if applicable, based on video review)
- Dimensions (WxDxH): 14.9" x 8.3" x 15.7"
- Item Weight: 9.0 lbs
- Color: Black
- Input Ports: VGA, HDMI
- Security: Kensington Security Port
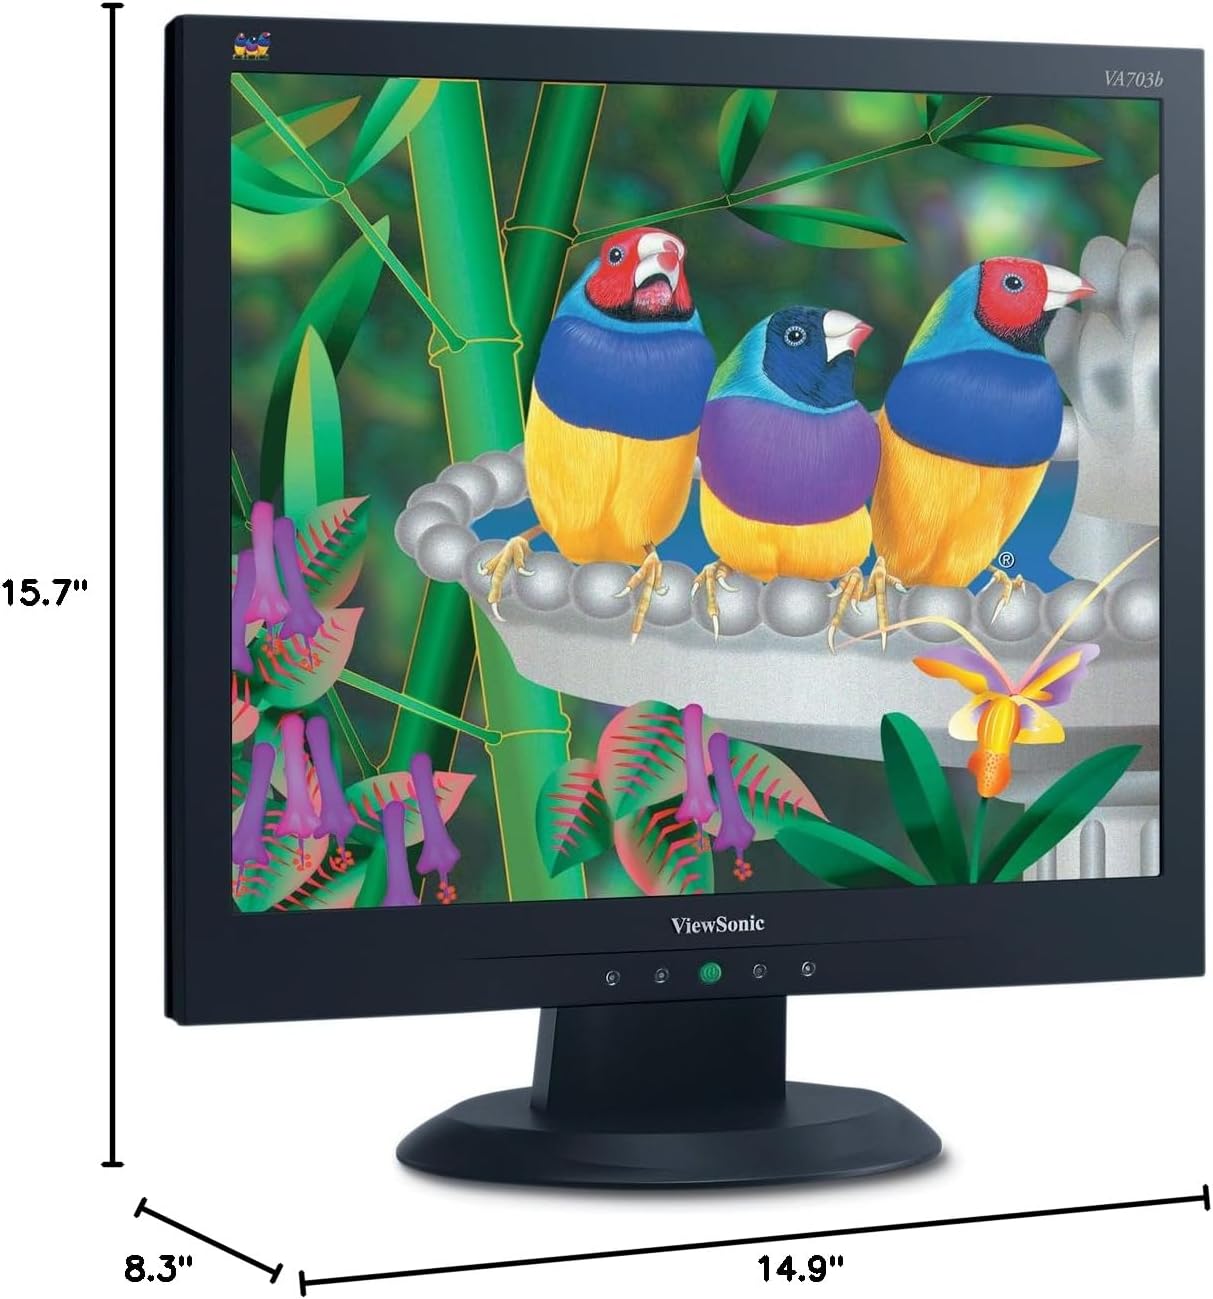
Figure 7.1: Dimensions of the ViewSonic VA703b monitor.
8. Warranty & Support
For warranty information and technical support, please refer to the warranty card included in your product packaging or visit the official ViewSonic website. Keep your purchase receipt as proof of purchase for warranty claims.
For further assistance, you may contact ViewSonic customer support through their official channels. Details can typically be found on the manufacturer's website or in the provided documentation.


