1. Introduction
Thank you for choosing the JVC KV-CR100 Cradle Unit. This unit is designed to securely hold and connect the JVC KD-AV7000 detachable monitor, enhancing its functionality and integration within your vehicle. This manual provides essential information for proper setup, operation, and maintenance of your KV-CR100 unit.
2. Safety Information
Please read all safety instructions carefully before using the KV-CR100 Cradle Unit. Failure to follow these instructions may result in damage to the unit, the KD-AV7000 monitor, or personal injury.
- Installation: Ensure the unit is installed securely in a stable location to prevent movement or detachment during vehicle operation. Consult a professional for installation if you are unsure.
- Power: Connect the unit to the specified power source as indicated in the KD-AV7000 manual. Incorrect power connections can cause damage.
- Environment: Avoid exposing the unit to extreme temperatures, direct sunlight, moisture, or dust.
- Cleaning: Use a soft, dry cloth for cleaning. Do not use liquid or aerosol cleaners.
- Disassembly: Do not attempt to disassemble or modify the unit. Refer all servicing to qualified personnel.
3. Package Contents
Verify that all items are present in the package:
- JVC KV-CR100 Cradle Unit (1)
- Instruction Manual (This document)
Note: The JVC KD-AV7000 detachable monitor is sold separately and is not included with the KV-CR100 Cradle Unit.
4. Setup and Installation
Proper installation of the KV-CR100 Cradle Unit is crucial for optimal performance and safety. This section outlines the general steps for connecting the cradle unit to your KD-AV7000 monitor.
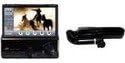
Image 1: JVC KV-CR100 Cradle Unit (right) shown alongside the KD-AV7000 Detachable Monitor (left). The cradle unit provides the necessary connection and support for the monitor.
- Mounting the Cradle Unit: Securely mount the KV-CR100 Cradle Unit in the desired location within your vehicle. Ensure it is stable and does not obstruct the driver's view or vehicle controls. Refer to your vehicle's manual for suitable mounting points.
- Connecting Power and Signal Cables: Connect the necessary power and signal cables from your vehicle's audio system to the KV-CR100 Cradle Unit. Ensure all connections are firm and correctly oriented. Refer to the KD-AV7000 monitor's manual for specific wiring diagrams.
- Attaching the KD-AV7000 Monitor: Carefully align the KD-AV7000 detachable monitor with the connection port on the KV-CR100 Cradle Unit. Gently push the monitor into place until it clicks securely. Ensure the monitor is firmly seated and does not wobble.
- Testing the Connection: Turn on your vehicle's ignition and the KD-AV7000 monitor. Verify that the monitor powers on and functions correctly when docked in the KV-CR100 Cradle Unit.
5. Operating Instructions
The KV-CR100 Cradle Unit primarily serves as a docking station for the KD-AV7000 monitor. Operation is straightforward once the unit is installed.
- Docking the Monitor: To dock the KD-AV7000 monitor, align its connector with the cradle's port and gently push until it locks into place. A secure connection is indicated by a firm fit.
- Undocking the Monitor: To remove the KD-AV7000 monitor, locate the release mechanism (if present on the monitor or cradle) and activate it while gently pulling the monitor away from the cradle. Avoid forceful removal to prevent damage.
- Power On/Off: The cradle unit facilitates power and signal transfer. The monitor's power state is typically controlled by the KD-AV7000 unit itself or your vehicle's ignition.
6. Maintenance
Regular maintenance ensures the longevity and optimal performance of your KV-CR100 Cradle Unit.
- Cleaning: Use a soft, dry, lint-free cloth to wipe the exterior of the cradle unit. Do not use abrasive cleaners, solvents, or chemical sprays, as these can damage the finish or internal components.
- Connector Care: Periodically inspect the electrical connectors on both the cradle unit and the KD-AV7000 monitor for dust or debris. If necessary, gently clean with a dry, soft brush or compressed air. Do not touch the metal contacts with your fingers.
- Storage: If the unit is to be stored for an extended period, ensure it is kept in a cool, dry place, away from direct sunlight and extreme temperatures.
7. Troubleshooting
If you encounter issues with your KV-CR100 Cradle Unit, refer to the following common problems and solutions:
- Monitor does not power on when docked:
- Ensure the KD-AV7000 monitor is correctly docked and securely connected to the cradle.
- Check all power connections to the cradle unit and the main audio system.
- Verify that your vehicle's ignition is on, if applicable.
- Consult the KD-AV7000 monitor's manual for its specific power requirements and troubleshooting.
- Monitor connection is intermittent or unstable:
- Ensure the monitor is fully seated and locked into the cradle.
- Inspect the connectors on both the cradle and the monitor for any visible damage or debris.
- Check for any loose wiring or connections behind the cradle unit.
- Physical damage to the cradle unit:
- If the unit has sustained physical damage, discontinue use and contact JVC customer support or a qualified service center for assistance.
If the problem persists after attempting these solutions, please contact JVC customer support.
8. Specifications
| Model Number | KV-CR100 |
| Manufacturer | JVC |
| Product Dimensions | 33.02 x 27.94 x 17.78 cm |
| Item Weight | 1.41 kg (3.1 pounds) |
| Compatibility | JVC KD-AV7000 Detachable Monitor |
| ASIN | B000FVUJFA |
9. Warranty and Support
For warranty information, please refer to the documentation provided with your original purchase or contact your retailer. JVC provides customer support for its products.
For further assistance or to inquire about service, please visit the official JVC support website or contact their customer service department. You can typically find support contact information on the JVC global website: JVC Global Support


