1. Introduction
This manual provides essential information for the safe and effective use of the Mile Marker 15002-01 Single Black 4 Prong Axel Spindle Nut Socket Tool. This tool is designed for the installation and removal of front spindle axle nuts on various compatible vehicles. Please read these instructions thoroughly before use to ensure proper operation and to prevent damage to the tool or vehicle.
2. Product Features
- High-Strength Steel Construction: Ensures durability and reliability during use.
- Sleek Black Finish: Provides a professional look and added protection against corrosion.
- 4-Prong Design: Ensures a secure fit and efficient operation when installing or removing axle spindle nuts.
- 1/2" Socket Drive: Compatible with standard 1/2" socket drives, making it easy to use with a variety of tools.
- Versatile Application: Suitable for use with various vehicles, including full-size Chevrolet Blazer, GMC Jimmy, Chevrolet/GMC 1/2 Ton and 3/4 Ton Pickups, and Dodge 1/2 Ton Pickups from specific model years.
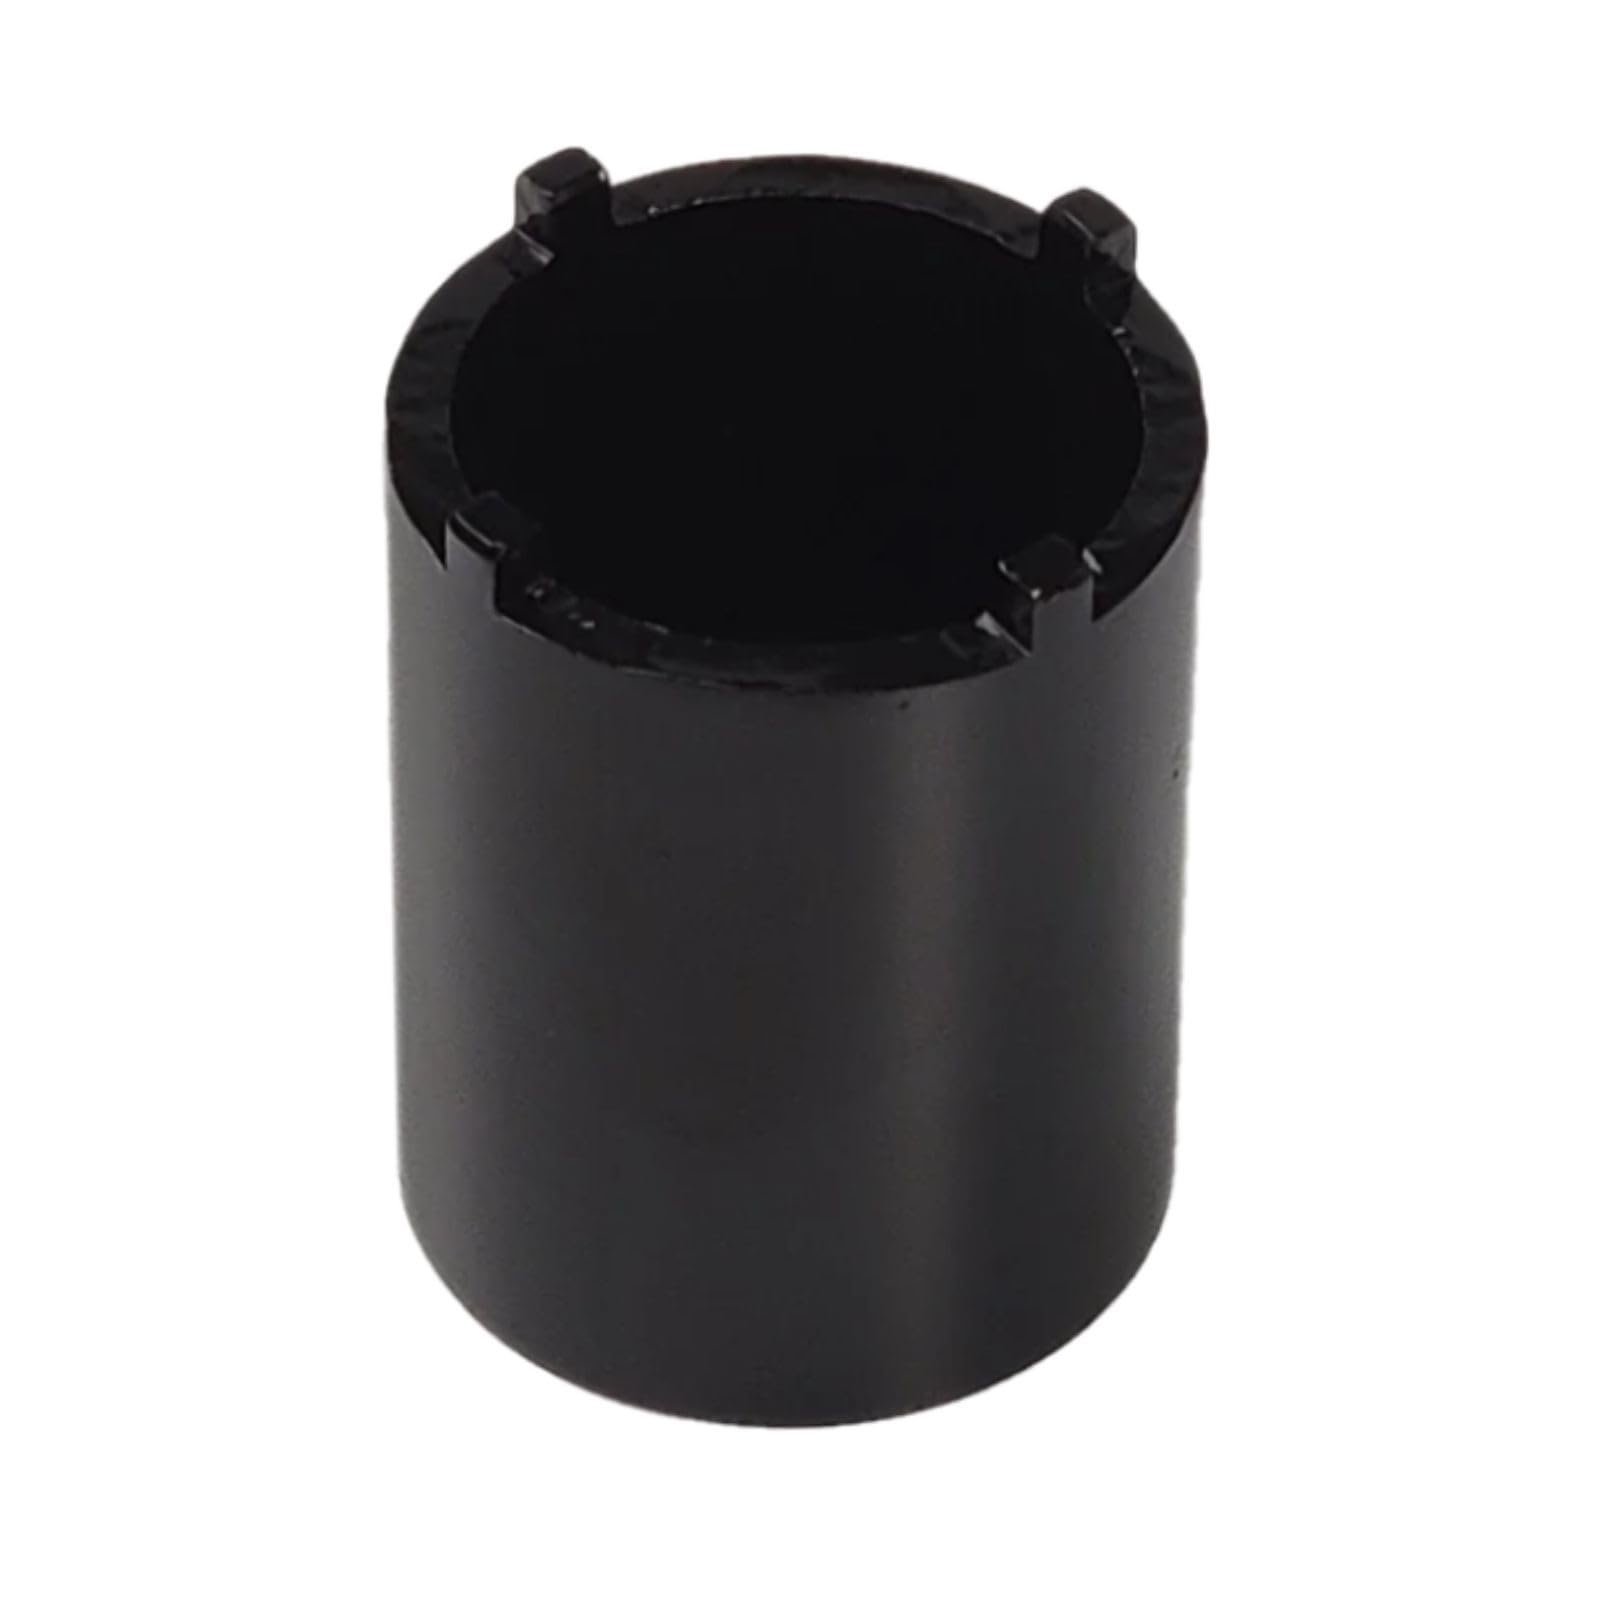
Figure 1: The Mile Marker 15002-01 Spindle Nut Socket Tool, showcasing its robust design.
3. Vehicle Compatibility
This spindle nut socket is designed for a range of vehicles. Please verify your vehicle's specifications before use.
- Full-size Chevrolet Blazer (specific model years)
- GMC Jimmy (specific model years)
- Chevrolet/GMC 1/2 Ton and 3/4 Ton Pickups (specific model years)
- Dodge 1/2 Ton Pickups (specific model years)

Figure 2: Detailed chart illustrating vehicle year, model, and prong count compatibility for various spindle nut sockets, including the 4-prong design.
4. Safety Information
WARNING: Always wear appropriate personal protective equipment (PPE), including safety glasses and gloves, when working with automotive tools. Ensure the vehicle is securely supported on jack stands before beginning any work. Failure to follow safety precautions may result in serious injury or property damage.
- Read and understand all instructions before using the tool.
- Use the correct tool for the job. Do not force the socket onto an incompatible nut.
- Keep work area clean and well-lit.
- Keep children and bystanders away while operating the tool.
- Store the tool in a dry, secure place when not in use.
5. Setup
The Mile Marker 15002-01 spindle nut socket is designed for use with a standard 1/2" drive tool. This includes torque wrenches, ratchets, or breaker bars.
- Ensure the spindle nut socket is clean and free from debris.
- Select a compatible 1/2" drive tool.
- Insert the 1/2" drive tool securely into the square opening at the base of the spindle nut socket.

Figure 3: The 1/2 inch square drive opening on the spindle nut socket, indicating compatibility with standard drive tools.
6. Operating Instructions: Spindle Nut Removal and Installation
Follow these steps for the proper removal and installation of spindle nuts using the Mile Marker 15002-01 tool.
- Safely lift and support the vehicle using appropriate jack stands. Remove the wheel and tire assembly.
- Locate the spindle nut on the axle. Ensure the 4-prong design of the socket aligns correctly with the spindle nut.
- Attach the Mile Marker 15002-01 spindle nut socket to your 1/2" drive tool.
- Carefully place the socket over the spindle nut, ensuring all four prongs engage firmly with the nut's slots.
- For removal, turn the drive tool counter-clockwise to loosen the spindle nut. For installation, turn clockwise to tighten. Refer to your vehicle's service manual for specific torque specifications.
- Once the nut is removed or tightened to specification, carefully remove the socket and drive tool.
- Reassemble the wheel and tire assembly, and lower the vehicle safely.

Figure 4: The 4-prong spindle nut socket engaged with an axle nut, ready for operation.

Figure 5: A close-up view demonstrating the precise fit of the spindle nut socket on the axle nut.
Instructional Videos
Video 1: Demonstration of a spindle nut socket tool in use for removal of a spindle nut. This video provides a visual guide to the process.
Video 2: A detailed overview of a 5-pack spindle nut socket tool kit, including a demonstration of its application for axle nut removal. This video highlights the ease of use for various tasks.
7. Maintenance
Proper maintenance will extend the life of your Mile Marker 15002-01 spindle nut socket.
- Cleaning: After each use, wipe the socket clean with a dry cloth to remove any grease, dirt, or debris.
- Storage: Store the tool in a dry environment to prevent rust and corrosion. Keep it away from excessive moisture and extreme temperatures.
- Inspection: Periodically inspect the socket for any signs of wear, cracks, or damage. Discontinue use if any damage is found and replace the tool.
8. Troubleshooting
If you encounter issues while using the spindle nut socket, consider the following:
- Socket does not fit: Ensure you are using the correct size and prong configuration for your specific vehicle's spindle nut. Refer to the compatibility section.
- Nut is stuck/difficult to turn: Apply penetrating oil to the nut and allow it to soak. Ensure you are using adequate leverage with your drive tool. Do not apply excessive force that could damage the nut or tool.
- Tool slips: Verify that the socket prongs are fully engaged with the spindle nut slots. The nut or socket may be worn if slipping persists.
9. Specifications
| Attribute | Value |
|---|---|
| Manufacturer | Mile Marker |
| Brand | MILE MARKER |
| Model | 15002-01 |
| Item Weight | 0.01 ounces |
| Product Dimensions | 4.2 x 3.5 x 3.2 inches |
| Item Model Number | 15002-01 |
| Exterior Finish | Black |
| Manufacturer Part Number | 15002-01 |
| OEM Part Number | 15002-01 |
| Socket Drive Size | 1/2 inches |
| Socket Material | Steel |
| Spindle Nut Type | 4-pronged |
10. Warranty and Support
Mile Marker products are manufactured to high-quality standards. For specific warranty information or technical support, please refer to the official Mile Marker website or contact their customer service directly. Keep your purchase receipt as proof of purchase.
For further assistance, visit the MILE MARKER Store on Amazon.


