1. Introduction
This manual provides comprehensive instructions for the installation, operation, and maintenance of your Linksys WRT300N Wireless-N Broadband Router. The WRT300N integrates a Wireless Access Point, a 4-port 10/100 Switch, and a Router function, enabling wireless connectivity, wired device networking, and shared high-speed internet access. Utilizing Wireless-N technology, it offers enhanced speed and range, compatible with Wireless-G and -B equipment. This technology multiplies the effective data rate by overlaying signals from multiple radios, improving range and reducing 'dead spots' in wireless coverage.
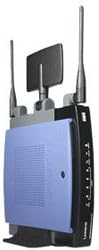
Figure 1: Front view of the Linksys WRT300N Wireless-N Broadband Router, showcasing its compact design with two external antennas and indicator lights.
2. Setup Guide
Follow these steps to set up your Linksys WRT300N Wireless-N Broadband Router.
2.1 Package Contents
- Linksys WRT300N Wireless-N Broadband Router
- Power Adapter
- Ethernet Cable
- Setup CD-ROM (if included)
- Quick Installation Guide
2.2 Hardware Installation
- Positioning the Router: Place the router in a central location to maximize wireless coverage. Avoid placing it near large metal objects, concrete walls, or other electronic devices that may cause interference.
- Connect the Antennas: Securely attach the two external antennas to the connectors on the back of the router.
- Connect to the Internet:
- Connect one end of an Ethernet cable to your cable or DSL modem's Ethernet port.
- Connect the other end of this Ethernet cable to the Internet (WAN) port on the back of the WRT300N router.
- Connect to Your Computer:
- Connect one end of the provided Ethernet cable to one of the numbered Ethernet (LAN) ports on the back of the WRT300N router.
- Connect the other end of this Ethernet cable to the Ethernet port on your computer.
- Power On: Connect the power adapter to the router's power port and then plug it into an electrical outlet. The power LED on the front of the router should illuminate.
2.3 Software Configuration (Web-Based Setup)
- Access the Setup Page: Open a web browser (e.g., Chrome, Firefox, Edge) on the computer connected to the router. In the address bar, type http://192.168.1.1 and press Enter.
- Login: A login prompt will appear.
- Username: admin
- Password: admin (default)
It is highly recommended to change the default password for security reasons after initial setup.
- Run Setup Wizard: The router's web-based setup utility will appear. Follow the on-screen instructions to configure your Internet connection type (e.g., DHCP, Static IP, PPPoE) and wireless network settings (SSID, security mode, password).
- Save Settings: After configuring, save your settings. The router may restart.
3. Operating Instructions
3.1 Connecting to the Wireless Network
- On your wireless device (laptop, smartphone, etc.), scan for available wireless networks.
- Select the Network Name (SSID) you configured during setup.
- Enter the Wireless Security Key (password) when prompted.
- Your device should now be connected to the wireless network.
3.2 Understanding LED Indicators
| LED Indicator | Status | Description |
|---|---|---|
| Power | Solid Green | Router is powered on and functioning correctly. |
| Internet | Solid Green | Successful connection to the Internet. |
| Internet | Flashing Green | Activity on the Internet connection. |
| Wireless | Solid Green | Wireless function is enabled. |
| Wireless | Flashing Green | Wireless data transmission. |
| LAN (1-4) | Solid Green | A device is connected to the corresponding LAN port. |
| LAN (1-4) | Flashing Green | Activity on the corresponding LAN port. |
4. Maintenance
- Firmware Updates: Periodically check the Linksys support website for firmware updates. Updating firmware can improve performance, add features, and fix bugs. Follow the instructions provided with the firmware update carefully.
- Regular Reboot: Rebooting the router every few weeks can help clear its memory and resolve minor performance issues. Simply unplug the power adapter for 10 seconds and then plug it back in.
- Security: Regularly change your router's administrative password and wireless network password. Use strong, unique passwords.
- Physical Cleaning: Keep the router free from dust. Use a soft, dry cloth to clean the exterior. Ensure ventilation openings are not blocked.
5. Troubleshooting
5.1 No Internet Connection
- Check Cables: Ensure all Ethernet cables are securely connected to the router and modem.
- Reboot Devices: Power cycle your modem, then the router, and then your computer. Wait for each device to fully boot before powering on the next.
- Check Internet LED: If the Internet LED on the router is off or red, there might be an issue with your modem or ISP connection. Contact your Internet Service Provider.
- Router Configuration: Access the router's web-based setup page (http://192.168.1.1) and verify your Internet connection settings.
5.2 Cannot Connect to Wireless Network
- Check Wireless LED: Ensure the Wireless LED on the router is solid green or flashing. If not, enable wireless in the router's settings.
- Verify SSID and Password: Confirm you are selecting the correct wireless network name (SSID) and entering the correct security key (password). Passwords are case-sensitive.
- Signal Strength: Move closer to the router to check if signal strength is an issue.
- Interference: Other wireless devices or appliances (e.g., cordless phones, microwaves) can cause interference. Try changing the wireless channel in the router's settings.
5.3 Slow Wireless Speed
- Wireless-N Compatibility: Ensure your wireless client devices support Wireless-N for optimal speeds.
- Interference: As mentioned above, interference can degrade performance. Adjusting the wireless channel may help.
- Router Placement: Optimize router placement for better signal coverage.
- Firmware: Ensure your router has the latest firmware installed.
5.4 Factory Reset
If you encounter persistent issues, a factory reset can restore the router to its default settings.
- With the router powered on, locate the Reset button on the back panel (usually a small, recessed button).
- Use a paperclip or a similar pointed object to press and hold the Reset button for approximately 10-15 seconds.
- Release the button. The router will reboot with factory default settings. You will need to reconfigure it from scratch.
6. Specifications
| Feature | Detail |
|---|---|
| Model Name | Linksys WRT300N |
| Brand | Linksys |
| Wireless Standard | 802.11n (Draft), compatible with 802.11g/b |
| Frequency Band | Dual-Band (operates primarily on 2.4 GHz for N/G/B compatibility) |
| LAN Ports | 4 x 10/100 Mbps Ethernet Ports |
| WAN Port | 1 x 10/100 Mbps Ethernet Port (for Internet connection) |
| Security Features | 256-bit Encryption, SPI Firewall, VPN Pass-through |
| Dimensions (L x W x H) | 6.93 x 7.4 x 1.57 inches |
| Item Weight | 1.16 pounds |
| Operating System | Cisco IOS (router firmware) |
| Special Feature | Access Point Mode |
7. Support and Warranty
7.1 Technical Support
For further assistance, please visit the official Linksys support website. You can find FAQs, updated drivers, firmware, and contact information for technical support.
7.2 Warranty Information
Warranty terms and conditions for the Linksys WRT300N Wireless-N Broadband Router are typically provided with the product packaging or available on the Linksys website. Please refer to these resources for detailed information regarding your product's warranty coverage.