Introduction
The HP Photosmart M525 Digital Camera is engineered for individuals seeking a compact, user-friendly camera capable of producing high-quality photographs suitable for printing, enlarging, or sharing. This manual provides comprehensive instructions for setting up, operating, maintaining, and troubleshooting your HP Photosmart M525 camera.
Key Features
- 6 MP Resolution: Capture impressive photos at 6 megapixels, ideal for beautiful 4 x 6-inch prints and enlargements.
- 1.7-inch Image Display: View and edit photos directly on a bright, clear display.
- 21x Total Zoom: Features 3x optical zoom and 7x digital zoom for versatile framing.
- In-Camera Editing: Change photos to black and white or sepia, add borders, or apply special effects without a PC.
- Video Recording: Record video clips with sound by simply pressing the dedicated video button.
- Automatic Red-Eye Removal: Eliminate red-eye directly in the camera, no computer required.
Product Overview
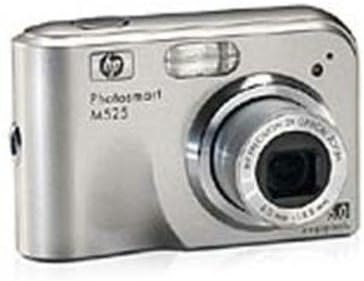
Figure 1: Front view of the HP Photosmart M525 Digital Camera, showcasing its silver body, lens, and flash.
The HP Photosmart M525 is a sleek, compact digital camera featuring a durable silver casing. Its design emphasizes ease of use, with clearly marked buttons and a prominent lens. The integrated flash ensures optimal lighting in various conditions, while the bright LCD screen allows for immediate review of captured images and videos. The camera's intuitive layout makes it accessible for photographers of all skill levels.
Setup
1. Battery Installation
Locate the battery compartment on the bottom of the camera. Open the latch and insert the required batteries (typically AA, refer to the compartment for specific type and quantity), ensuring correct polarity as indicated by the (+) and (-) symbols inside the compartment. Close the compartment securely until it clicks into place.
2. Memory Card Insertion
Open the memory card slot cover, usually found on the side or bottom of the camera. Insert a compatible SD (Secure Digital) card into the slot with the metal contacts facing the correct direction (refer to the diagram near the slot). Push the card gently until it clicks and is fully seated. Close the cover firmly.
3. Initial Power On
Press and hold the power button, typically located on the top of the camera, until the camera display illuminates. The camera may prompt you to set the date, time, and language during the first power-on. Use the navigation buttons to make your selections and confirm them.
Operating the Camera
Taking Photos
- Power On: Press the power button to turn on the camera.
- Select Mode: Use the mode dial or buttons to select your desired shooting mode (e.g., Auto, Program, Scene modes).
- Frame Your Shot: Use the LCD screen to compose your image. Adjust your position or zoom to achieve the desired framing.
- Focus: Press the shutter button halfway down. The camera will automatically focus, and an indicator (e.g., a green box) will appear when focus is achieved.
- Capture: Press the shutter button fully down to take the picture. Hold the camera steady until the image is captured.
Recording Videos
The HP Photosmart M525 is equipped to record video clips with accompanying sound. To initiate video recording, locate and press the dedicated video button (often marked with a camera icon). Press the button again to cease recording. Ensure that your memory card has sufficient available space for video storage, as video files consume more memory than still images.
Zoom Function
The camera features a 3x optical zoom and a 7x digital zoom, providing a total of 21x zoom capability. Utilize the zoom lever or buttons, typically positioned around the shutter button, to adjust the magnification. Optical zoom provides superior image quality as it uses the lens to magnify the subject, while digital zoom digitally enlarges the image, which may result in some loss of detail.
Image Playback and Editing
To review your captured photos and videos, press the playback button (often marked with a play icon). Use the navigation buttons to scroll through your media. The HP Photosmart M525 offers several in-camera editing features, including the ability to convert photos to black and white or sepia tones, add decorative borders, or apply various special effects. Additionally, the camera includes an automatic red-eye removal function that can be applied directly to images without the need for a computer.
Maintenance
Cleaning the Camera
- Camera Body: Use a soft, dry, lint-free cloth to gently wipe the camera body. For stubborn smudges, slightly dampen the cloth with water.
- Lens: Use a specialized lens cleaning brush to remove dust, then gently wipe with a microfiber lens cleaning cloth. For smudges, apply a small amount of lens cleaning solution to the cloth, not directly to the lens. Avoid touching the lens surface with your fingers.
- LCD Screen: Clean the LCD screen with a soft, dry cloth. Avoid using abrasive materials or harsh chemicals.
Battery Care
To prolong battery life and prevent leakage, remove batteries from the camera if it will not be used for an extended period. Store batteries in a cool, dry place. Always use the battery types recommended by the manufacturer to ensure optimal performance and safety.
Storage
When not in use, store the camera in a dry, dust-free environment, away from direct sunlight, extreme temperatures, and high humidity. Using a padded camera case is recommended to protect the camera from physical damage during storage and transport.
Troubleshooting
| Problem | Possible Cause | Solution |
|---|---|---|
| Camera does not power on. | Dead or incorrectly inserted batteries. | Replace batteries with fresh ones or ensure correct polarity. |
| Pictures are blurry. | Camera shake, out of focus, or dirty lens. | Hold camera steady, allow camera to focus by pressing shutter halfway, clean lens. |
| Memory card error. | Card not inserted correctly, incompatible card, or full card. | Reinsert card, use a compatible SD card, delete unnecessary files, or use a new card. |
| Flash not firing. | Flash mode is off, low battery, or subject is too far. | Check flash settings (e.g., Auto, Fill-in Flash), replace batteries, or move closer to the subject. |
| Cannot record video. | Insufficient memory card space or incorrect mode. | Delete files to free up space, or ensure camera is in video recording mode. |
Specifications
- Product Dimensions: 3.74 x 2.44 x 1.22 inches
- Item Weight: 6.7 ounces
- Manufacturer: Hewlett Packard
- Compatible Mountings: Micro Four Thirds
- Aspect Ratio: 4:3
- Photo Sensor Technology: CCD
- Supported File Format: JPEG
- Image Stabilization: Digital, Optical
- Maximum Focal Length: 114 Millimeters
- Optical Zoom: 3 x
- Expanded ISO Minimum: 100
- Metering Description: Center Weighted, Evaluative, Spot
Note: Specifications are subject to change without notice.
Warranty and Support
For detailed warranty information regarding your HP Photosmart M525 Digital Camera, please refer to the warranty card or documentation included in the original product packaging. Keep your proof of purchase, such as a receipt, as it will be required for any warranty claims.
For technical support, troubleshooting assistance, or to access drivers and software updates, please visit the official Hewlett Packard support website. Online resources often include FAQs, user forums, and contact options for customer service.
Online Support: www.hp.com/support
Manufacturer: Hewlett Packard


