Introduction
Thank you for choosing the Kidde AccessPoint 001267 KeySafe Pro. This robust pushbutton key lock box is designed to provide secure and convenient access to keys and access cards for authorized users. It is ideal for various applications, including residential, commercial, and lockout/tagout scenarios. Please read this manual thoroughly before installation and operation to ensure proper use and maximum security.
Product Overview
The Kidde AccessPoint 001267 KeySafe Pro is a durable, wall-mountable key storage solution featuring a pushbutton combination lock. Its extra-large capacity accommodates multiple keys, including those with large handles, and access cards. The combination is user-settable and can be changed as often as desired, offering over 1,000 possible combinations for enhanced security.

Image 1: Front view of the Kidde AccessPoint 001267 KeySafe Pro, showing the pushbutton keypad and the "OPEN" lever.
Setup and Installation
The KeySafe Pro is designed for secure wall mounting. Choose a discreet, well-lit location for installation. Mounting hardware is not included and must be selected based on your wall material to ensure maximum security.
Mounting Steps:
- Select Location: Choose a sturdy wall or flat surface. Consider both accessibility for authorized users and concealment from unauthorized individuals.
- Mark Drilling Points: Hold the KeySafe Pro against the desired mounting surface and mark the locations for the mounting screws.
- Drill Pilot Holes: Drill pilot holes appropriate for your chosen mounting hardware and wall material.
- Secure the KeySafe: Attach the KeySafe Pro to the wall using appropriate screws and anchors (not included). Ensure it is firmly secured and does not wobble.
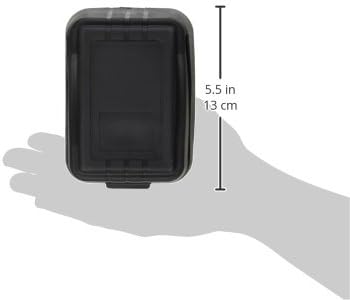
Image 2: Side view of the Kidde AccessPoint 001267 KeySafe Pro, illustrating its dimensions (5.5 inches / 13 cm in height). This view helps in planning installation space.
Operating Instructions
The KeySafe Pro uses a pushbutton combination lock. The combination can be any sequence of the available numbers, and the order of entry does not matter. Over 1,000 combinations are possible.
Setting Your Combination:
- Open the KeySafe: The KeySafe comes with no combination set, allowing it to be opened initially.
- Locate the Tool: Inside the lid, you will find a small plastic card tool with a flat-screwdriver tab.
- Engage Numbers: Use the screwdriver tab to turn each slot corresponding to the numbers you wish to include in your combination. Turn them 180 degrees from left to right. An arrow icon next to each slot indicates its status: pointing left means "disengaged," and pointing right means "engaged" (part of the combination).
- Store the Tool: Place the plastic card tool back in its designated spot inside the lid for future use.
- Test the Combination:
- Press the "RESET" button.
- Enter your chosen combination by pressing the engaged number buttons.
- Press the "OPEN" lever down to open the KeySafe.
- Close the KeySafe. Note that every time you open or close the latch, the mechanism automatically resets, requiring you to re-enter the combination to open it again.
Important Note: The order in which you press the combination buttons does not matter. Only the selected numbers need to be pressed.
Changing Your Combination:
To change the combination, open the KeySafe using the current combination. Then, follow the "Setting Your Combination" steps, disengaging any numbers you no longer wish to use and engaging new ones.
Opening the KeySafe:
- Press the "RESET" button.
- Press the buttons corresponding to your set combination.
- Push the "OPEN" lever down. The door will unlatch.
Closing the KeySafe:
- Ensure the door is properly aligned.
- Close the door firmly until it latches. The lock mechanism automatically resets upon closing.
Note on Key Ring Size: If using the internal keyring holder, ensure your key ring is small enough not to obstruct the lid's closing mechanism. An oversized key ring can prevent the KeySafe from closing or opening properly.
Maintenance
The Kidde AccessPoint 001267 KeySafe Pro is designed for durability and requires minimal maintenance. The included rubber cover helps protect the unit from environmental elements like rain and dust, extending its lifespan.
- Cleaning: Periodically wipe the exterior with a soft, damp cloth to remove dirt and grime. Avoid abrasive cleaners or solvents.
- Mechanism Check: Occasionally check the pushbutton mechanism for smooth operation. If buttons become stiff, a small amount of graphite lubricant can be applied, but avoid oil-based lubricants.
- Cover Inspection: Inspect the rubber weather cover for any tears or damage and replace if necessary to maintain protection.
Troubleshooting
| Problem | Possible Cause | Solution |
|---|---|---|
| KeySafe does not open with the correct combination. |
|
|
| Buttons feel stiff or unresponsive. |
|
|
| Door does not close properly. |
|
|
Specifications
- Brand: Kidde
- Model Number: 001267
- Product Dimensions: 2.48"D x 3.46"W x 4.84"H
- Lock Type: Pushbutton Combination Lock
- Color: Black
- Material: Metal
- Mounting Type: Wall Mount
- Item Weight: 3.5 Pounds
- Water Resistance Level: Not Water Resistant (Note: Rubber cover provides some weather protection)
- Combinations Available: Over 1,000
- Included Components: KeySafe Unit, Plastic Combination Setting Tool
Warranty and Support
The Kidde AccessPoint 001267 KeySafe Pro comes with a 1 Year Limited Warranty. For warranty claims, technical assistance, or further support, please contact Kidde Customer Service. Refer to the official Kidde website or product packaging for the most current contact information.
Disclaimer: This product is intended for convenience and to deter casual theft. It is not designed to prevent determined theft. Install in a discreet, well-hidden location for optimal security.


