

1. Product Overview
The Fel-Pro TCS 45971 Timing Cover Gasket Set is engineered to provide a reliable and durable seal for your vehicle's timing cover. This set includes application-specific materials designed to meet or exceed original equipment specifications, ensuring optimal performance and preventing leaks.
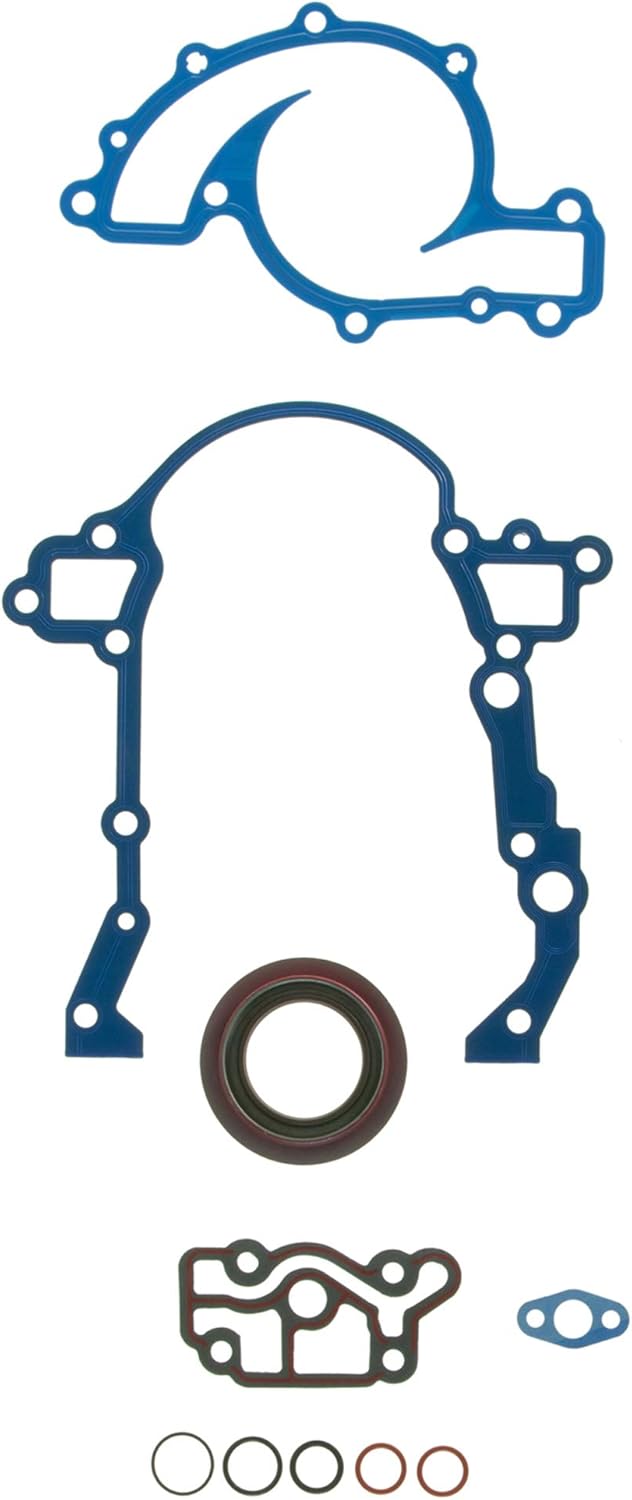
Image 1.1: Complete Fel-Pro TCS 45971 Timing Cover Gasket Set, showing various gaskets and seals.

Image 1.2: Detail of a Fel-Pro gasket, highlighting material quality.

Image 1.3: Gasket manufacturing process, demonstrating precision engineering.
Key Features:
- Meets or exceeds all original equipment specifications.
- Application-specific design for unsurpassed quality and a trusted seal.
- Validated for fit, form, and function.
- Engineered for the demanding sealing repair environment.
- Each gasket is manufactured to exacting standards using proprietary design, engineering, and manufacturing processes.
What's in the Box:
- Timing Cover Set (specific components may vary by application, refer to packaging for exact contents).
2. Installation Instructions (Setup)
Proper installation is crucial for the performance and longevity of your Fel-Pro timing cover gasket set. Always refer to your vehicle's specific service manual for detailed, step-by-step instructions, torque specifications, and any special tools required. The following are general guidelines.

Image 2.1: Mechanic performing engine work.

Image 2.2: Tightening a bolt during engine assembly.

Image 2.3: Illustrative diagram of timing cover gasket placement.
- Preparation:
- Ensure the engine is cool and disconnected from the battery.
- Drain engine oil and coolant as necessary, depending on the vehicle's design.
- Remove all components obstructing access to the timing cover (e.g., belts, pulleys, accessories).
- Timing Cover Removal:
- Carefully remove the timing cover bolts. Note their positions if they vary in length.
- Gently pry the timing cover away from the engine block. Avoid damaging mating surfaces.
- Surface Cleaning:
- Thoroughly clean all mating surfaces on both the engine block and the timing cover. Remove all traces of old gasket material, sealant, oil, and debris.
- Use a plastic scraper or gasket remover tool to prevent scratching aluminum surfaces.
- Ensure surfaces are completely dry and free of contaminants before proceeding.
- Gasket Placement:
- Carefully position the new Fel-Pro gaskets onto the timing cover or engine block, as specified by your vehicle's service manual.
- Apply a thin, even bead of RTV sealant in specific areas if recommended by the vehicle manufacturer (e.g., corners, oil pan rail junctions).
- Install any new seals (e.g., crankshaft seal) included in the kit, ensuring they are properly seated and lubricated.
- Timing Cover Reinstallation:
- Carefully align the timing cover with the engine block, ensuring the gaskets remain in place.
- Install all timing cover bolts by hand to prevent cross-threading.
- Tighten bolts to the manufacturer's specified torque in the correct sequence. Refer to your vehicle's service manual for these critical details.
- Reassembly:
- Reinstall all removed components (pulleys, belts, accessories).
- Refill engine oil and coolant to appropriate levels.
- Reconnect the battery.
3. Post-Installation Checks and Function (Operating)
After installing the timing cover gasket set, perform the following checks to ensure proper function and prevent potential issues.

Image 3.1: A mechanic performing a post-installation inspection.
- Initial Start-up:
- Start the engine and allow it to idle.
- Monitor for any unusual noises, vibrations, or warning lights.
- Leak Inspection:
- Visually inspect the timing cover area for any signs of oil or coolant leaks.
- Allow the engine to reach operating temperature and re-check for leaks.
- A clean cardboard sheet placed under the vehicle overnight can help detect slow leaks.
- Fluid Levels:
- After the engine has cooled, re-check engine oil and coolant levels and top up if necessary.
- Test Drive:
- Perform a short test drive to ensure all systems are functioning correctly.
- After the test drive, re-inspect for any leaks.
4. Maintenance
While the Fel-Pro timing cover gasket set itself does not require specific maintenance, adhering to your vehicle's recommended maintenance schedule is essential for the longevity of all engine components, including gaskets and seals.
- Regular Oil Changes: Follow your vehicle manufacturer's recommendations for oil change intervals and use the specified oil type. Clean oil helps prevent premature wear on seals.
- Coolant System Maintenance: Ensure your cooling system is properly maintained, with regular coolant flushes and checks for proper concentration. Overheating can stress gaskets and seals.
- Fluid Level Checks: Periodically check engine oil and coolant levels. Low fluid levels can lead to overheating or insufficient lubrication, potentially damaging seals.
- Visual Inspections: During routine maintenance, visually inspect the timing cover area for any signs of leaks or deterioration. Early detection can prevent more significant issues.
5. Troubleshooting
If you encounter issues after installing your timing cover gasket set, consider the following common troubleshooting steps. Always consult a qualified mechanic if you are unsure about any repair procedures.

Image 5.1: An oil leak on the ground, indicating a potential gasket issue.
- Oil or Coolant Leaks:
- Cause: Improper surface cleaning, incorrect gasket placement, insufficient or uneven bolt torque, damaged gasket during installation, or incorrect sealant application.
- Solution: Re-inspect the timing cover area. If a leak is identified, the timing cover may need to be removed, surfaces re-cleaned, and new gaskets installed with proper torque and sealant application. Ensure the correct gasket set was used for your specific vehicle application.
- Gasket Not Seating Properly:
- Cause: Debris on mating surfaces, warped timing cover, or incorrect gasket for the application.
- Solution: Verify mating surfaces are perfectly clean and flat. Check the timing cover for warpage. Confirm the gasket set is the correct part number for your vehicle.
- Damaged Crankshaft Seal:
- Cause: Improper installation of the front crankshaft seal, leading to leaks.
- Solution: The crankshaft seal must be installed squarely and to the correct depth. Use a seal installation tool if available. Ensure the sealing surface on the crankshaft is not damaged.
6. Specifications
| Attribute | Detail |
|---|---|
| Brand | Fel-Pro |
| Model Number | TCS 45971 |
| Manufacturer Part Number | TCS45971 |
| OEM Part Number | TCS45971 |
| UPC | 841136580130, 084113658013 |
| Item Weight | 5 ounces |
| Product Dimensions | 15 x 11 x 0.5 inches |
| Unit Count | 1.0 Count |
| Color | Multicolor |
7. Warranty and Support
For specific warranty information regarding your Fel-Pro TCS 45971 Timing Cover Gasket Set, please refer to the documentation included with your purchase or contact Fel-Pro customer service directly. Warranty terms typically cover manufacturing defects.
If you require technical assistance or have questions about the product, please visit the official Fel-Pro website or contact their customer support department. When contacting support, have your product model number (TCS 45971) and purchase details readily available.
Fel-Pro Official Website: www.felpro.com