
TIMKEN 3946
Contents
Timken 3946 Seal Instruction Manual
Model: 3946 | Brand: TIMKEN
Product Overview
The Timken 3946 Seal is an automotive replacement component designed to provide effective sealing in various applications, primarily preventing fluid leakage and protecting internal components from external contaminants. This seal is engineered for durability and reliable performance.
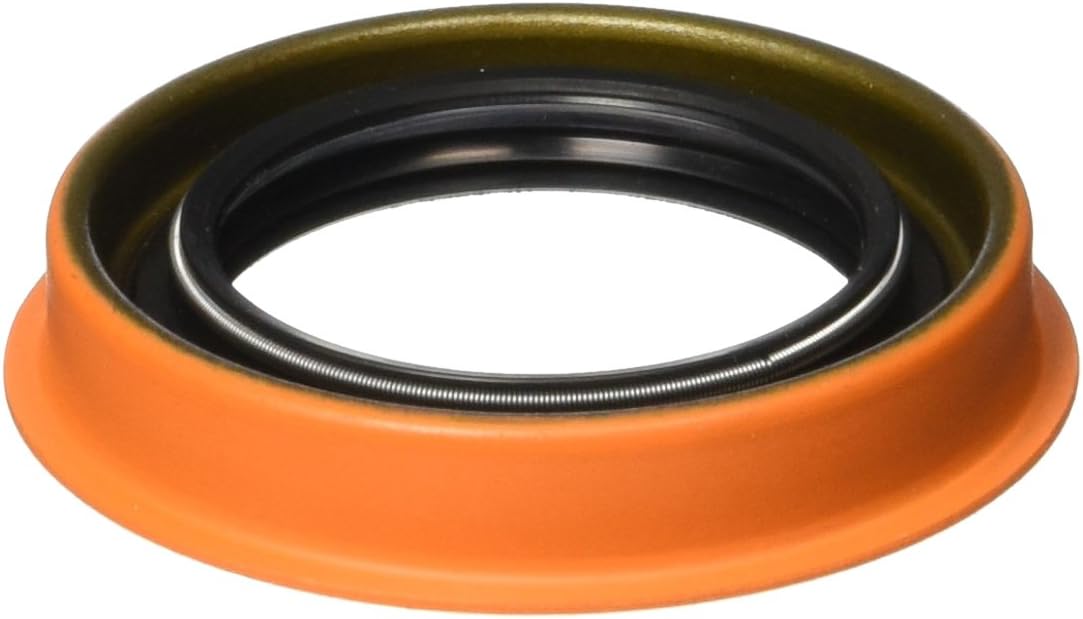
This image displays the Timken 3946 Seal, highlighting its robust construction designed for effective sealing. The seal features an orange exterior ring, a black inner rubber component, and a visible metal spring, all contributing to its ability to prevent leakage and resist contaminants.
Key Features:
- Prevents seal leakage, ensuring optimal system performance.
- Offers excellent sealing ability to maintain fluid integrity.
- Resists abrasives, corrosive moisture, and other harmful contaminants from entering the machines, extending component life.
- Provides superior service life due to high-quality materials and construction.
- Manufactured to world-class standards, ensuring reliability and consistency.
Installation and Setup
Proper installation is crucial for the Timken 3946 Seal to perform effectively and prevent premature failure. It is recommended that installation be performed by a qualified technician or individuals with appropriate mechanical experience.
General Installation Steps:
- Preparation: Ensure the mating surfaces where the seal will be installed are thoroughly cleaned and free of old gasket material, debris, rust, or burrs. A clean surface is essential for a proper seal.
- Inspection: Inspect the new Timken 3946 Seal for any visible defects or damage before installation.
- Lubrication: Apply a thin, even coat of appropriate lubricant (e.g., clean oil or grease, as specified by the vehicle/component manufacturer) to the sealing lip of the new seal. This aids in installation and prevents initial dry running.
- Seating the Seal: Carefully align the seal with its housing. Use a seal driver tool or a suitable socket that matches the outer diameter of the seal to press it squarely into place. Avoid using hammers directly on the seal without a proper driver, as this can deform or damage the seal. Ensure the seal is seated evenly and fully into its bore.
- Reassembly: Reassemble the surrounding components according to the vehicle or component manufacturer's specifications, ensuring all fasteners are torqued to the correct values.
- Post-Installation Check: After reassembly, perform a visual inspection for proper fitment. If applicable, check fluid levels and inspect for any immediate signs of leakage.
Note: Specific installation procedures may vary depending on the vehicle or component. Always refer to the vehicle's service manual for detailed instructions and torque specifications.
Operating Principles
The Timken 3946 Seal operates passively by creating a barrier between two environments, typically to contain lubricants or fluids and exclude contaminants. Once installed, the seal's design, including its flexible lip and internal spring, maintains constant contact with the rotating or reciprocating shaft, forming a tight seal. This prevents the escape of internal fluids and blocks the ingress of dirt, moisture, and other harmful external elements, thereby protecting bearings and other critical components from wear and corrosion.
Maintenance
Timken 3946 Seals are designed for long-term, maintenance-free operation once correctly installed. Regular maintenance for the seal itself is generally not required. However, it is advisable to:
- Periodic Inspection: During routine vehicle or equipment inspections, visually check the area around the seal for any signs of fluid leakage or excessive dirt accumulation.
- Address Leaks Promptly: If any leakage is observed, it indicates a potential seal failure or improper installation. The seal should be replaced immediately to prevent further damage to the system.
- Maintain Fluid Levels: Ensure that the fluid levels in the sealed component (e.g., differential, transfer case) are maintained at the manufacturer's recommended levels. Low fluid levels can lead to overheating and premature seal wear.
Troubleshooting
While the Timken 3946 Seal is a reliable component, issues can arise, often related to installation or compatibility. Here are common troubleshooting scenarios:
Common Issues and Solutions:
| Problem | Possible Cause | Solution |
|---|---|---|
| Fluid Leakage After Installation |
|
|
| Seal Does Not Fit Properly |
|
|
If troubleshooting steps do not resolve the issue, it is recommended to consult with a professional mechanic or contact Timken customer support.
Specifications
| Attribute | Detail |
|---|---|
| Manufacturer | Timken |
| Brand | TIMKEN |
| Model | Seal |
| Item Model Number | 3946 |
| Item Weight | 1.76 ounces |
| Product Dimensions | 3.7 x 3.7 x 0.8 inches |
| Exterior Finish | Machined |
| Manufacturer Part Number | 3946 |
| Date First Available | September 20, 2007 |
Warranty Information
Specific warranty details for the Timken 3946 Seal are not provided in this manual. For information regarding product warranty, including terms, conditions, and duration, please refer to the official Timken website or contact Timken customer service directly. Keep your proof of purchase for any warranty claims.
Customer Support
If you require further assistance, have questions about the Timken 3946 Seal, or need technical support, please contact Timken directly through their official channels. This may include their website, customer service phone number, or authorized distributors.
No official product videos were found for this product.
Ask a question about this manual
Ask about setup, troubleshooting, compatibility, parts, safety, or missing instructions. Manuals+ will review the question and use this page’s manual context to help answer it.