

Introduction
The Aqua-Magic Style II RV toilet is designed for permanent installation in recreational vehicles, offering a comfortable and homelike experience. This model features a full china bowl and a lightweight plastic body. The customizable residential seat is made of antimicrobial materials to inhibit mold and odor-causing bacteria.
This manual provides essential information for the proper setup, operation, and maintenance of your Aqua-Magic Style II RV toilet to ensure long-lasting performance and user satisfaction.
Product Overview
The Aqua-Magic Style II RV toilet combines versatility, functionality, and convenience for all RV types. Its design ensures a comfortable experience with a full-size residential seat.
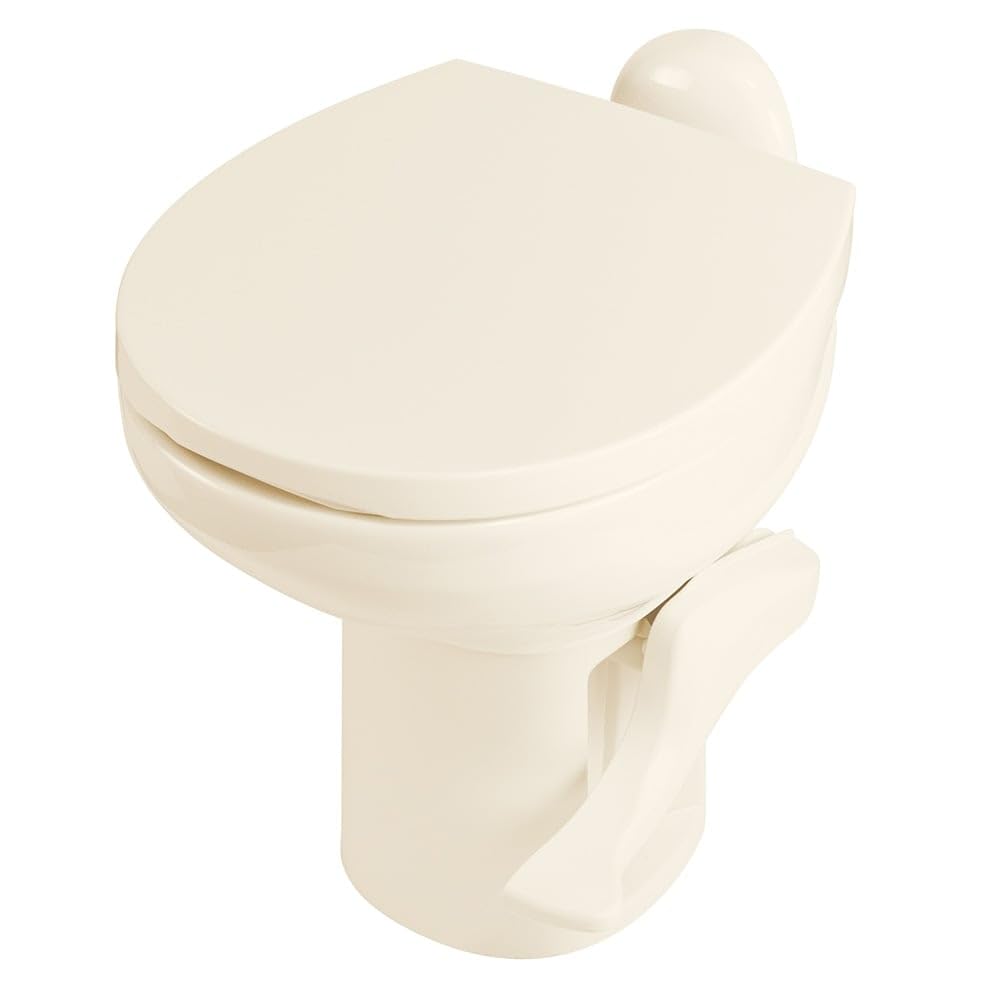
Figure 1: Thetford Aqua-Magic Style II RV Toilet (High Profile, Bone)
- Versatility: Suitable for all RV types.
- Functionality: Features a single-pedal system for adding water to the bowl and for flushing, providing 100% bowl coverage.
- Sanitary: Antimicrobial seat material helps prevent mold and odor-causing bacteria growth.
- Convenience: Lightweight china bowl with a full-size customizable residential seat.
- Optional: A hand sprayer can be installed to further reduce water consumption and assist with bowl rinsing.

Figure 2: Key Features of the Aqua-Magic Style II RV Toilet
Setup and Installation
The Aqua-Magic Style II RV Toilet is designed for floor-mounted installation. It comes with all necessary seals and bolts for a straightforward setup.
What's in the Box:
- Aqua-Magic Style II RV Toilet - High Profile - Bone Color
- New lower seal
- New bolts and bolt caps
Installation Steps:
- Ensure the water supply is turned off before beginning installation.
- Remove the old toilet, if applicable, and clean the mounting area.
- Position the new lower seal correctly on the flange.
- Place the Aqua-Magic Style II toilet onto the mounting bolts, ensuring proper alignment.
- Secure the toilet with the provided bolts and caps. Tighten bolts alternately to ensure even pressure.
- Connect the water supply line to the rear of the toilet. A 1/2-inch NPT tube or fitting is required.
- Turn on the water supply and check for leaks.
- Test the flush mechanism.
For optimal sealing, it is recommended to sit on the toilet bowl itself after initial tightening to apply downward pressure, then perform a final tightening of the bolts.
Operating Instructions
The Aqua-Magic Style II RV toilet features a user-friendly single-pedal flush system:
- Adding Water to Bowl: Press the flush pedal halfway down to add water to the bowl. This is useful for pre-wetting the bowl or for adding water after flushing.
- Flushing the Toilet: Press the flush pedal all the way down to open the valve and flush the toilet. The design ensures 100% bowl coverage for effective cleaning.
To conserve water, consider installing an optional hand sprayer. This allows for targeted rinsing of the bowl, reducing the need for full flushes in certain situations.
Maintenance
Regular maintenance is crucial for the longevity and proper function of your RV toilet. The ball-style valve, while self-cleaning, can experience friction over prolonged use, leading to the bowl not holding water.
Seal Lubrication:
To prevent the rubber seal from drying out and to reduce friction, lubrication is recommended. There are two primary methods:
- Manual Lubrication (using silicone grease):
- Remove the flush pedal by pulling on it.
- Actuate the ball valve to fully drain the bowl.
- Apply Danco Silicone Grease (or a similar silicone-based lubricant) to both the ball valve and the rubber seal.
- Wipe the lubricant around the seal and ball valve to ensure even coverage.
- Reinstall the flush pedal. Ensure the toilet waste ball valve is rotated clockwise to its stopping point, and the water valve is also rotated clockwise to its stopping point. Align the flap arm into the square recess, the spring into its position, the tube, and the water valve arm into the narrow elliptical recess. Press the pedal in carefully.
- Thetford Toilet Seal Lubricant and Conditioner:
- Pour the recommended amount of Thetford Toilet Seal Lubricant and Conditioner directly into the toilet bowl.
- Allow it to sit for approximately 8 hours. This method lubricates the entire assembly without requiring disassembly.
Regular application of either method will help maintain the rubber seal's integrity and ensure smooth operation of the flush mechanism.
Troubleshooting
Issue: Toilet bowl does not hold water.
Cause: Over time, friction between the ball valve and the rubber seal can increase due to mineral buildup or drying of the rubber. This prevents the spring mechanism from fully closing the valve, leading to water leakage from the bowl.
Solution: Refer to the "Maintenance" section for detailed instructions on lubricating the ball valve and rubber seal. Applying a silicone-based lubricant or a dedicated toilet seal conditioner will restore the seal's flexibility and reduce friction, allowing the valve to close completely and hold water effectively.
Specifications
| Feature | Detail |
|---|---|
| Model | Aqua-Magic Style II RV Toilet |
| Item Model Number | 42062 |
| Color | Bone |
| Product Dimensions (D x W x H) | 22.5"D x 22.5"W x 18"H |
| Height (from ground to highest point – lid and seat raised) | 17-1/2 in (44.5 cm) |
| Length (from front of bowl to back of toilet) | 20 in (50.8 cm) |
| Width (bowl size from side to side) | 15 in (38.1 cm) |
| Material | China bowl, Plastic body |
| Seat Material Type | Plastic (Antimicrobial) |
| Item Weight | 26.5 Pounds |
| Installation Type | Floor Mounted |
| Shape | Oblong |
| UPC | 028985420620 |
| Manufacturer Part Number | 42062 |
Warranty and Support
For warranty information, technical support, or to purchase replacement parts, please contact Thetford customer service directly. Refer to the product packaging or the official Thetford website for the most current contact details and warranty terms.


