Introduction
The NETGEAR SC101 Storage Central is a network storage device designed to provide shared, expandable, and secure storage for all personal computers on your network. It allows you to store, share, and back up digital content such as music, photos, videos, and documents, making it accessible as a simple letter drive from any connected PC.
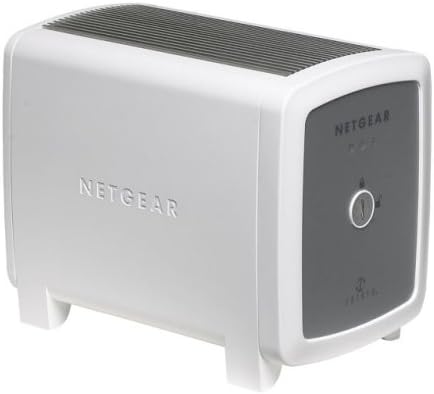
This image displays the NETGEAR SC101 Storage Central device. The front panel features indicators for power and drive status, along with the NETGEAR logo. The side of the unit also prominently displays the NETGEAR branding.
Setup
Package Contents
Verify that all items are present in the package:
- SC101 Storage Central Unit
- Resource CD
- Power Adapter
- Ethernet Cable
- Installation Guide
- SmartSync Pro Backup Software CD
- Warranty/Support Information Card
Hardware Installation
- Prepare Hard Drives: The SC101 requires one or two 3.5" IDE (Parallel ATA) disk drives. Ensure the drives are compatible with ATA6 or above. Hard drives are sold separately.
- Install Hard Drives:
- Locate the latch on the SC101 unit. Turn the latch (a coin may be used) to open the unit. No tools are typically required.
- Attach the power connectors and IDE cables to the hard drive(s).
- Set the jumpers on the hard drive(s) according to the drive manufacturer's instructions (e.g., Master/Slave/Cable Select).
- Slide the hard drive(s) into the designated bays within the SC101 unit.
- Close the unit and secure the latch.
- Connect to Network: Connect the SC101 to your wired or wireless router or switch using the provided Ethernet cable.
- Connect Power: Plug the power adapter into the SC101 unit and then into an electrical outlet.
Software Installation
- Insert Resource CD: Insert the Resource CD into your computer's CD-ROM drive.
- Run Smart Wizard: Follow the on-screen instructions to launch the Smart Wizard installation assistant. This wizard will guide you through the configuration process.
- Install Drivers and Utilities: The software installation includes necessary drivers and utilities for your computer to access and manage the SC101 drives.
- Create Disk Partitions: After installation, use the software to create disk partitions on the installed hard drives within the SC101.
- Access Drives: Once configured, the SC101 drives will appear as network drives (e.g., a new letter drive) on your computer, accessible like any local drive.
Note: The NETGEAR SC101 is compatible only with Windows operating systems (Windows 2000 SP4, XP Home/Pro SP1/SP2, Windows 2003 SP4). It is not compatible with macOS or Linux.
Operating Instructions
Accessing Files
Once the SC101 is set up, you can access files from any connected PC on your network. The drives will appear as a letter drive, allowing you to drag and drop files, save documents, and access media directly.
Storage Options (Mirroring and Spanning)
When two hard drives are installed in the SC101, you have two primary configuration options:
- Mirroring (RAID 1): This option creates an exact copy of your data on both drives. If one drive fails, your data remains safe on the other drive, providing data redundancy and protection against data loss. Both drives will appear as a single volume with the capacity of the smaller drive.
- Spanning (JBOD): This option combines the capacity of both drives into a single, larger volume. The drives appear as one logical drive, and data is written sequentially across them. This maximizes storage capacity but does not offer data redundancy.
Select your preferred storage option during the software configuration process.
Data Protection and Backup
The SC101 automatically stores and, if configured for mirroring, duplicates your data. The included SmartSync Pro advanced backup software can be used to create scheduled backups of your valuable files to the Storage Central.
Front Panel Indicators
The front panel of the SC101 features three LED indicators to provide status at a glance:
- Power LED: Indicates the power status of the unit.
- Hard Disk LED: Indicates activity or status of the installed hard drive(s).
- Network LED: Indicates network connectivity and activity.
Maintenance
General Care
- Keep the unit in a well-ventilated area to prevent overheating.
- Avoid exposing the unit to extreme temperatures or humidity.
- Clean the exterior with a soft, dry cloth. Do not use liquid cleaners.
Firmware Updates
Periodically check the NETGEAR support website for any available firmware updates for the SC101. Firmware updates can improve performance, add features, or resolve issues.
Data Backup Strategy
Even with mirroring enabled, it is recommended to maintain an additional backup strategy for critical data. This could include off-site backups or cloud storage solutions.
Troubleshooting
No Power
- Ensure the power adapter is securely connected to both the SC101 and a working electrical outlet.
- Verify the power outlet is functional by plugging in another device.
Cannot Access Drives on Network
- Check that the Ethernet cable is securely connected to both the SC101 and your router/switch.
- Verify that the Network LED on the SC101 is active.
- Ensure your network has a DHCP server enabled, as the SC101 requires an IP address from it.
- Confirm that the NETGEAR software and drivers are correctly installed on your computer.
- Temporarily disable any firewall software on your computer to see if it is blocking access. If this resolves the issue, configure your firewall to allow communication with the SC101.
- Restart the SC101 unit and your computer.
Hard Drive Not Detected or Errors
- Ensure the hard drive(s) are properly seated and connected inside the SC101.
- Verify that the hard drive jumpers are set correctly (Master/Slave/Cable Select).
- Confirm that the hard drive(s) are compatible ATA6 or above IDE drives.
- If using two drives, check the mirroring/spanning configuration in the software.
- The SC101 uses a proprietary Zetera formatting. Drives installed in the SC101 cannot be directly read by a standard Windows machine if removed from the unit.
Slow Data Transfer Speeds
- Ensure your network connection is 10/100 Mbps.
- Network congestion can affect transfer speeds. Try transferring files during off-peak hours or when fewer devices are using the network.
- Large file transfers will naturally take longer.
Specifications
| Model Number | SC101 |
| Brand | NETGEAR |
| Product Dimensions | 6.64 x 4.21 x 5.57 inches (D x W x H) |
| Item Weight | 3 pounds |
| Material | Plastic |
| Compatible Devices | Desktop, Laptop (Windows OS only) |
| Network Interface | 10/100 Mbps Ethernet |
| Hard Drive Compatibility | One or two 3.5" IDE (Parallel ATA) hard disks, ATA6 or above |
| Operating System Requirements | Windows 2000 (SP4), XP Home or Pro (SP1 or SP2), Windows 2003 (SP4) |
| Network Requirements | DHCP server in the network |
| Power Input | 100-240V (multiple voltage compatible) |
Warranty Information
The NETGEAR SC101 Storage Central is backed by a 1-year limited warranty from the date of purchase. This warranty covers defects in materials and workmanship under normal use. Please refer to the warranty/support information card included in your package for full terms and conditions.
For warranty claims or detailed information, please visit the official NETGEAR support website.
Support
For technical assistance, product registration, or to download the latest drivers and firmware, please visit the official NETGEAR support website:
Before contacting support, it is recommended to review the troubleshooting section of this manual and check the NETGEAR support website for frequently asked questions (FAQs) and knowledge base articles.


