
Fram CH9018P
FRAM EG+ CH9018P Engine Oil Filter Installation and Maintenance Manual
Model: CH9018P | Brand: Fram
Introduction
The FRAM EG+ CH9018P Engine Oil Filter is designed to keep your engine running smoothly. This automotive replacement oil filter provides proven protection for up to 10,000 miles and is engineered for use with conventional or synthetic motor oil. EG+ filters utilize a special blend of cellulose and glass to create a proprietary filter media, offering advanced engine protection. It balances 95% dirt-trapping efficiency with high dirt-holding capacity, capturing nearly all dirt particles that can cause harmful engine wear. Engineered with a silicone non-drain back valve, this filter delivers superior start-up engine protection with up to 3X the hot oil resistance. The SureGrip feature provides a non-slip surface for easier installation and removal. This manual provides detailed instructions for proper installation and maintenance.
Safety Information
Always follow proper safety procedures to avoid personal injury while performing vehicle maintenance. Perform this installation only when your car is off. Wear safety glasses and gloves to avoid skin contact with engine oil. Follow local laws and regulations for the safe disposal of used oil and filters.
Materials Needed
- FRAM EG+ CH9018P Oil Filter
- Engine Oil (appropriate type and quantity for your vehicle)
- Oil Catch Pan
- Funnel
- Wrench (appropriate size for drain plug)
- Clean, dry cloth or rag
- Safety glasses
- Gloves
Setup & Installation
The following steps outline the process for replacing your engine oil and filter. Refer to your vehicle's service manual for specific oil capacity and torque specifications.
1. Drain Old Engine Oil
- Locate the oil drain plug, typically found directly underneath the engine at one end of the oil pan.
- Position an oil catch pan directly under the drain plug.
- Using a wrench, carefully loosen the drain plug. Finish loosening by hand and remove it. Be cautious to avoid contact with warm engine oil.
- Allow the old oil to completely drain from the oil pan. Reposition the catch pan as the oil stream slows.
- Once drained, clean the tip of the oil drain plug with a clean, dry cloth to remove any debris.
- Clean the surface around the oil pan opening.
- Replace the drain plug. Do not overtighten to avoid stripping the threads in the oil pan.
Video: How to Install a Fram Oil Filter. This video demonstrates the general process of draining oil and replacing an oil filter.
2. Replace Oil Filter
- Locate the old oil filter.
- Carefully loosen the old oil filter by hand. Allow any remaining oil to drain around the filter into the catch pan.
- Remove the old filter by hand.
- Check to ensure the old gasket came off with the filter and is not stuck to the mounting base. If it is, remove it.
- Compare the old filter to the new FRAM EG+ CH9018P filter to ensure you have the correct replacement. The new filter should have the same size gasket and thread as the old one.
- Clean the mounting base and inspect it for any cracking, thread wear, or damage.
- Before installing the new filter, apply a small amount of clean engine oil to the new gasket. This helps the gasket to seal properly.
- Install the new filter by hand, tightening it until it is snug. Then, turn it an additional three-quarters to one full turn to seal it. FRAM oil filters are equipped with SureGrip for easier handling.
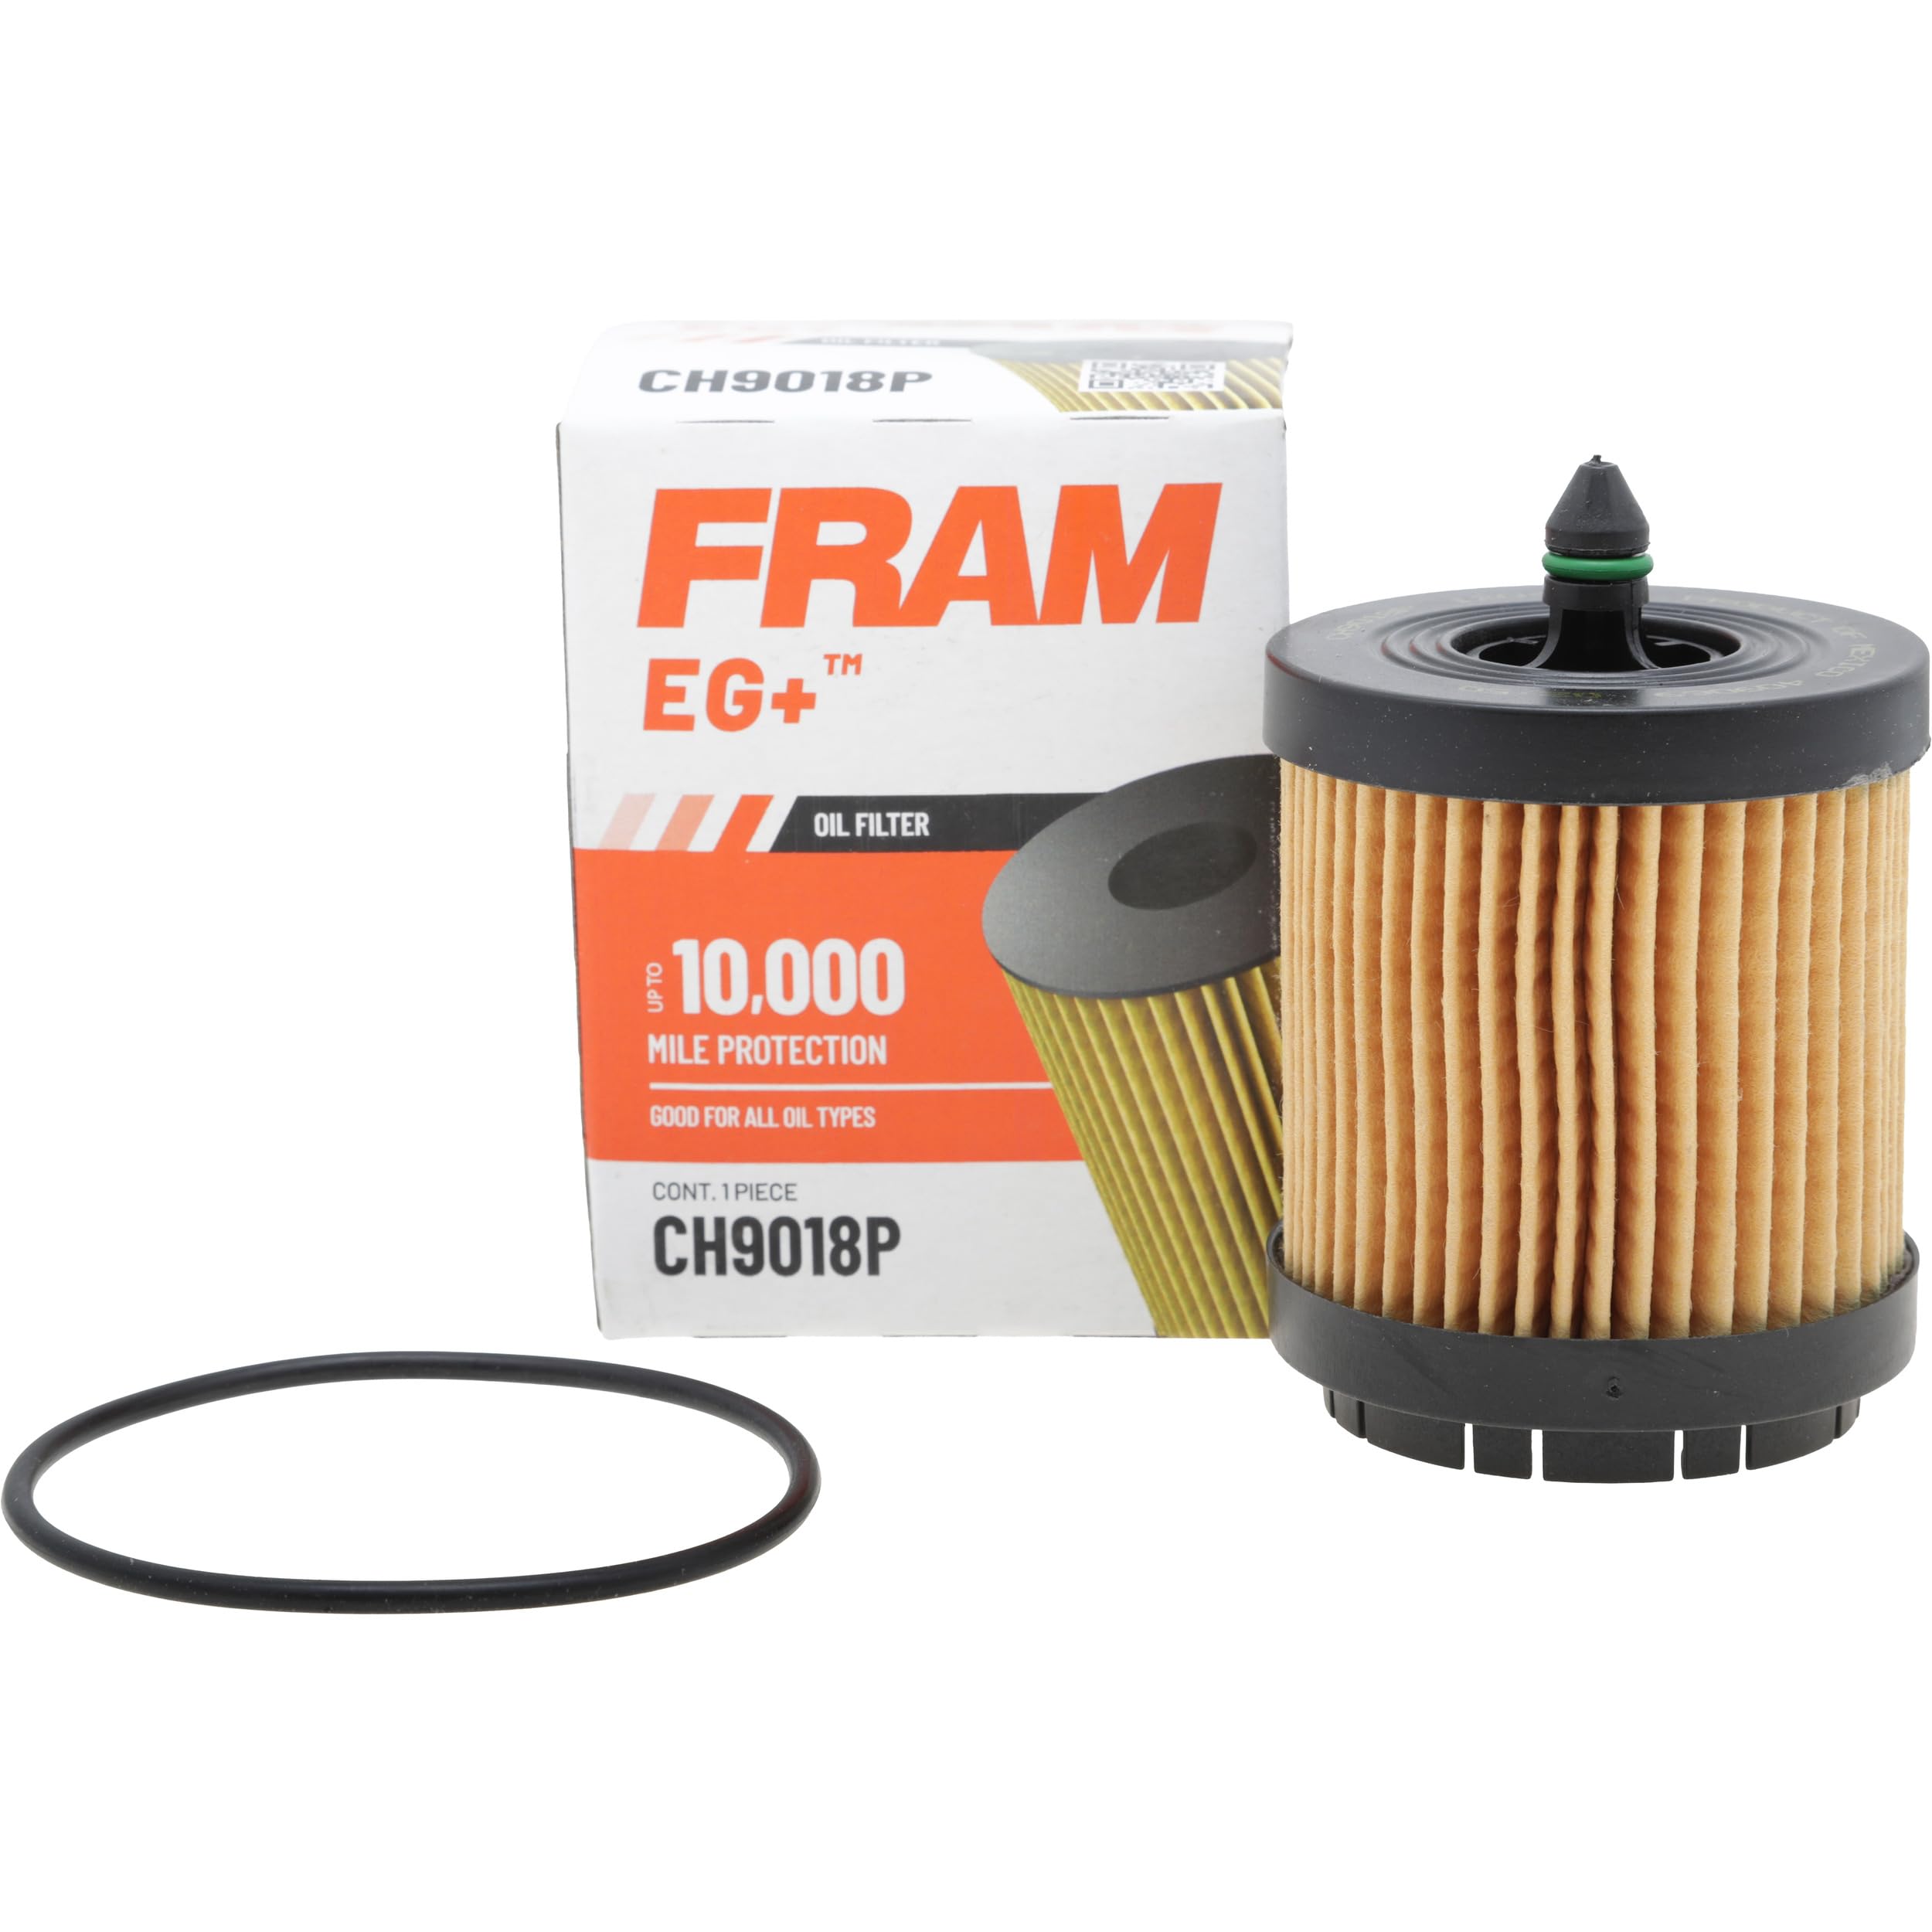
Image: The FRAM EG+ CH9018P oil filter and its accompanying O-ring, ready for installation.

Image: A hand wearing a glove is shown installing the FRAM oil filter into the engine bay, highlighting the SureGrip feature.
Video: Premium Engine Oil Filter. This video provides a visual overview of the FRAM oil filter's components and function.
3. Add New Engine Oil
- Locate the oil filler cap on your engine, usually marked with an oil can symbol or the words "Engine Oil". Remove it.
- Insert a funnel into the oil filler opening to prevent spills.
- Slowly pour in the new engine oil, ensuring not to exceed your vehicle's recommended oil capacity.
- Check the oil dipstick periodically to monitor your progress. To get an accurate reading, remove the dipstick, wipe it clean, reinsert it, let it sit for a moment, and then remove it again. The oil level should never exceed the "FULL" line.
- Once the oil level is correct, replace the filler cap.
- Start the engine and let it run for approximately one minute. Visually inspect for any leaks around the drain plug and oil filter.
- Shut off the engine and recheck the dipstick. Add oil if necessary to reach the "FULL" mark without overfilling.
Operating
After completing the oil and filter change, ensure all caps and plugs are securely fastened. Regularly check your engine oil level between scheduled maintenance intervals to ensure proper lubrication and prevent potential engine damage. Refer to your vehicle's owner's manual for recommended oil check frequency.
Maintenance
For optimal engine performance and longevity, it is recommended to change your FRAM EG+ CH9018P oil filter and engine oil every 10,000 miles under regular driving conditions. Always refer to your vehicle's owner's manual for specific service intervals and oil type recommendations.

Image: The FRAM Extra Guard oil filter, highlighting its 10,000-mile change interval capability.
Oil Life Reset (Example for Chevrolet Equinox)
After changing your engine oil and filter, you may need to reset your vehicle's oil life indicator. The following steps are common for a Chevrolet Equinox, but procedures may vary by vehicle model. Consult your vehicle's owner's manual for exact instructions.
- Turn the ignition key to the ON position (do not start the engine).
- The display may show a "Change Engine Oil Soon" message.
- Locate the menu buttons on your vehicle's dashboard or steering wheel controls.
- Press the "Menu" button to navigate through the display options until you find "Remaining Oil Life".
- Press the "Set/Clr" (Set/Clear) button.
- The display will ask "Are you sure that you want to reset?".
- Use the up arrow button to select "Yes".
- Press the "Set/Clr" button again to confirm.
- The oil life indicator should now show 100%.
Troubleshooting
- Oil Leaks: If you observe oil leaks after installation, immediately shut off the engine. Recheck the tightness of the drain plug and the oil filter. Ensure the old gasket was completely removed and the new gasket is properly seated and lubricated.
- Bulging Filter: If the old oil filter appeared bulging or deformed upon removal, this could indicate an issue with your vehicle's lubrication system being over-pressurized. In such cases, it is recommended to have your lubrication system checked by a qualified mechanic immediately.
- Low Oil Pressure Warning: If your vehicle's low oil pressure warning light illuminates after an oil change, immediately shut off the engine and check the oil level. If the level is correct, there may be a more serious issue requiring professional inspection.
Specifications
| Feature | Detail |
|---|---|
| Brand | Fram |
| Model Number | CH9018P |
| Material | Resin, fiber |
| Product Grade | Performance Part |
| Vehicle Service Type | Street-Sport-Motorcycles |
| Item Dimensions (L x W x H) | 2.64 x 2.64 x 3.62 inches |
| Item Weight | 0.16 ounces |
| Manufacturer | FRAM |
| Filtration Efficiency | 95% dirt-trapping efficiency |
| Protection Interval | Up to 10,000 miles |
Disposal Information
Proper disposal of used engine oil and filters is crucial for environmental protection. Do not pour used oil down drains or onto the ground.
- Locate special reclamation centers in your area for used oil and filter collection.
- Check local laws and regulations for proper disposal procedures.
- In the meantime, store used oil in sealed containers, clearly labeled as "USED OIL". Do not use old beverage containers or other common household jars/jugs to avoid accidents.
- Store containers in a secure location, away from children or pets.
Warranty and Support
For warranty information or technical support regarding your FRAM EG+ CH9018P oil filter, please refer to the official Fram website or contact their customer service. Keep your purchase receipt as proof of purchase.
Visit the Fram Store: Fram Official Store
Related documentsCH9018P


Ask a question about this manual
Ask about setup, troubleshooting, compatibility, parts, safety, or missing instructions. Manuals+ will review the question and use this page’s manual context to help answer it.