
Product Overview
The Leviton 6124H-I Decora LCD Timer Switch is designed to provide automated control for lighting and appliances. This 24-hour programmable timer offers convenience and energy savings by allowing users to set specific on/off times throughout the day. Its Decora styling integrates seamlessly into various home decors.
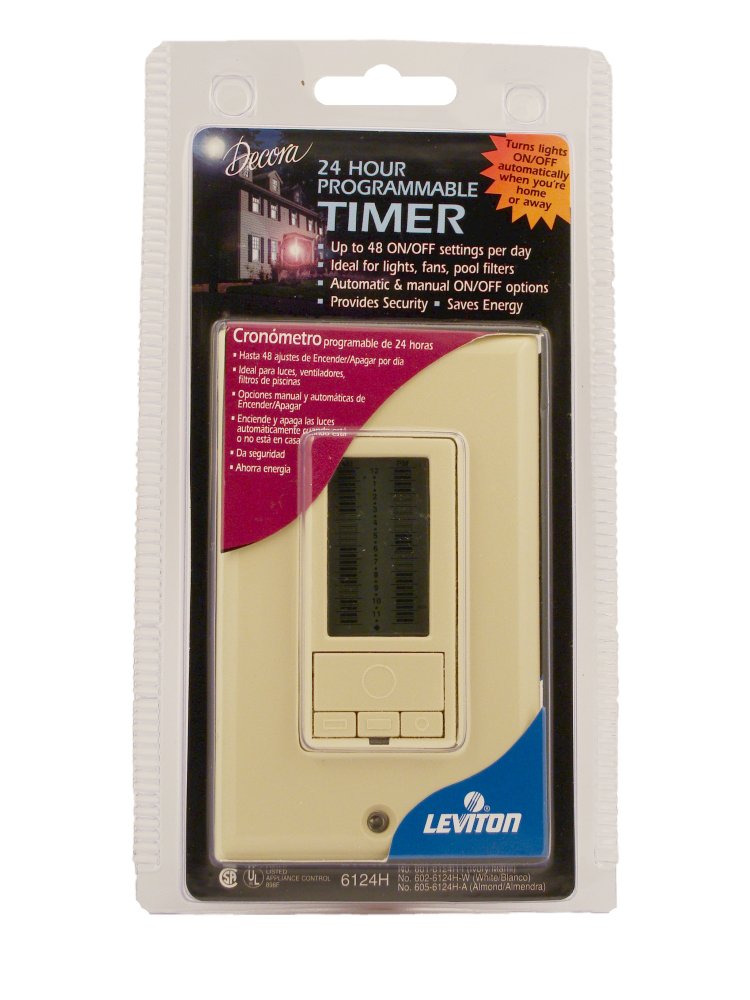
Image: Front view of the Leviton 6124H-I Decora LCD Timer Switch in Ivory. It features a large LCD display and multiple control buttons.
Key Features:
- 24-Hour Programmable: Allows for precise scheduling of on/off cycles in 30-minute intervals.
- LCD Display: Clear display for time and programming settings.
- Multiple Control Buttons: Includes a large ON/OFF button and three smaller buttons for programming.
- Single-Pole Application: Designed for controlling a single light or appliance from one location.
- Incandescent Only: Suitable for incandescent lighting loads.
- Neutral Not Required: Simplifies installation in many existing wiring configurations.
Safety Information
WARNING: To avoid fire, shock, or death, turn off power at the circuit breaker or fuse box and test that power is off before wiring. This device must be installed in accordance with all national and local electrical codes. Use copper wire only.
- Do not use with fluorescent fixtures, motor loads, or low-voltage lighting unless specified.
- Ensure the total wattage of connected lights does not exceed the timer's maximum rating.
- If you are unsure about any part of these instructions, consult a qualified electrician.
Setup and Installation
Tools Required:
- Screwdriver (Phillips and flathead)
- Wire strippers
- Electrical tape
- Voltage tester
Wiring Instructions:
- Turn Off Power: Locate the circuit breaker or fuse that supplies power to the switch box and turn it OFF. Verify power is off using a voltage tester.
- Remove Old Switch: Carefully remove the existing wall plate and switch. Disconnect the wires from the old switch. Note which wire was connected to the "line" (power in) and "load" (power out to fixture) terminals.
- Identify Wires:
- Line Wire: Carries power from the circuit breaker.
- Load Wire: Carries power to the light fixture.
- Ground Wire: Typically bare copper or green insulated.
- Neutral Wire: (Not required for this model, but typically white).
- Connect New Timer Switch:
- Connect the Line wire to the terminal marked "LINE" on the timer switch.
- Connect the Load wire to the terminal marked "LOAD" on the timer switch.
- Connect the Ground wire from the wall box to the green or bare copper ground screw on the timer switch.
- Secure all wire connections firmly.
- Mount Timer Switch: Carefully fold the wires into the wall box. Mount the timer switch into the wall box using the provided screws. Attach the wall plate.
- Restore Power: Turn the power back ON at the circuit breaker.
Note: The timer switch may fill a significant portion of the gang box. Ensure wires are neatly arranged to allow for proper fit.
Operating Instructions
Initial Power-Up:
Upon initial power-up, the LCD display will illuminate. You may need to set the current time before programming schedules.
Controls Overview:
- Large Button: Manual ON/OFF control. Press to override the timer schedule and turn the connected load ON or OFF.
- Left Button (Cursor Advance): Used during programming to move the cursor along the 30-minute interval hash marks on the LCD.
- Center Button (Toggle Interval): Used during programming to toggle a selected 30-minute interval as "ON" (light will be on during this interval).
- Right Button (Set Time): Used to set the current time. This button moves a second cursor along the 30-minute hash marks to indicate the current time.
Setting the Current Time:
- Press the Right Button repeatedly to advance the current time cursor to the correct 30-minute interval. The LCD displays 24 hours in 30-minute increments.
- Once the correct time is set, the timer will begin tracking time from that point.
Programming ON/OFF Schedules:
The timer allows for flexible scheduling in 30-minute intervals throughout a 24-hour period.
- Enter Programming Mode: The specific method to enter programming mode may vary slightly. Typically, holding down one of the programming buttons (Left or Center) for a few seconds will activate it. Refer to the on-screen prompts if available.
- Select Interval: Use the Left Button to move the cursor to the desired 30-minute interval you wish to program.
- Set ON/OFF: Press the Center Button to toggle the selected interval to "ON" or "OFF". When an interval is set to "ON", the light will be active during that 30-minute period.
- Repeat: Continue using the Left and Center buttons to program all desired ON/OFF intervals for the 24-hour cycle.
- Exit Programming Mode: The timer will usually exit programming mode automatically after a period of inactivity, or by pressing a specific button (e.g., the large ON/OFF button) to return to normal operation.
The display screen is backlit in a phosphorous blue when any button is pressed, aiding visibility in low light conditions.
Maintenance
- Cleaning: To clean the timer switch, wipe with a soft, damp cloth. Do not use abrasive cleaners or solvents.
- Inspection: Periodically inspect the wall plate and switch for any signs of damage or loose connections.
- Power Outages: This timer is designed to retain its settings during power outages, eliminating the need for reprogramming after a power interruption.
Troubleshooting
| Problem | Possible Cause | Solution |
|---|---|---|
| Timer does not turn ON/OFF at scheduled times. | Incorrect programming; current time not set correctly; manual override active. | Verify programming settings. Ensure the current time is accurately set. Check if the large ON/OFF button has been pressed, overriding the schedule. |
| No power to the light/appliance. | Circuit breaker tripped; loose wiring connection; faulty bulb/appliance. | Check the circuit breaker and reset if tripped. Ensure all wiring connections are secure. Test the light bulb or appliance separately. |
| LCD display is blank. | No power to the timer; internal fault. | Check power at the circuit breaker. If power is present and the display remains blank, the unit may require replacement. |
Specifications
- Model: 6124H-I
- Voltage: 120 VAC, 60 Hz
- Load Rating: 1200W / 1200VA, 1HP
- Switch Type: Single-Pole
- Load Type: Incandescent Only
- Programming: 24-hour, 30-minute intervals
- Color: Ivory
- Neutral Wire: Not Required
Warranty Information
This Leviton product is covered by a 2-year limited warranty from the date of purchase. This warranty covers defects in materials and workmanship under normal use and service. For full warranty terms and conditions, please refer to the official Leviton website or contact customer support.
Support and Contact
For technical assistance, product information, or warranty claims, please contact Leviton customer support:
- Website: www.leviton.com
- Refer to the official Leviton website for the most up-to-date contact information and support resources.

