1. Introduction
This manual provides detailed instructions for the safe installation, operation, and maintenance of your Progress Lighting 2-Light Adjustable Swivel Flood Light, Model P5203-31. Please read this manual thoroughly before installation and retain it for future reference.
The Two-Light Adjustable Swivel Flood Light is designed to provide added safety and security for your home with its twin classic shades that direct light in two angled directions. Its durable aluminum construction and bold black finish ensure long-life performance and a touch of simple sophistication for exterior walls and garages.

Image 1.1: The Progress Lighting P5203-31 2-Light Adjustable Swivel Flood Light in black finish. This fixture features two adjustable lamp holders designed for outdoor use.
2. Safety Information
WARNING: Read instructions carefully and turn electricity off at main circuit breaker panel before beginning installation.
- Electrical Safety: All wiring must be in accordance with the National Electrical Code (NEC) and local electrical codes. If you are unsure about wiring, consult a qualified electrician.
- Outdoor Installation: When installing outdoors or in a wet location, the edge of the fixture must be sealed to the mounting surface with a permanent waterproof caulking material (latex, silicone, urethane, etc.) to comply with U.L. requirements.
- Proposition 65 Warning: This product contains chemicals known to the State of California to cause cancer, birth defects and/or other reproductive harm. Thoroughly wash hands after installing, handling, cleaning, or otherwise touching this product.
- Bulb Handling: Exercise caution when handling lamps (bulbs). All glass is fragile.
3. Package Contents
Verify that all components are present before beginning installation. Refer to the installation diagram for visual identification.
- Fixture Assembly (2-Light Adjustable Swivel Flood Light)
- Mounting Hardware (screws, wire nuts)
- Installation Sheet

Image 3.1: Diagram showing the components and wiring for the P5203-31 flood light. This includes the fixture, lamp holders, cover plate, and wiring connections.
4. Specifications
| Feature | Detail |
|---|---|
| Model Number | P5203-31 |
| Brand | Progress Lighting |
| Color | Black |
| Material | Aluminum |
| Product Dimensions (L x W x H) | 22.5" x 6.25" x 11.31" |
| Mounting Type | Wall Mount (4-13/16" dia.) |
| Power Source | AC |
| Voltage | 120 Volts |
| Max Wattage per Bulb | 150 watts |
| Bulb Base | E26 (Medium Base) |
| Recommended Bulb Type | PAR38 or BR30 (Halogen or LED) |
| Number of Light Sources | 2 |
| Special Feature | Dimmable (with compatible dimmer and bulbs) |
| Indoor/Outdoor Usage | Outdoor (UL-CUL Wet location listed) |
| Warranty | 1-year limited warranty |
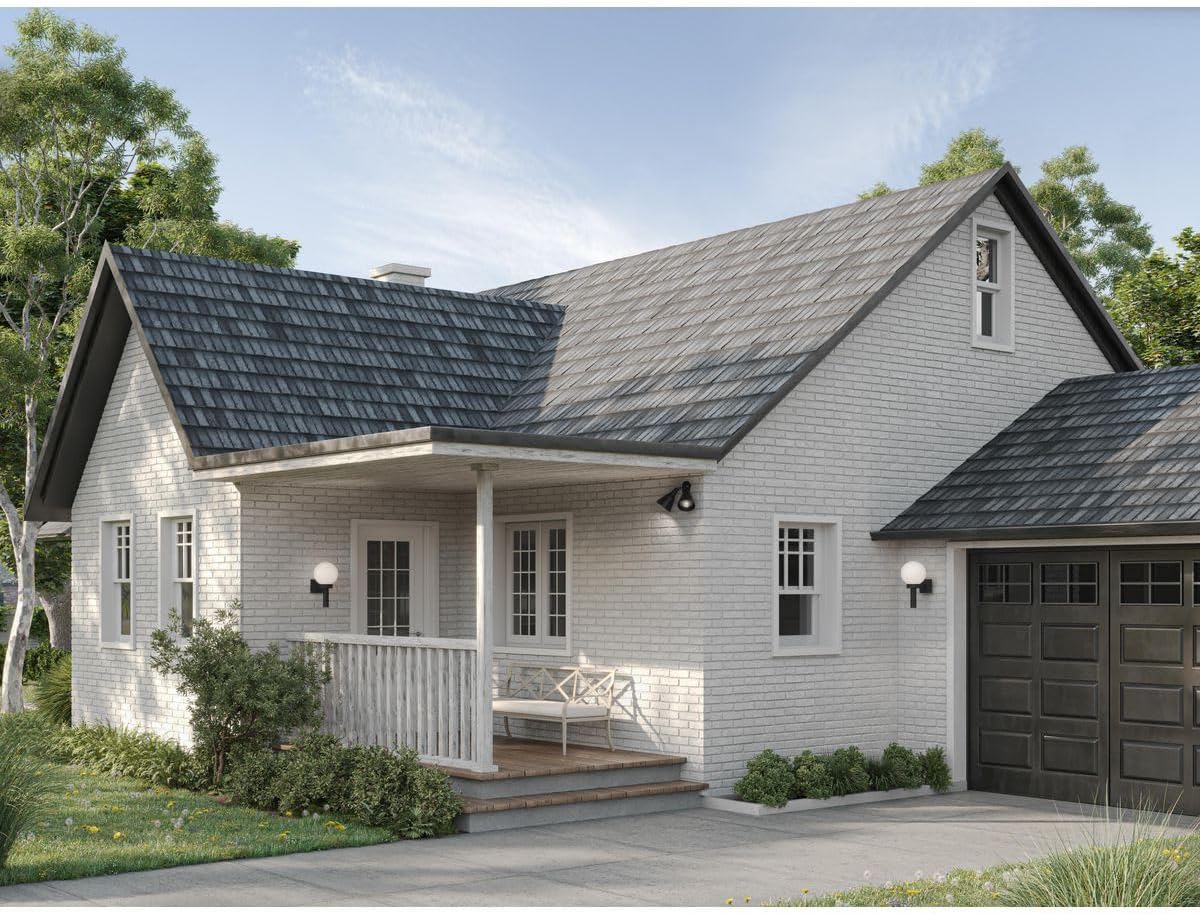
Image 4.1: Technical drawing illustrating the dimensions of the P5203-31 flood light, showing a width of 6-1/4 inches, height of 11-5/16 inches, and length of 22-1/2 inches.

Image 4.2: Information regarding compatible bulb types (E26 base, PAR30 or BR30 shape) and the dimmable feature of the fixture when used with appropriate bulbs and wall dimmer.
5. Setup and Installation
Before You Begin: Ensure power is turned off at the circuit breaker. Gather necessary tools (screwdriver, wire strippers, caulk gun, caulk).
- Prepare Wiring: Slip the fixture wires (3) of the lampholder(s) (7) through the hole(s) in the Cover Plate (5).
- Attach Lampholders: Secure each lampholder (7) to the Cover Plate (5) with one Locknut (4) per lampholder and one on each side of the Cover Plate (5).
- Connect Wires: Connect the fixture wires (3) to the supply wires as shown in the wiring diagram (refer to Image 3.1).
- Connect the black fixture wire to the black supply wire.
- Connect the white fixture wire to the white supply wire.
- Connect the green or bare copper fixture ground wire to the green or bare copper supply ground wire.
- Mount Fixture: Knock out appropriate mounting holes in the Cover Plate (5) to match the mounting holes in the outlet box (1). Slip machine screws (6) through these holes and thread into the outlet box (1). (PRE-WIRING IS ALWAYS).
- Seal Fixture: Slip Gasket (8) onto the lamp(s) (9), (5206 & 5207 ONLY).
- Install Lamps: Install the appropriate lamps (bulbs) (9) (not furnished).
CAUTION: All glass is fragile. Use care when handling lamps (bulbs).
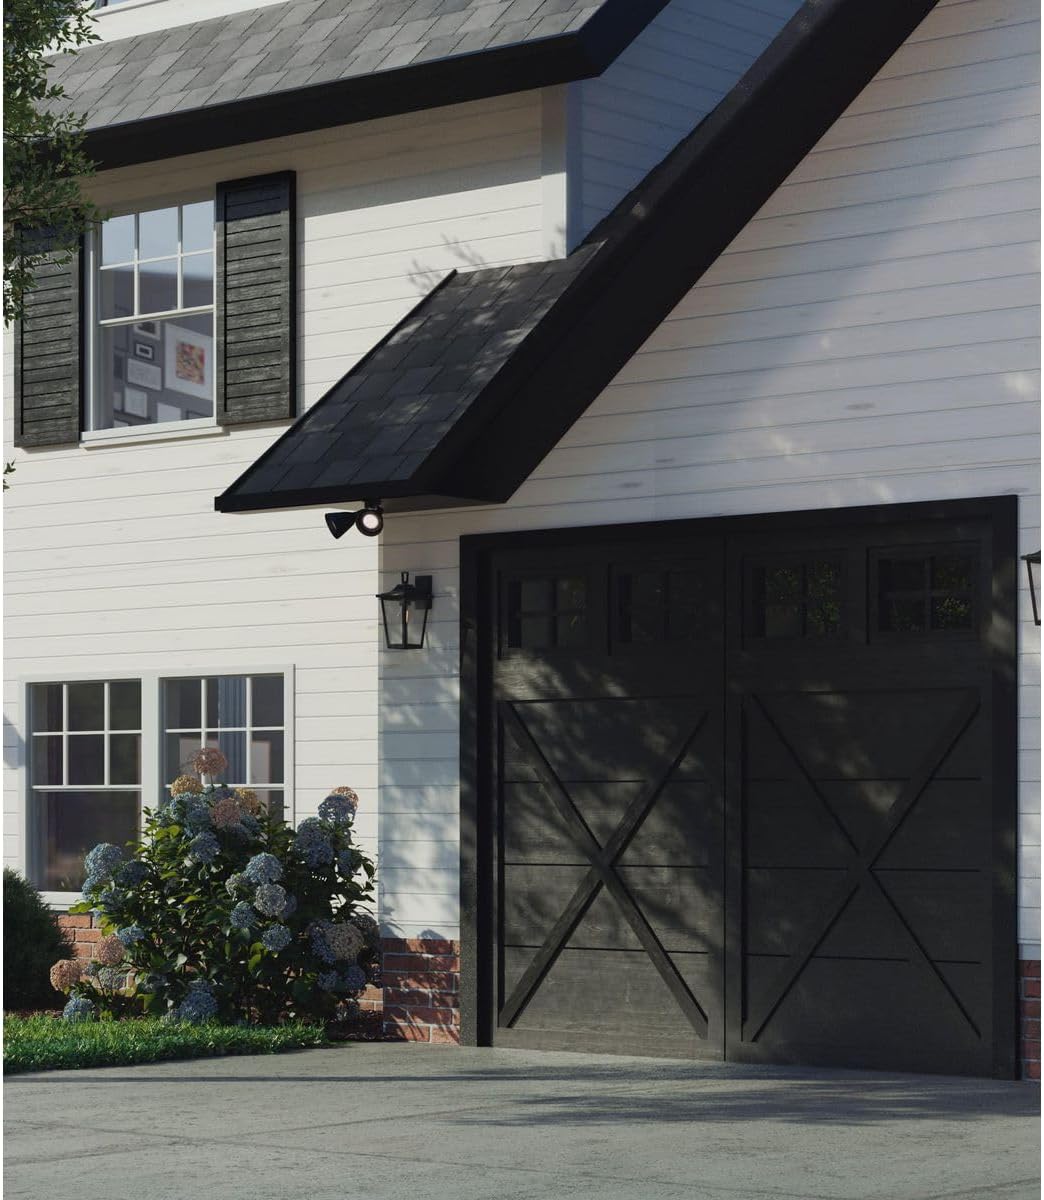
Image 5.1: The P5203-31 flood light installed on the exterior wall of a house, providing illumination for the pathway.

Image 5.2: The P5203-31 flood light mounted above a garage door, enhancing security and visibility for the garage area.
6. Operating Instructions
Once installed and wired correctly, the flood light operates via your standard wall switch or dimmer switch.
- Power On/Off: Use the wall switch connected to the fixture to turn the flood light on or off.
- Adjusting Light Direction: The two lamp holders are adjustable. Gently swivel each lamp holder to direct the light beam to your desired area.
- Dimming Function: If dimmable bulbs and a compatible wall dimmer switch are installed, you can adjust the brightness of the flood light using the dimmer control.
7. Maintenance
- Cleaning: To clean the fixture, ensure power is off. Wipe with a soft, damp cloth. Do not use abrasive cleaners or solvents, as they may damage the finish.
- Bulb Replacement:
- Turn off power at the circuit breaker before replacing bulbs.
- Allow bulbs to cool completely before touching.
- Unscrew the old bulb and screw in a new E26 base, max 150W PAR38 or BR30 bulb.
- Restore power.
- Inspection: Periodically inspect the fixture for any signs of damage, loose wiring, or wear. Address any issues promptly.
8. Troubleshooting
| Problem | Possible Cause | Solution |
|---|---|---|
| Light does not turn on. | No power to the fixture. | Check circuit breaker and wall switch. Ensure power is on. |
| Loose wire connections. | Turn off power at the breaker. Check all wire connections for tightness. | |
| Faulty bulb. | Replace bulb with a new one of the correct type and wattage. | |
| Light flickers or dims unexpectedly. | Loose bulb or wiring. | Ensure bulbs are screwed in tightly. Check wire connections. |
| Incompatible dimmer switch or bulbs. | Ensure both bulbs and dimmer switch are rated for dimming and are compatible with each other. | |
| Water inside fixture or around mounting. | Improper sealing during installation. | Turn off power. Re-seal the edge of the fixture to the mounting surface with waterproof caulk. Ensure all gaskets are properly seated. |
9. Warranty and Support
This Progress Lighting fixture is covered by a 1-year limited warranty from the date of purchase. This warranty covers defects in materials and workmanship under normal use.
For warranty claims, technical support, or replacement parts, please contact Progress Lighting customer service. Refer to the official Progress Lighting website for current contact information.
Manufacturer: Progress Lighting
Website: www.progresslighting.com