Product Overview
This manual provides essential information for the proper use, installation, and maintenance of your CURT 13029 Class 3 Trailer Hitch. Designed for serious towing, this hitch offers a vehicle-specific fit and robust weight capacity for various trailers.
The CURT 13029 is a custom-fit Class 3 hitch, commonly used on pickup trucks, SUVs, full-size cars, crossovers, and minivans. It features a 2-inch receiver tube and is rigorously tested to SAE J684 standards for safety. Its construction includes high-strength steel and a co-cured finish of liquid A-coat and black powder coat for superior resistance to rust, chipping, and UV damage.

Image: The CURT 13029 Class 3 Trailer Hitch, a black square tube frame with a 2-inch receiver, designed for vehicle-specific mounting.
Key Features and Benefits
- Dependable Strength: Rated for 6,000 lbs. Gross Trailer Weight (GTW) and 600 lbs. Tongue Weight (TW). With a weight distribution hitch, capacity increases to 10,000 lbs. WD and 1,000 lbs. WDTW.
- Versatile Design: Equipped with a standard 2-inch x 2-inch hitch receiver, suitable for various towing applications.
- Fully Tested: Each design undergoes real-world, on-vehicle testing and meets SAE J684 standards for safety.
- Rust, Chip, UV-Resistant: Features a dual-coat finish of rust-resistant liquid A-coat and durable black powder coat, co-cured for enhanced protection.
- Easy to Install: Custom, factory fit for select Chevy Blazer, Chevy Suburban, Chevy Tahoe, Cadillac Escalade, and GMC Yukon models.
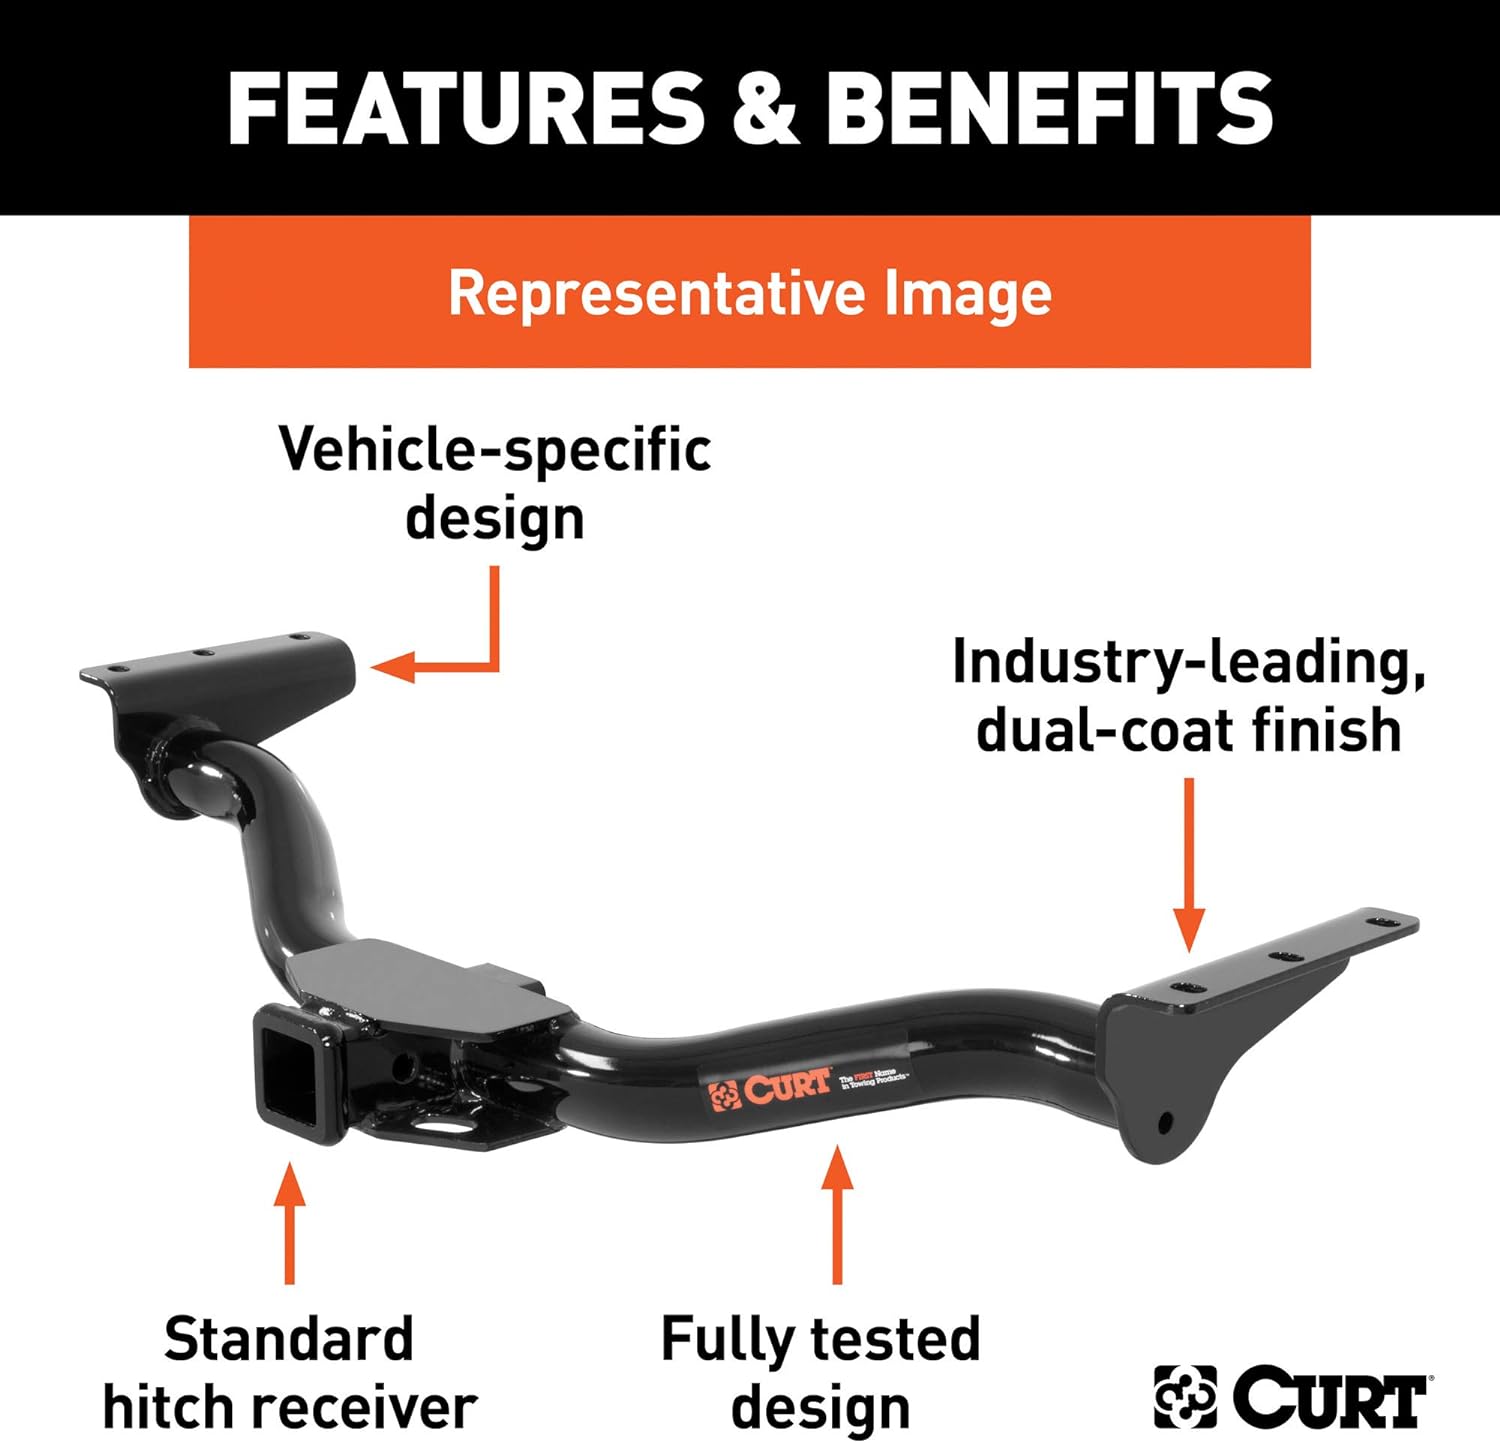
Image: A representative diagram highlighting the vehicle-specific design, industry-leading dual-coat finish, standard hitch receiver, and fully tested design of the CURT trailer hitch.
Setup and Installation
The CURT 13029 trailer hitch is designed for a custom, vehicle-specific fit, simplifying the installation process. While this manual provides general guidance, it is highly recommended to refer to the detailed Installation Manual (PDF) provided by CURT for precise, step-by-step instructions tailored to your specific vehicle model.
General Installation Steps (Consult PDF for specifics):
- Preparation: Ensure the vehicle is on a level surface and properly supported. Gather all necessary tools as specified in the installation manual.
- Clearance: Depending on the vehicle, minor modifications or temporary removal of components (e.g., spare tire, exhaust hangers) may be required to gain access to the frame.
- Positioning: Carefully lift the hitch into position, aligning the mounting holes with the existing holes in the vehicle's frame.
- Hardware Installation: Insert the provided carriage bolts and square spacers into the frame rails using the included fish wire or bolt leader, if applicable. Secure the hitch with the washers and nuts.
- Torqueing: Tighten all fasteners to the torque specifications listed in the detailed installation manual. Proper torqueing is critical for safety and performance.
- Final Check: Verify that the hitch is securely mounted and all components are properly installed.
For optimal safety and performance, professional installation is recommended if you are not familiar with vehicle modifications or towing equipment.

Image: A CURT trailer hitch mounted on a testing rig, demonstrating the rigorous testing process to ensure durability and safety standards are met.
Operating Instructions
Once installed, your CURT Class 3 trailer hitch provides a secure attachment point for various towing accessories. Always adhere to safe towing practices and never exceed the lowest-rated towing component (vehicle, hitch, or trailer).
Connecting a Trailer:
- Insert Ball Mount: Slide your 2-inch x 2-inch ball mount into the receiver tube.
- Secure with Pin: Align the pin hole on the ball mount with the hole on the receiver and insert a hitch pin and clip (sold separately) to secure it.
- Attach Trailer: Lower the trailer coupler onto the hitch ball. Ensure the coupler is fully seated and latched.
- Safety Chains: Cross the trailer's safety chains under the coupler and attach them to the designated chain loops on the hitch.
- Electrical Connection: Connect the trailer's wiring harness to your vehicle's electrical connector, if applicable. Test all lights (brake, turn signals, running lights).
Towing Considerations:
- Always ensure proper tongue weight (typically 10-15% of the gross trailer weight).
- Distribute the load evenly on the trailer.
- Adjust tire pressure on both the tow vehicle and trailer as recommended.
- Drive at reduced speeds and allow for increased braking distances.
- Avoid sudden maneuvers.

Image: A close-up view of the standard 2-inch x 2-inch hitch receiver, showing its robust construction and opening for a ball mount.
Maintenance
Regular maintenance ensures the longevity and safe operation of your CURT trailer hitch.
- Inspect Regularly: Before each towing trip, visually inspect the hitch for any signs of damage, cracks, excessive rust, or loose fasteners.
- Clean: Keep the receiver tube free of dirt, debris, and rust. A wire brush can be used for stubborn buildup.
- Lubricate: Apply a light coat of grease or anti-corrosion spray to the inside of the receiver tube and any moving parts of your towing accessories (e.g., ball mount shank) to prevent rust and ensure smooth operation.
- Check Fasteners: Periodically re-torque all mounting bolts to the manufacturer's specifications, especially after the first few towing trips and after prolonged use.
- Finish Protection: While the dual-coat finish offers excellent protection, minor scratches or chips should be touched up with rust-inhibiting paint to prevent corrosion.

Image: Hitch components submerged in a liquid A-coat bath, illustrating the first layer of the dual-coat finish for superior rust resistance.
Troubleshooting
Most issues related to trailer hitches are minor and can be resolved with simple checks.
| Problem | Possible Cause | Solution |
|---|---|---|
| Hitch does not fit vehicle. | Incorrect model for vehicle year/make/model. | Verify vehicle compatibility using CURT's application guide or the product's fitment information. |
| Excessive play in receiver. | Loose hitch pin or worn ball mount shank. | Ensure hitch pin is fully inserted and secured. Inspect ball mount for wear; replace if necessary. Consider an anti-rattle device. |
| Rust formation. | Damage to protective coating; exposure to elements. | Clean affected area and apply rust-inhibiting paint. Store vehicle in a dry environment when possible. |
| Difficulty inserting/removing ball mount. | Rust or debris inside receiver tube. | Clean receiver tube thoroughly with a wire brush and apply lubricant. |
If you encounter issues not listed here or require further assistance, please contact CURT customer support.
Specifications
| Attribute | Detail |
|---|---|
| Model Number | 13029 |
| Hitch Class | Class 3 |
| Receiver Tube Size | 2 inches x 2 inches |
| Gross Trailer Weight (GTW) | 6,000 lbs. |
| Tongue Weight (TW) | 600 lbs. |
| Weight Distribution (WD) Capacity | 10,000 lbs. |
| Weight Distribution Tongue Weight (WDTW) | 1,000 lbs. |
| Material | Carbon Steel |
| Finish | Gloss Black Powder Coat (Dual-Coat) |
| Testing Standard | SAE J684 |
| Item Weight | 32 Pounds |
| Product Dimensions | 42 x 21 x 10 inches |

Image: A graphic illustrating the 2-inch receiver tube size, indicating compatibility with standard 2x2 inch hitch accessories.
Warranty and Support
For detailed warranty information regarding your CURT 13029 Class 3 Trailer Hitch, please refer to the official CURT website or contact their customer service directly. Warranty terms typically cover defects in materials and workmanship.
For technical support, installation assistance, or any product-related inquiries, please visit the CURT Store on Amazon or the official CURT manufacturing website. You may also find additional resources, FAQs, and contact information there.

Image: The "Made in USA" logo, signifying the domestic manufacturing and quality standards of CURT products.


