1. Introduction
This manual provides detailed instructions for the assembly, painting, and care of your TAMIYA 1/48 Focke Wulf FW190 A3 plastic model kit. The Focke Wulf FW190 A3 is a highly detailed replica of the renowned German World War II fighter aircraft. TAMIYA kits are known for their precision engineering and excellent fit, ensuring a rewarding building experience.
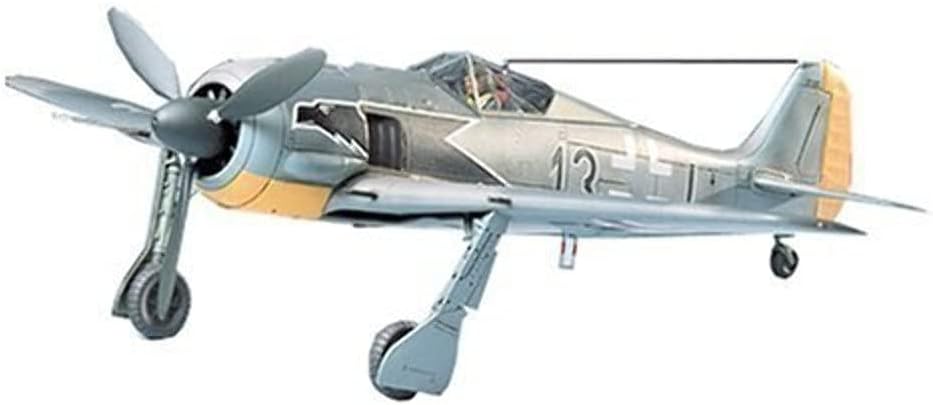
Figure 1: Assembled TAMIYA 1/48 Focke Wulf FW190 A3 model. This image displays the completed model from a three-quarter front view, showcasing its detailed fuselage, wings, propeller, and landing gear. The aircraft is painted in a typical Luftwaffe camouflage scheme with national markings.
2. Safety Information
- Small Parts: This kit contains small parts which may pose a choking hazard. Keep all model kit parts away from small children. Recommended for ages 10 and older.
- Sharp Tools: Assembly requires the use of sharp modeling tools such as hobby knives and nippers. Always exercise caution and supervise younger builders.
- Adhesives and Paints: Use model-specific glues and paints in a well-ventilated area. Refer to the manufacturer's safety data sheets for specific product warnings. Avoid prolonged skin contact and inhalation of fumes.
- Eye Protection: Consider wearing eye protection during cutting and sanding operations to prevent injury from flying debris.
3. Package Contents
Before beginning assembly, verify that all components are present and undamaged. Your TAMIYA 1/48 Focke Wulf FW190 A3 kit (Item #61037) should include:
- Plastic parts mounted on sprue trees (typically two main sprues and one clear sprue for canopy).
- Decal sheet for various markings and insignia.
- Instruction booklet with assembly diagrams and painting guide.
Note: Glue, paint, and modeling tools are not included and must be purchased separately.
4. Assembly
Follow the numbered steps in the included instruction booklet carefully. TAMIYA kits are known for their excellent fit, but proper preparation is key to a successful build.
4.1 Required Tools (Not Included)
- Hobby knife or sprue nippers
- Plastic cement (liquid or tube glue)
- Sandpaper or sanding sticks (various grits)
- Tweezers
- Small files
4.2 General Assembly Steps
- Part Preparation: Carefully remove parts from the sprue using nippers or a hobby knife. Clean any mold lines or excess plastic ("flash") with a hobby knife or fine-grit sandpaper.
- Test Fit: Always test fit parts before applying glue. This helps identify any potential fit issues and ensures proper alignment.
- Gluing: Apply a small amount of plastic cement to one of the mating surfaces. Hold the parts firmly together until the glue sets. Avoid using too much glue, as it can damage the plastic.
- Sub-Assemblies: Build smaller sections (e.g., cockpit, landing gear, engine) first, then integrate them into the main fuselage and wings.
- Clear Parts: Use a clear parts cement or white glue for the canopy to avoid fogging the clear plastic.
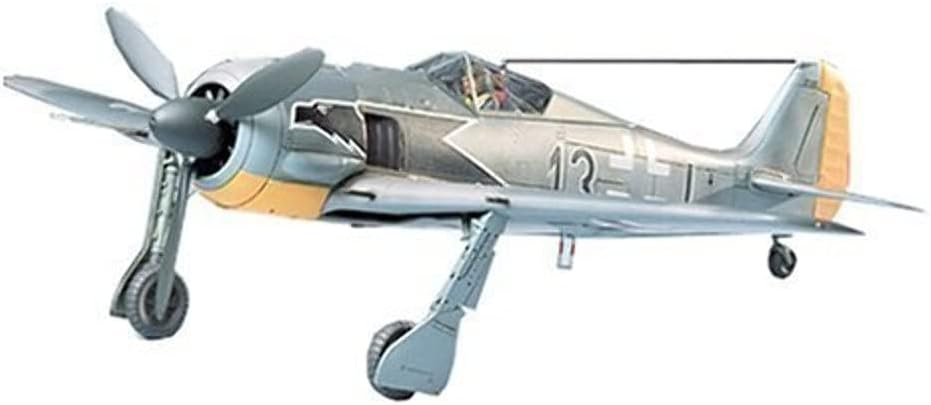
Figure 2: TAMIYA 1/48 Focke Wulf FW190 A3 model kit box art. This image shows the packaging of the model kit, featuring an illustration of the Focke Wulf FW190 A3 in flight, along with the TAMIYA logo and model details.
5. Painting
Painting is a critical step to achieve a realistic finish. Refer to the painting guide in your instruction booklet for specific color schemes and camouflage patterns for the Focke Wulf FW190 A3.
5.1 Preparation
- Ensure the model is clean and free of dust, grease, or fingerprints. Wash with mild soap and water if necessary, then allow to dry completely.
- Mask off any areas not to be painted, such as clear parts or areas designated for different colors, using masking tape designed for models.
- Apply a primer coat for better paint adhesion and a uniform base color.
5.2 Application
- Use thin coats of paint to avoid obscuring fine details. Multiple thin coats are better than one thick coat.
- Allow each coat to dry thoroughly before applying the next or handling the model.
- For camouflage patterns, apply lighter colors first, then mask and apply darker colors.
- Consider using an airbrush for smoother finishes, or high-quality brushes for hand painting.
6. Decals
Decals add the final markings and realism to your model. Apply them after the main paint scheme has fully dried.
- Surface Preparation: Apply a gloss clear coat over the painted surface where decals will be placed. This provides a smooth surface for the decals and prevents "silvering" (air trapped under the decal).
- Application: Cut out each decal close to its edge. Dip the decal in lukewarm water for 10-20 seconds until it slides freely on its backing paper.
- Placement: Slide the decal from its backing paper onto the model surface. Position it carefully using tweezers or a wet brush.
- Setting: Gently blot excess water with a soft cloth or cotton swab. Use decal setting solutions to help the decal conform to irregular surfaces and eliminate air bubbles.
- Sealing: Once decals are dry, apply a final clear coat (gloss, satin, or matte, depending on desired finish) to protect them and blend them into the model's surface.
7. Maintenance
Once completed, your TAMIYA Focke Wulf FW190 A3 model requires minimal maintenance to preserve its appearance.
- Cleaning: Dust the model regularly with a soft, dry brush or a can of compressed air. Avoid using harsh chemicals or abrasive materials.
- Storage: Store the model in a display case or a location away from direct sunlight, extreme temperatures, and high humidity to prevent fading, warping, or decal degradation.
- Handling: Handle the model by its sturdy parts (e.g., fuselage, main wings) to avoid damaging delicate components like antennas, landing gear, or propellers.
8. Troubleshooting Common Issues
| Issue | Possible Cause | Solution |
|---|---|---|
| Parts do not fit together | Excess plastic (flash), mold lines, or improper alignment. | Carefully trim flash/mold lines with a hobby knife or sand down. Test fit parts before gluing to ensure correct orientation. |
| Paint appears uneven or thick | Paint applied too thickly, insufficient thinning, or improper surface preparation. | Apply multiple thin coats. Ensure paint is properly thinned according to manufacturer instructions. Clean and prime the surface before painting. |
| Decals "silver" (appear milky or have air bubbles) | Surface not smooth enough, air trapped under decal, or insufficient setting solution. | Apply decals over a gloss clear coat. Use decal setting solutions to help decals conform and eliminate air. Puncture small bubbles with a sharp needle and apply more setting solution. |
| Small parts break during assembly | Excessive force, improper tool use, or delicate nature of the part. | Exercise care when removing and handling small parts. Use appropriate tools (e.g., fine nippers). If a part breaks, attempt to re-glue with plastic cement or super glue. |
9. Specifications
- Model Name: Focke Wulf FW190 A3
- Brand: TAMIYA
- Model Number: 61037
- Scale: 1/48
- Product Dimensions: 12.2 x 2.36 x 8.27 inches (packaging)
- Item Weight: 1.01 pounds (packaging)
- Recommended Age: 10 years and older (for assembly)
- Material: Plastic
10. Warranty and Support
For inquiries regarding damaged products or defective parts, please contact Tamiya America Customer Service.
- Tamiya America Customer Service: 1-800-826-4922
Please have your model item number (TAM61037) available when contacting support.


