
1. Overview
The CAD Audio TSM411 is a compact and rugged dynamic microphone designed for capturing high-impact sound sources. Its super-cardioid polar pattern provides excellent isolation, making it suitable for various instruments in both live and studio environments. This microphone is ideal for applications such as snare drums, toms, congas, guitar and keyboard amplifiers, brass instruments, and other percussion or electric/acoustic instruments.

Figure 1: Front view of the CAD Audio TSM411 Dynamic Microphone.
2. Features
The TSM411 Dynamic Microphone incorporates several features for optimal performance:
- Super-Cardioid Polar Pattern: Provides focused sound capture and excellent rejection of off-axis noise.
- Rugged Construction: Designed for durability in demanding environments.
- Wide Frequency Response: Captures a broad range of audio from 100Hz to 15 kHz.
- Low Impedance: 310 ohms, compatible with most professional audio equipment.
- Included Rubber Mic Clip: Offers additional isolation from vibrations and facilitates precise positioning.
- Versatile Application: Suitable for brass, guitar cabinets, bass cabinets, snare drums, rack/floor toms, percussion, and various electric/acoustic instruments.
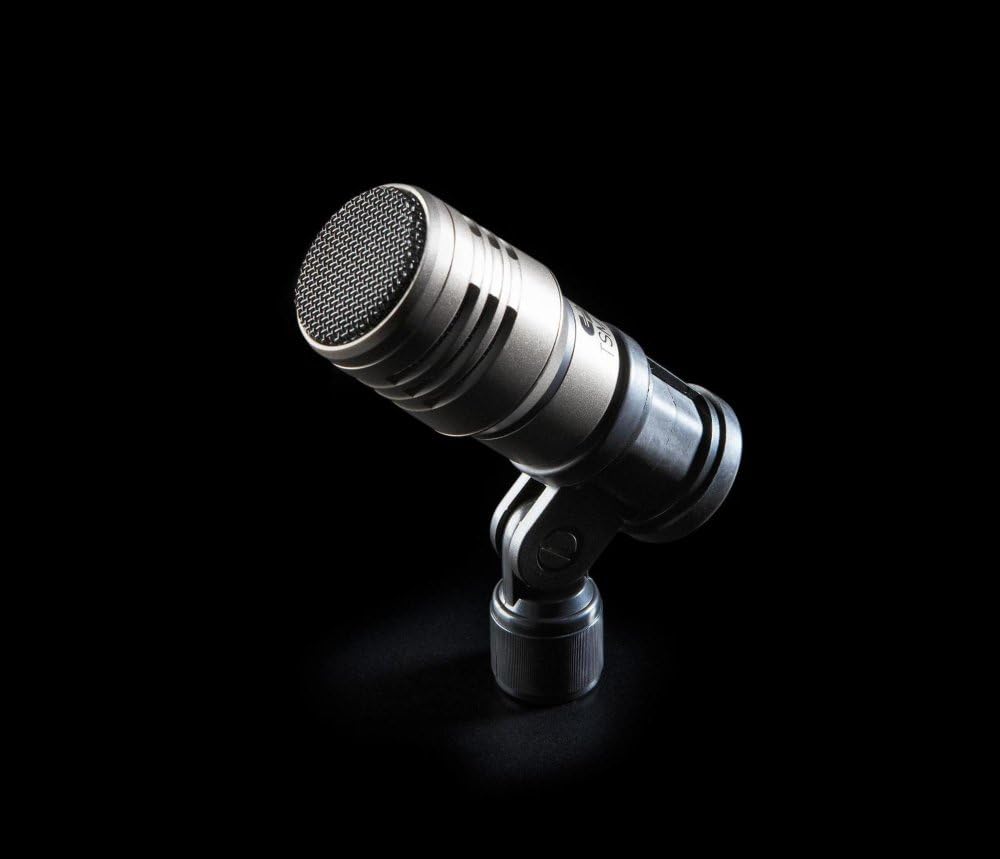
Figure 2: The TSM411 microphone mounted on a stand, showcasing its compact design.
3. Setup
Follow these steps to set up your TSM411 Dynamic Microphone:
- Mounting: Secure the TSM411 microphone onto a compatible microphone stand using the included rubber mic clip. The clip helps to isolate the microphone from stand-borne vibrations.
- Connection: Connect one end of a standard XLR cable (not included) to the XLR 3-pin connector located at the base of the microphone.
- Audio Equipment Connection: Connect the other end of the XLR cable to a compatible audio input on your amplifier, mixer, or audio interface. Ensure the connection is firm and secure.
- Power: The TSM411 is a dynamic microphone and does not require phantom power. Ensure your connected device is powered on.

Figure 3: The base of the TSM411 microphone, highlighting the XLR 3-pin connector for audio input.
4. Operating
To achieve optimal sound capture with your TSM411 microphone:
- Microphone Placement: Position the microphone close to the sound source. For instruments like drums or guitar cabinets, experiment with angles and distances to find the sweet spot that captures the desired tone and minimizes unwanted resonance.
- Utilizing the Super-Cardioid Pattern: The super-cardioid pattern is highly directional. Aim the front of the microphone (the grille) directly at the sound source you wish to capture. This will help to reject sounds coming from the sides and rear, improving isolation and clarity.
- Gain Staging: Adjust the input gain on your mixer or audio interface. Start with the gain low and gradually increase it until you achieve a strong signal level without peaking or distorting.
- Monitoring: Always monitor the sound through headphones or studio monitors to ensure the microphone is capturing the audio as intended and to make any necessary adjustments to placement or gain.

Figure 4: Side view of the TSM411, illustrating its compact form factor suitable for various instrument miking positions.
5. Maintenance
Proper maintenance ensures the longevity and performance of your TSM411 microphone:
- Cleaning: Use a soft, dry cloth to wipe the microphone body. For the grille, a soft brush can remove dust and debris. Avoid using liquid cleaners or solvents directly on the microphone, as they can damage internal components.
- Storage: When not in use, store the microphone in a protective case or bag to shield it from dust, moisture, and physical impact.
- Handling: Always handle the microphone with care. Avoid dropping it or subjecting it to harsh impacts. Do not expose the microphone to extreme temperatures or high humidity.
6. Troubleshooting
If you encounter issues with your TSM411 microphone, consider the following:
- No Sound Output:
- Verify that all XLR cable connections are secure at both the microphone and the audio input device.
- Check the input gain level on your mixer or audio interface; ensure it is not set too low or muted.
- Test with a different XLR cable to rule out a faulty cable.
- Confirm the correct input channel is selected and active on your audio device.
- Poor Sound Quality (Distortion, Low Volume, Hum):
- Adjust the input gain; too much gain can cause distortion, while too little results in low volume.
- Ensure the microphone is positioned correctly relative to the sound source, avoiding excessive proximity that can lead to proximity effect or clipping.
- Check for any physical obstructions on the microphone grille.
- If a hum is present, ensure all audio equipment is properly grounded and that the XLR cable is not running parallel to power cables.
- Test the microphone with a different input channel or audio device to determine if the issue lies with the microphone or other equipment.
7. Specifications
| Microphone Form Factor | Microphone Only |
| Item Dimensions (L x W x H) | 5 x 4 x 3 inches |
| Power Source | Corded Electric |
| Material | Brass |
| Signal-to-Noise Ratio | 74 dB |
| Number of Channels | 1 |
| Frequency Response | 100Hz to 15 kHz |
| UPC | 631922100914 |
| Manufacturer | CAD Microphones |
| Item Model Number | TSM-411 |
| Recommended Uses | Recording |
| Connectivity Technology | XLR |
| Connector Type | XLR 3 pin |
| Special Feature | Clip |
| Compatible Devices | Amplifier, Mixer, Audio Interface |
| Color | Black |
| Included Components | Supercardioid Polar Pattern (referring to the microphone's characteristic) |
| Polar Pattern | Super Cardioid |
| Item Weight | 9.6 ounces |
8. Warranty & Support
For detailed warranty information, product registration, and technical support, please visit the official CAD Audio Store or their official website. It is recommended to register your product to ensure you receive all applicable warranty benefits and support updates.


