
1. Introduction
The Yamaha YRT-304B Tenor Recorder is a musical instrument designed for both experienced players and those new to the tenor recorder. Crafted from durable ABS plastic, it offers a focused, mellow sound that is balanced across all registers. This instrument is pitched in the key of C and features an arched windway, providing enhanced control for nuanced musical expression. This manual provides essential information for the proper assembly, operation, maintenance, and care of your Yamaha YRT-304B Tenor Recorder.
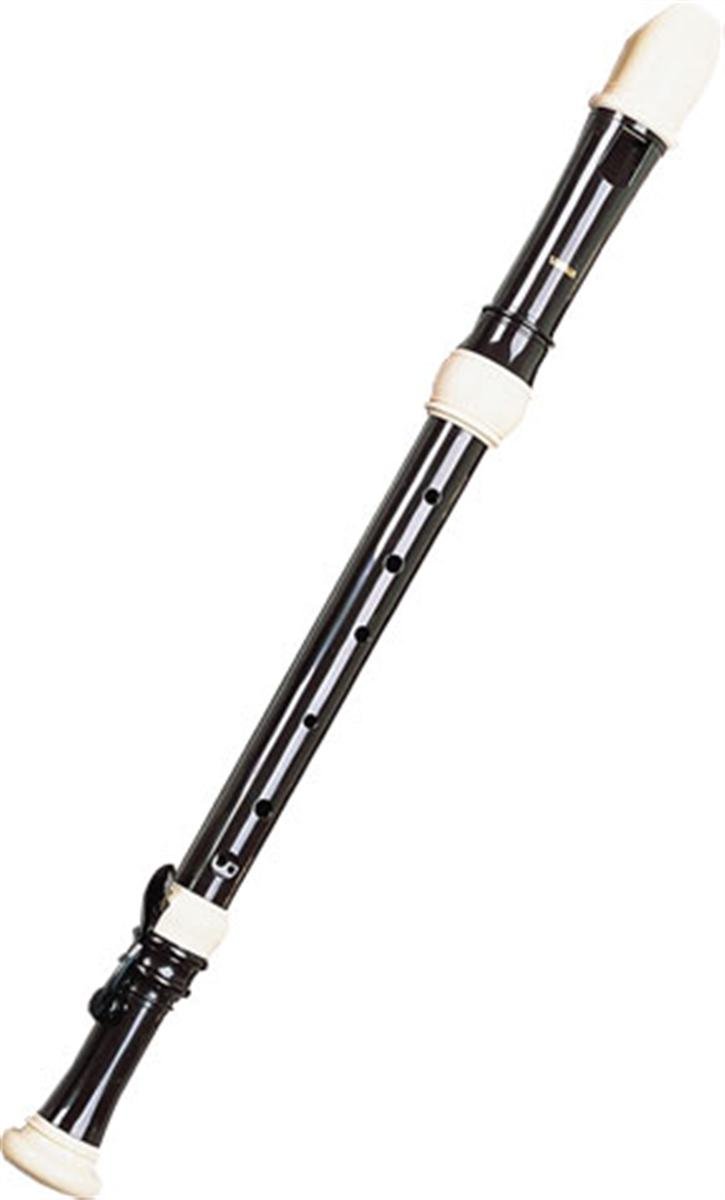
Image 1.1: The Yamaha YRT-304B Tenor Recorder, a three-piece black plastic instrument.
2. Components
The Yamaha YRT-304B Tenor Recorder is a three-piece instrument, designed for easy assembly, cleaning, and transport. Understanding each component is crucial for proper handling and sound production.
- Headjoint (Mouthpiece): This is the top section of the recorder, containing the windway and labium (window) where the sound is produced.
- Middle Joint: The central and longest section of the recorder, featuring most of the finger holes.
- Footjoint: The bottom section, typically with one or two finger holes, often including a double hole for the lowest notes.

Image 2.1: The three main components of the Yamaha YRT-304B Tenor Recorder: headjoint, middle joint, and footjoint.
3. Setup and Assembly
Proper assembly ensures the recorder functions correctly and produces optimal sound. Follow these steps to assemble your YRT-304B Tenor Recorder:
- Prepare the Joints: Ensure all three sections (headjoint, middle joint, footjoint) are clean and free of debris.
- Apply Joint Cream (Optional): If the joints feel stiff or difficult to connect, apply a small amount of recorder joint cream (often included with the instrument) to the cork or plastic tenons. This lubricates the joints and prevents damage.
- Assemble Middle and Footjoint: Gently twist the footjoint onto the middle joint. Align the finger holes of the footjoint with the corresponding holes on the middle joint for comfortable playing.
- Attach Headjoint: Carefully twist the headjoint onto the assembled middle joint. Ensure the labium (window) on the headjoint is aligned with the finger holes on the middle joint.
- Check Alignment: Verify that all sections are securely connected and properly aligned for comfortable finger placement and optimal airflow.
Note: Avoid forcing the joints together, as this can cause damage. If resistance is met, reapply joint cream or gently rotate while pushing.
4. Operating Your Recorder
Playing the tenor recorder requires proper posture, breath control, and finger technique. The YRT-304B's arched windway provides experienced players with greater control over tone and dynamics.
4.1 Holding the Recorder
- Hold the recorder with your left hand at the top (near the headjoint) and your right hand at the bottom.
- Your left thumb covers the thumb hole on the back. Your left index, middle, and ring fingers cover the top three holes on the front.
- Your right thumb supports the recorder from underneath (a thumb rest may be used). Your right index, middle, ring, and pinky fingers cover the remaining holes.
- Ensure all finger holes are completely covered to produce clear notes. The larger size of the tenor recorder may require some practice to comfortably reach all holes.
4.2 Breath Control and Articulation
- Use a steady, gentle stream of air. Avoid blowing too hard, which can cause the note to squeak or be out of tune.
- Articulate notes by gently touching your tongue to the roof of your mouth behind your front teeth, as if saying "doo" or "too."
4.3 Basic Fingering
While specific fingering charts are beyond the scope of this manual, general principles apply:
- Lower notes typically require more holes to be covered.
- Higher notes often require fewer holes covered, or specific half-hole techniques.
- Practice scales and simple melodies to develop finger dexterity and muscle memory.

Image 4.1: A close-up view of the recorder's windway, highlighting the design that influences sound production.
5. Maintenance and Care
Regular maintenance will prolong the life of your recorder and ensure consistent sound quality.
5.1 Cleaning After Each Use
- Swab the Interior: Use the provided cleaning rod with a soft, lint-free cloth (such as an eyeglass cleaning cloth or a cotton sock) to swab out any moisture from the inside of the recorder. Disassemble the recorder into its three parts for thorough cleaning.
- Clean the Windway: Gently wipe the windway (the narrow channel in the headjoint) with a corner of the cloth. Avoid inserting anything sharp or abrasive into the windway, as this can damage the delicate structure and affect the sound.
- Wipe Exterior: Wipe the exterior of the recorder with a soft, dry cloth to remove fingerprints and dust.
5.2 Periodic Deep Cleaning
Since the YRT-304B is made of ABS plastic, it can be washed with mild soap and lukewarm water. Ensure all soap residue is rinsed off thoroughly. Allow all parts to air dry completely before reassembling. Do not use hot water, harsh chemicals, or abrasive cleaners.
5.3 Storage
Store your recorder in its case or a protective pouch when not in use to prevent dust accumulation and accidental damage. Avoid exposing the recorder to extreme temperatures or direct sunlight.
6. Troubleshooting
Here are solutions to common issues you might encounter with your tenor recorder:
- Clogging/Blocked Sound: This is typically caused by moisture buildup in the windway. Disassemble the recorder and thoroughly clean the windway and interior with a cleaning rod and cloth. If persistent, gently blow air through the headjoint from the wider end to dislodge moisture.
- Squeaky or Airy Sound: This often indicates improper breath control (blowing too hard or too softly) or incomplete coverage of finger holes. Ensure all holes are sealed completely by your fingertips and practice a steady, controlled breath.
- Difficulty Reaching Lower Notes (e.g., low C): The tenor recorder has wider finger spacing. This requires practice and finger stretching. Ensure your hands are relaxed and your fingers are curved to cover the holes effectively. If persistent, consider consulting a music instructor for technique guidance.
- Joints are Stiff/Hard to Assemble: Apply a small amount of recorder joint cream to the tenons (the parts that connect). If you don't have joint cream, a very small amount of petroleum jelly can be used as a temporary measure.
7. Specifications
| Model Name | YRT-304B |
| Brand | Yamaha |
| Instrument Key | C |
| Material | ABS Plastic |
| Construction | 3-piece |
| Color | Black |
| Item Weight | 1.1 pounds |
| Item Dimensions | 2 x 2 x 14 inches |
| UPC | 086792572550 |

Image 7.1: ABS plastic pellets, the durable material used in the construction of the YRT-304B recorder.
8. Warranty Information
Your Yamaha YRT-304B Tenor Recorder is covered by a 1-year manufacturer warranty from Yamaha Corporation of America. Yamaha is committed to the quality and craftsmanship of its products. This limited warranty applies only to products purchased from an authorized Yamaha retailer within the fifty United States (including the District of Columbia) and used in this area. Authorized retailers are equipped with sales and service support materials and training not readily available to non-authorized retailers. For detailed information regarding the terms and conditions of your warranty, please refer to the official Yamaha website or contact an authorized Yamaha service center.
9. Support and Contact
For further assistance, technical support, or inquiries regarding your Yamaha YRT-304B Tenor Recorder, please utilize the following resources:
- Yamaha Official Website: Visit the official Yamaha musical instruments website for product information, FAQs, and support contacts.
- Authorized Yamaha Retailers: Your purchasing retailer can often provide immediate assistance and guidance.
- Yamaha Customer Service: Refer to the Yamaha website for direct customer service contact information, including phone numbers and email support.
When contacting support, please have your model number (YRT-304B) and purchase date available.
