
Introduction
Thank you for purchasing the Norpro Meat Grinder, Mincer and Pasta Maker. This versatile kitchen tool is designed to simplify your food preparation tasks, allowing you to grind meats, mince ingredients, and create fresh pasta with ease. Please read this manual thoroughly before first use to ensure proper assembly, operation, and maintenance. Keep this manual for future reference.
Product Features & Included Components
- Two grinding screens: coarse and fine, for various textures.
- Three pasta attachments: rigatoni, spaghetti, and linguine, for homemade pasta.
- Sausage funnel attachment for easy sausage stuffing.
- Secure suction base with a locking key for stability during use.
- Includes recipes and instructions for various applications.
The product includes the main grinder unit, a handle, a food pusher, two grinding screens (coarse and fine), three pasta attachments, and a sausage funnel.

Image: The Norpro Meat Grinder, Mincer and Pasta Maker shown with all its components and attachments.
Safety Information
- Always ensure the unit is securely attached to a clean, smooth, non-porous surface using the suction base before operation.
- Keep fingers and utensils away from moving parts and blades during operation. Use the provided food pusher to guide ingredients.
- Do not attempt to grind bones or other hard, non-food items, as this can damage the unit.
- Keep out of reach of children.
- Wash all parts thoroughly before first use and after each subsequent use.
Assembly
Before assembly, ensure all parts are clean and dry. Refer to the video below for a visual guide to assembly.
- Attach the main body of the grinder to a clean, smooth countertop by pressing down and turning the locking key on the suction base to the 'LOCK' position.
- Insert the auger (spiral shaft) into the transparent housing.
- Place the desired blade onto the end of the auger, ensuring it is facing the correct direction (sharp edges outward).
- Place the chosen grinding screen (coarse or fine) or pasta attachment over the blade.
- Secure the front cap by twisting it clockwise until it is tight.
- Insert the crank handle into the designated slot and secure it by tightening the knob.

Image: All components of the Norpro Meat Grinder laid out before assembly.
Assembly Video
Video: Official Norpro product video demonstrating the assembly of the meat grinder (0:05 - 0:43).
Operating Instructions
Meat Grinding
- Prepare meat by cutting it into small pieces that fit easily into the feed tube. Remove any bones or tough sinews.
- Ensure the coarse or fine grinding screen is installed.
- Place a bowl or container under the grinder's output.
- Feed the meat into the hopper and use the food pusher to gently guide it down towards the auger.
- Turn the crank handle clockwise to begin grinding.
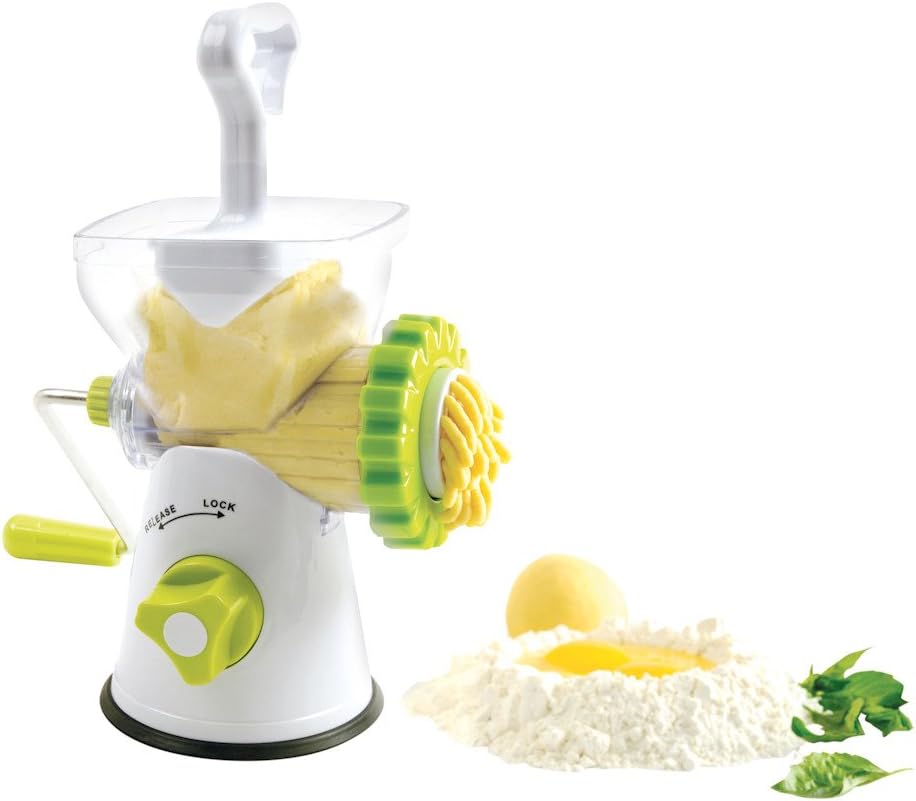
Image: The Norpro Meat Grinder actively grinding meat into a bowl.
Pasta Making
- Prepare your pasta dough according to your recipe. The dough should be firm but pliable.
- Install one of the three pasta attachments (rigatoni, spaghetti, or linguine) in place of the grinding screen.
- Feed small portions of dough into the hopper.
- Turn the crank handle clockwise to extrude the pasta. Cut the pasta to your desired length as it emerges.

Image: The Norpro Meat Grinder extruding fresh pasta.
Sausage Stuffing
- Prepare your seasoned ground meat mixture.
- Install the sausage funnel attachment.
- Carefully slide the casing onto the sausage funnel, gathering it at the base.
- Feed the ground meat mixture into the hopper and turn the crank handle. The meat will fill the casing.
- Guide the casing as it fills, ensuring it is evenly stuffed without air pockets. Twist or tie the casing at intervals to form links.

Image: The Norpro Meat Grinder with the sausage funnel attachment, alongside prepared sausages.
Dry Saltery (Grinding Nuts, Biscuits, Dried Chili)
The Norpro Meat Grinder can also be used to process various dry ingredients. Ensure the appropriate grinding screen (coarse or fine) is installed based on your desired texture.
- Place the dry ingredients (e.g., almonds, peanuts, biscuits, dried chili) into the hopper.
- Use the food pusher to gently guide the ingredients towards the auger.
- Turn the crank handle clockwise to grind the ingredients.
Operation Video
Video: Official Norpro product video demonstrating various operations including meat grinding (0:44 - 1:38), dry saltery (1:44 - 2:28), and sausage stuffing (2:29 - 2:35).
Cleaning and Maintenance
- After each use, disassemble the grinder by reversing the assembly steps.
- Wash all parts immediately in warm, soapy water. Use a brush to remove any food residue from the screens and blades.
- Rinse thoroughly and dry all parts completely before storing.
- Do not use abrasive cleaners or scouring pads, as these can scratch the surfaces.
- Store the disassembled parts in a dry place.
Troubleshooting
- Unit not suctioning to surface: Ensure the countertop is clean, smooth, and dry. Press down firmly on the unit while turning the locking key.
- Difficulty grinding/mincing: Ensure meat is cut into small, manageable pieces and free of bones or tough connective tissue. Do not overfill the hopper.
- Pasta not extruding properly: Check that the pasta dough consistency is correct (not too wet or too dry). Ensure the pasta attachment is correctly installed.
- Sausage casing tearing: Ensure the casing is properly lubricated (e.g., soaked in water) and that you are not overstuffing it.
Specifications
- Brand: Norpro
- Model: B0002I5QHW
- Item Weight: 2.2 Pounds
- Power Source: Manual
- Included Components: Two screens (coarse and fine mincing plates), three pasta attachments, sausage funnel.
- Material: Plastic body with stainless steel blades.
Warranty and Support
For warranty information or product support, please refer to the packaging or contact Norpro customer service directly. Contact details can typically be found on the product packaging or the official Norpro website.