1. Introduction
The EasyHeat ADKS-400 80-foot Roof Deicing Cable is engineered to prevent the formation of ice dams on inclined roofs with tab shingles, as well as in gutters and downspouts. Ice dams can cause significant water damage to your home by preventing melting snow from draining properly. This pre-assembled cable provides a clear path for melting water to flow off the roof, mitigating potential damage from ice and snow buildup. This product is not intended for use as a snow melting system to clear an entire roof of ice and snow.

The EasyHeat ADKS-400 80-foot Roof Deicing Cable, shown in its retail packaging, ready for installation. This cable is designed to prevent ice dams on roofs and in gutters.
2. Safety Information
Read and understand all instructions before installing or operating this product. Failure to follow these instructions may result in electric shock, fire, or property damage.
- Always disconnect power before installing, servicing, or performing maintenance on the deicing cable.
- This product must be connected to a Ground Fault Circuit Interrupter (GFCI) protected outlet.
- Do not cut, splice, or modify the heating cable or power cord.
- Ensure the cable is properly secured with the provided mounting clips to prevent damage from wind or movement.
- Do not install the cable in standing water or areas where it may be submerged.
- Keep children and pets away from the installed cable.
- Refer to local electrical codes and regulations for proper installation. If unsure, consult a qualified electrician.
- Do not use the cable if it appears damaged or frayed.
3. Package Contents
Verify that all components are present before beginning installation:
- EasyHeat ADKS-400 80-foot Roof Deicing Cable with pre-assembled power cord and plug.
- Mounting clips (appropriate quantity for installation).
- Instruction Manual (this document).
4. Installation Instructions
The EasyHeat ADKS-400 cable is designed for straightforward, pre-assembled installation. Proper planning and secure fastening are crucial for effective operation and longevity.
4.1 Planning the Layout
- Determine the areas prone to ice dam formation, typically roof edges, gutters, and downspouts.
- Measure the total length required, ensuring the 80-foot cable is sufficient for your application.
- Plan the cable path to ensure it reaches a GFCI-protected outdoor electrical outlet without excessive tension or stretching.
4.2 Roof Edge Installation
- For roof edges, install the cable in a zig-zag or loop pattern along the lower edge of the roof, extending approximately 18-24 inches up the roof and into the gutter.
- Secure the cable to the shingles using the provided mounting clips. Ensure clips are evenly spaced and hold the cable firmly without pinching or damaging it.
- Maintain a minimum spacing of 2 inches between parallel cable runs on the roof.
4.3 Gutter and Downspout Installation
- Run the cable along the bottom of the gutter. For optimal performance, consider running two rows within the gutter, back and forth, securing it to the gutter's top edge with clips.
- Extend the cable into the downspout. For effective drainage, run the cable in a double thickness (looping it back on itself) all the way down the downspout to ensure water can drain freely.
- Use clips to secure the cable within the gutter and downspout, preventing it from shifting or becoming dislodged.
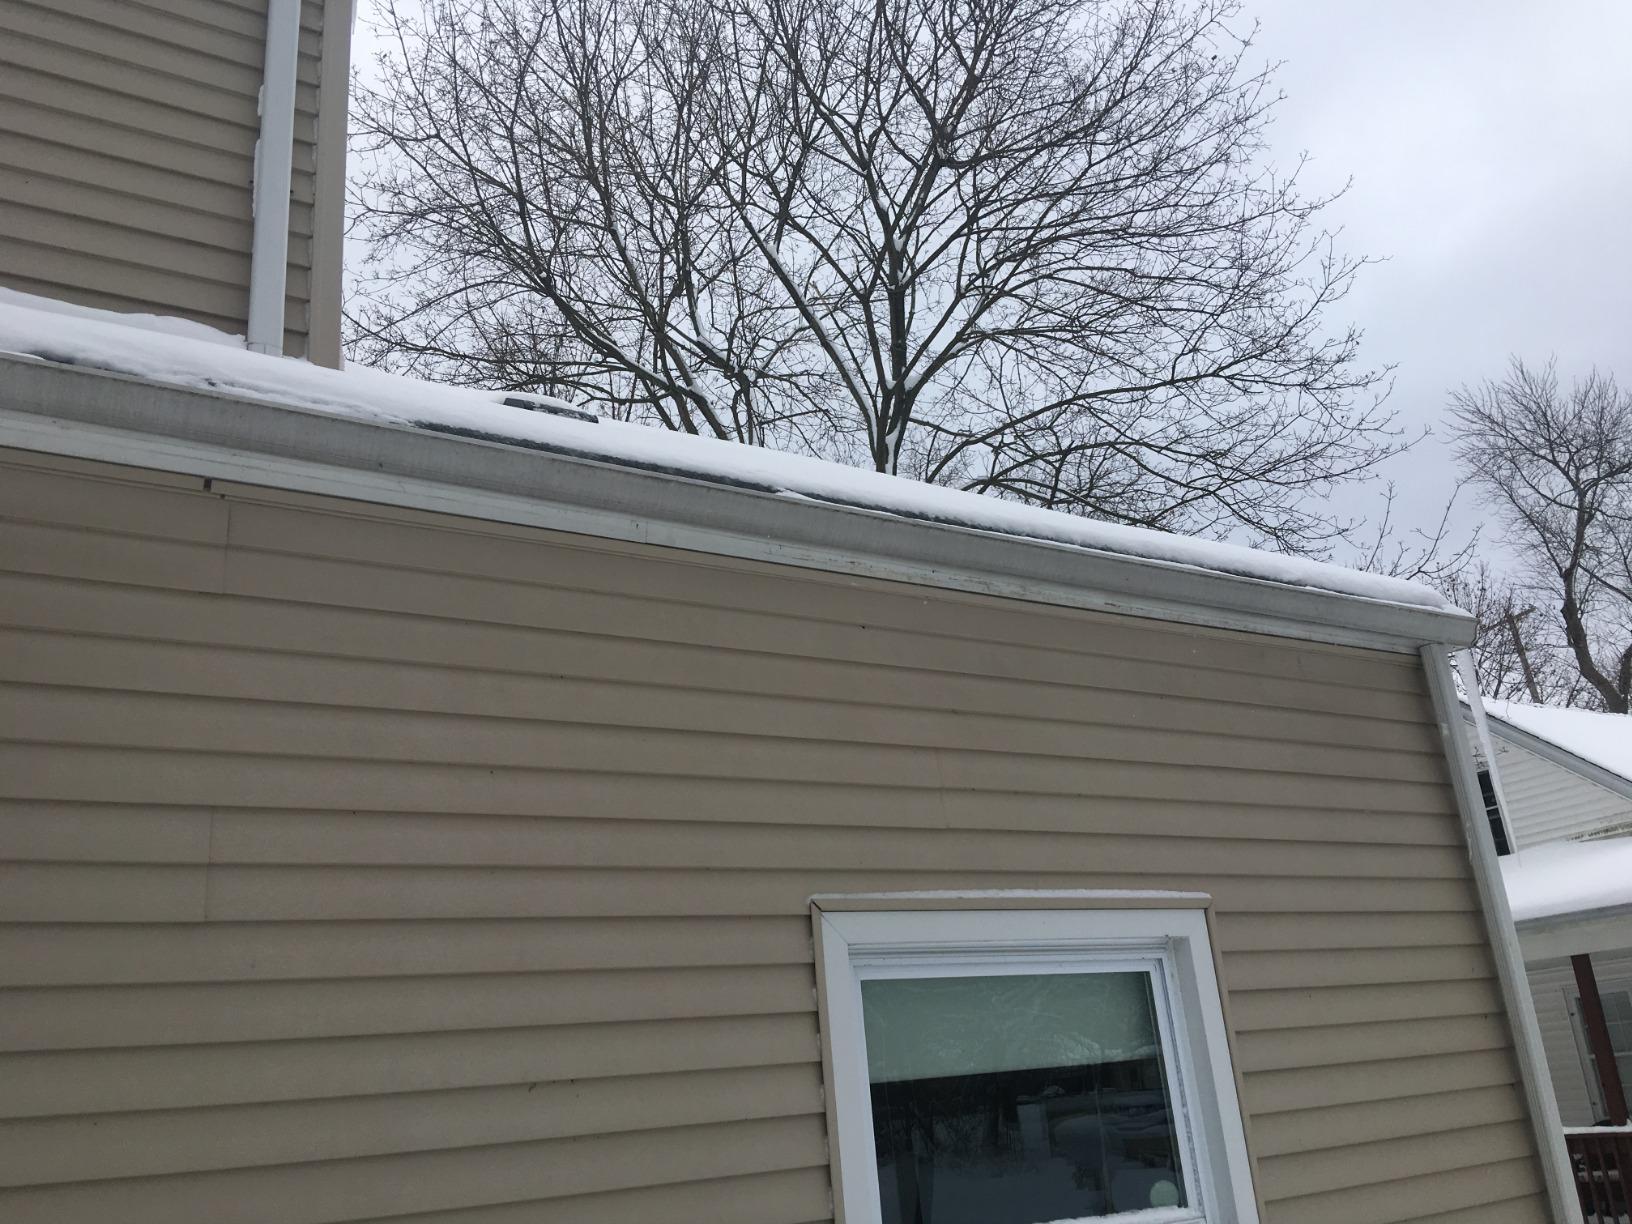
An example of the EasyHeat deicing cable installed within a gutter, demonstrating effective ice prevention with water visibly flowing through the downspout, even in cold conditions.
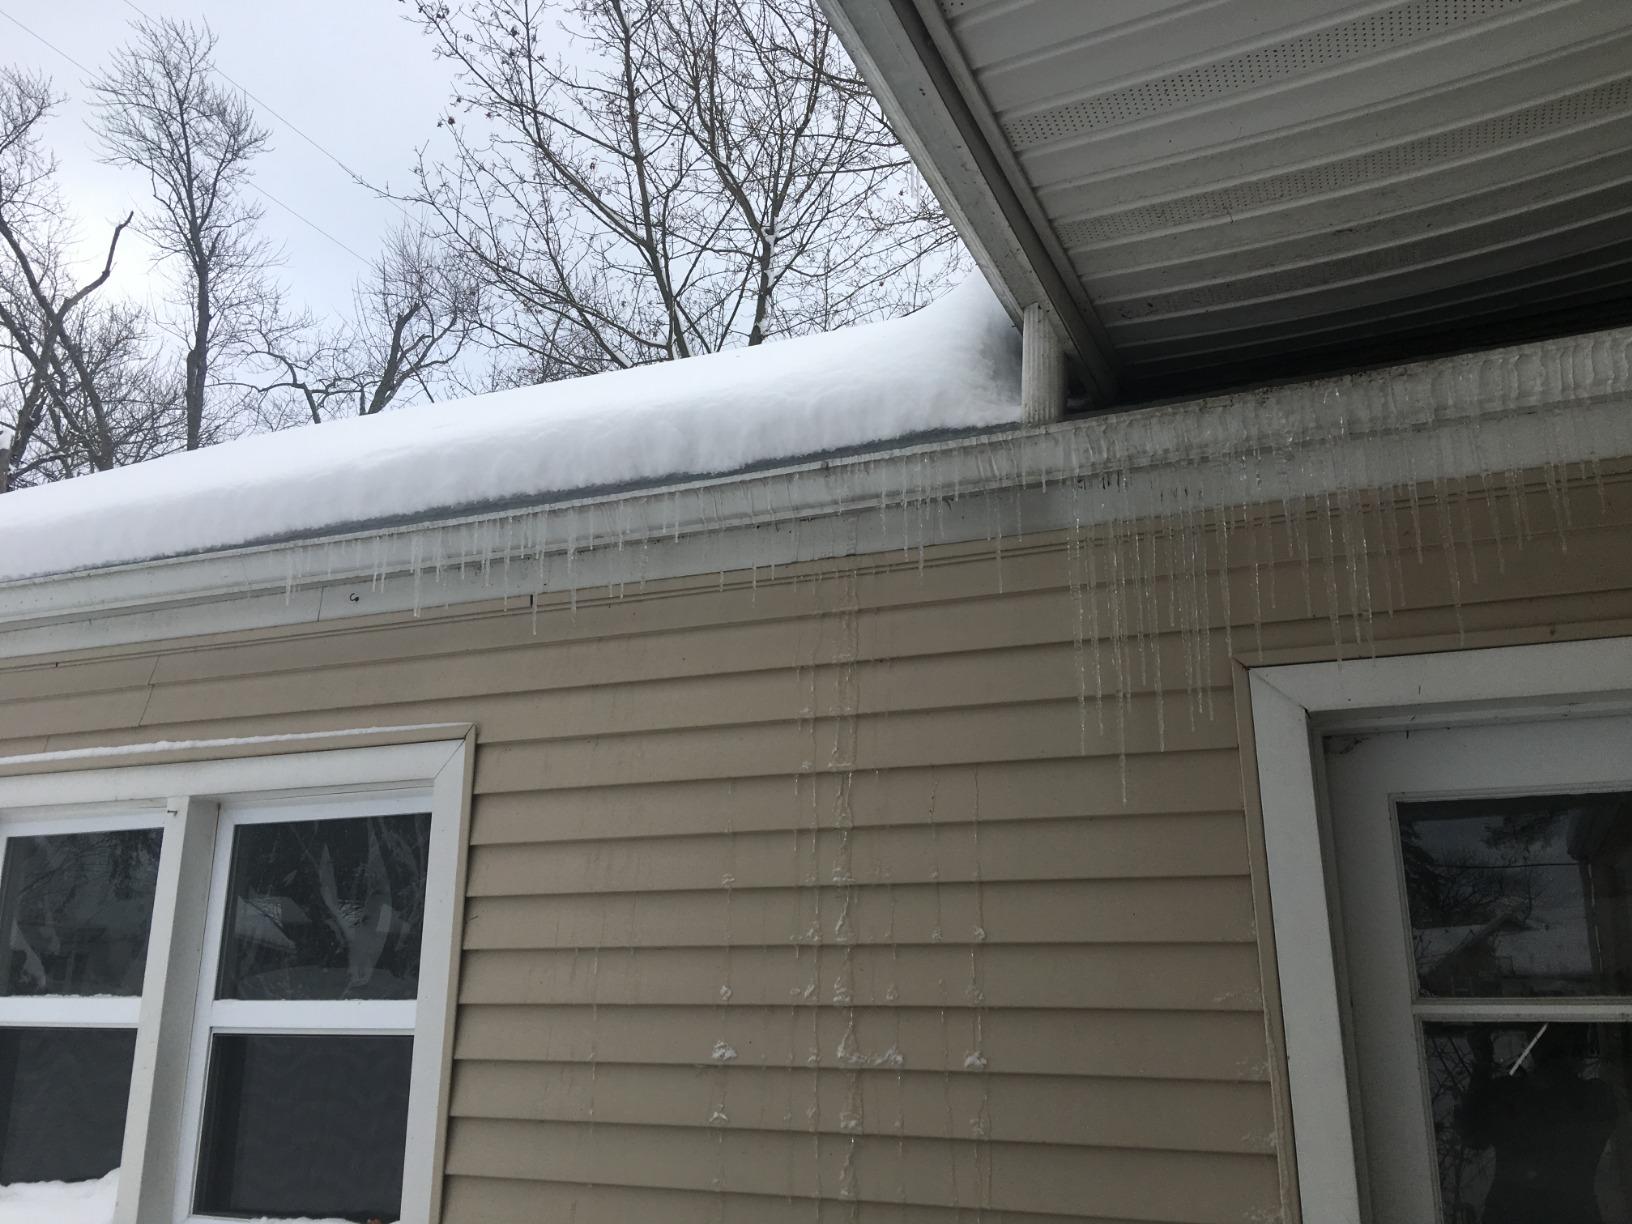
A comparison image showing significant ice buildup on a garage gutter where no deicing cable is installed, highlighting the problem the EasyHeat cable is designed to solve.
4.4 Electrical Connection
- Once the cable is fully installed and secured, plug the pre-assembled power cord into a standard 120V AC GFCI-protected outdoor electrical outlet.
- Ensure the outlet cover is weather-resistant and properly closed to protect the connection from moisture.
5. Operating Instructions
The EasyHeat ADKS-400 deicing cable is designed for simple operation once installed.
- Activation: Plug the cable into a GFCI-protected outlet. The cable will begin to heat when the ambient temperature drops to a level where ice formation is likely.
- Optimal Use: For best results, activate the deicing cable before significant snow or ice accumulation is expected. This allows the cable to maintain a clear path for melting water from the outset.
- Energy Efficiency: To minimize electricity consumption, consider using an external timer or a smart plug to operate the cable only during periods when ice formation is a risk (e.g., during and immediately after snowfall, or when temperatures are consistently below freezing).
- Deactivation: Unplug the cable from the outlet when winter conditions subside and the risk of ice dams is no longer present.
6. Maintenance
Regular inspection and basic maintenance will ensure the longevity and effective performance of your deicing cable.
- Annual Inspection: Before each winter season, inspect the entire length of the cable, power cord, and plug for any signs of damage, fraying, cuts, or wear.
- Clip Security: Verify that all mounting clips are securely fastened and the cable remains firmly in place on the roof, in gutters, and downspouts. Replace any loose or broken clips.
- Gutter Clearance: Keep gutters and downspouts clear of leaves, twigs, and other debris that could impede water flow or damage the cable.
- Avoid Covering: Do not paint, cover, or insulate the deicing cable, as this can lead to overheating and damage.
- Storage: If removing the cable for off-season storage, clean it thoroughly and store it in a dry, protected area away from direct sunlight and extreme temperatures.
7. Troubleshooting
If you encounter issues with your EasyHeat deicing cable, refer to the following troubleshooting guide:
| Problem | Possible Cause | Solution |
|---|---|---|
| Cable is not heating. |
|
|
| Ice dams still forming. |
|
|
| High electricity consumption. |
|
|
8. Specifications
| Feature | Detail |
|---|---|
| Model Number | ADKS-400 |
| Cable Length | 80 feet |
| Power Output | 400 Watts |
| Voltage | 120V AC |
| Product Dimensions (Packaged) | 6 x 8 x 8 inches |
| Item Weight (Packaged) | 2.6 pounds |
| Manufacturer | Easy Heat |
9. Warranty and Support
For specific warranty information, please refer to the documentation included with your product packaging or visit the official Easy Heat website. If you require technical assistance or have questions not covered in this manual, please contact Easy Heat customer support directly.
Note: Product specifications and features are subject to change without notice.