
1. Introduction
This manual provides essential information for the safe and efficient operation of your ViewSonic VG700 17-inch LCD Monitor. The VG700 combines outstanding screen images and multimedia performance in a stylish package, featuring a high 450:1 contrast ratio, 260 nits of brightness, and a fast video response time for superior picture clarity. Please read this manual thoroughly before using the monitor and keep it for future reference.
2. Safety Information
- Always place the monitor on a stable, flat surface to prevent it from falling.
- Ensure proper ventilation around the monitor. Do not block ventilation openings.
- Use only the power cord and adapter supplied with the monitor.
- Do not expose the monitor to rain or moisture to avoid fire or shock hazards.
- Unplug the monitor from the power outlet before cleaning.
- Do not attempt to service the monitor yourself. Refer all servicing to qualified service personnel.
3. Package Contents
Verify that all items are present in your package:
- ViewSonic VG700 17-inch LCD Monitor
- Power Cable
- VGA Cable (D-Sub)
- Audio Cable (for integrated speakers)
- User Manual (this document)
4. Setup
Follow these steps to set up your ViewSonic VG700 monitor:
- Position the Monitor: Place the monitor on a stable, flat surface at a comfortable viewing distance.
-
Connect Video Cable: Connect one end of the VGA cable to the VGA port on your computer's graphics card and the other end to the VGA input port on the back of the VG700 monitor. Secure the connection by tightening the screws on the cable connectors.
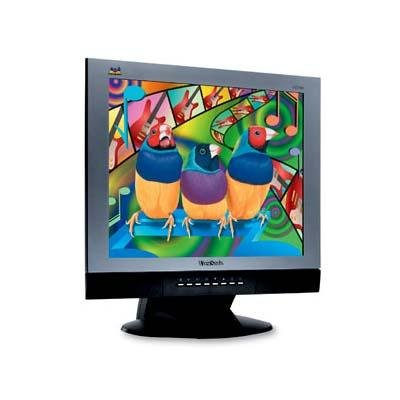
Image 1: Front view of the ViewSonic VG700 monitor, illustrating its compact design and integrated stand. This image helps in identifying the product during setup.
- Connect Audio Cable (Optional): If you wish to use the integrated speakers, connect the audio cable from your computer's audio output jack to the audio input jack on the monitor.
- Connect Power Cable: Plug the power cable into the monitor's power input port, then plug the other end into a grounded electrical outlet.
- Power On: Press the power button on the front of the monitor. Then, power on your computer. The monitor should automatically detect the input signal.
5. Operating Instructions
5.1 On-Screen Display (OSD) Controls
The OSD menu allows you to adjust various display settings. The control buttons are typically located on the front or bottom bezel of the monitor.
- Power Button: Turns the monitor on or off.
- Menu Button: Opens the OSD menu.
- Up/Down Arrows: Navigate through menu options and adjust values.
- Select/Enter Button: Confirms a selection or enters a sub-menu.
- AutoTune Button: Automatically optimizes display settings for the best picture.
5.2 Adjusting Display Settings
To adjust settings such as brightness, contrast, color temperature, and input source:
- Press the Menu button to open the OSD.
- Use the Up/Down arrow buttons to navigate to the desired setting (e.g., Picture, Color).
- Press the Select/Enter button to enter the sub-menu.
- Use the Up/Down arrow buttons to adjust the value or select an option.
- Press the Menu button again to exit the OSD.
6. Maintenance
6.1 Cleaning the Screen
To clean the screen, gently wipe it with a soft, lint-free cloth. For stubborn marks, dampen the cloth slightly with water or a mild, non-abrasive screen cleaner. Do not spray cleaner directly onto the screen.
6.2 Cleaning the Casing
Wipe the monitor casing with a soft, dry cloth. Avoid using strong detergents or abrasive cleaners, as they can damage the finish.
7. Troubleshooting
| Problem | Possible Solution |
|---|---|
| No image on screen |
|
| Poor image quality (blurry, distorted) |
|
| No sound from speakers |
|
8. Specifications
| Feature | Specification |
|---|---|
| Model Name | VG700 |
| Screen Size | 17 Inches |
| Panel Type | TFT Active Matrix LCD |
| Optimal Resolution | 1280 x 1024 (SXGA) |
| Contrast Ratio | 450:1 |
| Brightness | 260 nits |
| Viewing Angles (H/V) | 140 degrees / 135 degrees |
| Integrated Speakers | Two 3-watt speakers |
| Compatibility | PC and Mac compatible |
| Wall Mount Compliant | Yes |
| Item Weight | 5 kg |
9. Warranty and Support
ViewSonic products are manufactured to the highest standards and deliver high-quality performance. For specific warranty details, please refer to the warranty card included with your product or visit the official ViewSonic website. For technical support or service inquiries, please contact ViewSonic customer service through their official channels.


