1. Introduction
This manual provides comprehensive instructions for the safe and effective use of the Fluke 620 CableMeter. The Fluke 620 is a robust multi-tester designed for accurately measuring cable current and performing various network testing functions. Please read this manual thoroughly before operating the device.
1.1 Safety Information
Always observe standard safety precautions when working with electrical equipment. Ensure the device is used within its specified operating conditions. Do not attempt to open or repair the device yourself, as this may void the warranty and pose a safety risk. Refer all servicing to qualified personnel.
2. Product Features
- Measures Cable Current: Accurately measures up to 600-amp cable current for electrical testing and troubleshooting.
- Durable and Rugged: Durable plastic housing with IP-67 rating protects against dust and water splashes.
- Easy to Use: Simple front-panel display shows current readings in amps or milliamps.
- Compact and Portable: Slim design with built-in stand allows for handheld or desktop use.
- Trusted Brand: From Fluke Networks, a leader in electrical testing and diagnostic tools.
3. Components and Controls

Figure 3.1: Front view of the Fluke 620 CableMeter. This image displays the LCD screen, the 'SETUP', 'UP/DOWN arrow', and 'ENTER' buttons, and the central rotary switch with 'OFF', 'TEST', 'LENGTH', and 'WIRE MAP' positions.
3.1 Front Panel Overview
- LCD Display: Shows measurement readings, menu options, and status indicators.
- SETUP Button: Accesses the device's configuration menu.
- Up/Down Arrow Buttons: Navigates through menu options and adjusts settings.
- ENTER Button: Confirms selections or enters a specific mode.
- Rotary Switch: Selects the operating mode:
- OFF: Powers off the device.
- TEST: Initiates a cable test.
- LENGTH: Measures the length of the cable.
- WIRE MAP: Displays the wiring configuration of the cable.
4. Setup
4.1 Battery Installation
The Fluke 620 CableMeter requires batteries for operation. Follow these steps to install or replace the batteries:
- Ensure the device is powered off by setting the rotary switch to 'OFF'.
- Locate the battery compartment cover on the rear of the device.
- Open the battery compartment cover.
- Insert the required batteries, observing the correct polarity (+/-) as indicated inside the compartment.
- Securely close the battery compartment cover.
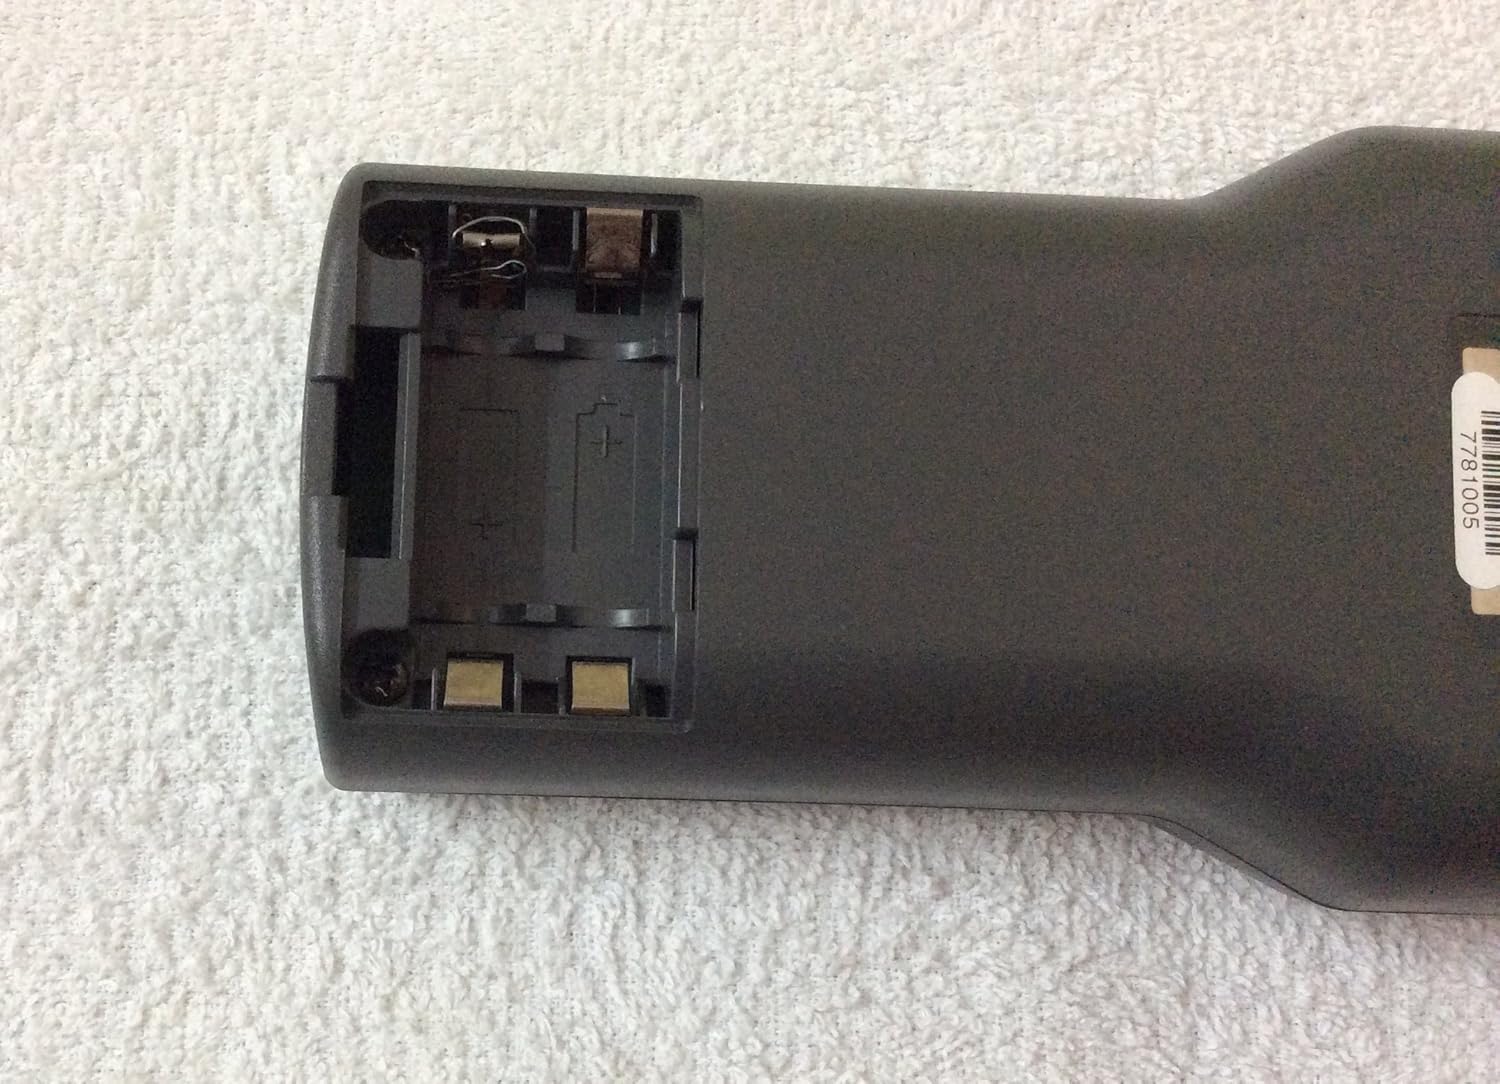
Figure 4.1: Rear view of the Fluke 620 CableMeter with the battery compartment open. This image shows the empty battery slots and the internal contacts. A label with the identifier "7781005" is visible on the casing.
5. Operating Instructions
5.1 Powering On/Off
To power on the device, rotate the central switch from 'OFF' to any desired operating mode (TEST, LENGTH, or WIRE MAP). To power off, rotate the switch back to 'OFF'.
5.2 Basic Cable Testing (TEST Mode)
- Connect the cable to be tested to the appropriate ports on the Fluke 620 CableMeter (refer to device ports for specific connections).
- Rotate the central switch to 'TEST'.
- The device will automatically begin testing or prompt you to press 'ENTER' to start.
- Observe the results on the LCD display.
5.3 Cable Length Measurement (LENGTH Mode)
- Connect the cable to the device.
- Rotate the central switch to 'LENGTH'.
- The device will measure and display the cable's length.
5.4 Wire Map Testing (WIRE MAP Mode)
- Connect the cable to the device.
- Rotate the central switch to 'WIRE MAP'.
- The display will show the pin-to-pin wiring configuration, indicating any open, short, or crossed wires.
5.5 Using the SETUP Menu
Press the 'SETUP' button to access various settings such as measurement units, backlight, and calibration options. Use the 'Up/Down' arrow buttons to navigate and 'ENTER' to select or confirm changes.
6. Maintenance
6.1 Cleaning
Wipe the device with a soft, damp cloth. Do not use abrasive cleaners or solvents. Ensure the device is dry before storage or next use.
6.2 Battery Replacement
Replace batteries when the low battery indicator appears on the display. Refer to Section 4.1 for battery installation instructions.
6.3 Storage
Store the Fluke 620 CableMeter in a cool, dry place away from direct sunlight and extreme temperatures. If storing for extended periods, remove the batteries to prevent leakage.
7. Troubleshooting
| Problem | Possible Cause | Solution |
|---|---|---|
| Device does not power on. | Dead or incorrectly installed batteries. | Check battery polarity; replace batteries if necessary. |
| Inaccurate readings. | Poor cable connection; damaged cable; incorrect settings. | Ensure cables are securely connected. Inspect cables for damage. Check settings in the SETUP menu. |
| Display is blank or dim. | Low battery; backlight setting. | Replace batteries. Adjust backlight setting in the SETUP menu. |
If the problem persists after attempting these solutions, please contact Fluke Networks customer support.
8. Specifications
| Specification | Value |
|---|---|
| Manufacturer | FLUKE NETWORKS |
| Part Number | 620 |
| Item Weight | 1.95 pounds |
| Package Dimensions | 10.4 x 7.3 x 4.3 inches |
| Item Model Number | 620 |
| Style | Classic |
| IP Rating | IP-67 (Dust and water splash protection) |
| Date First Available | February 17, 2007 |
9. Warranty and Support
The Fluke 620 CableMeter is backed by Fluke Networks' commitment to quality. For specific warranty details, please refer to the warranty card included with your product or visit the official Fluke Networks website.
For technical support, service, or to purchase accessories, please contact Fluke Networks customer service. You can find contact information on their official website or through the Fluke Networks Store on Amazon.


