1. Introduction
This manual provides instructions for the safe and effective use of your Olympus C-3000 3.2MP Digital Camera. Please read this manual thoroughly before using the camera and keep it in a safe place for future reference.
The Olympus C-3000 Zoom is a 3.2-megapixel digital camera featuring a 3x optical zoom lens and 2x digital zoom. It offers various shooting modes, including aperture and shutter priority, manual exposure, and creative image effects.

Image 1.1: Front view of the Olympus C-3000 Digital Camera. The camera is gray and black, with the lens extending from the front. The flash and viewfinder are visible on the upper left.
2. Camera Components
Familiarize yourself with the main components of your camera.
2.1 Front View
- Lens: 3x optical zoom lens (32-96mm equivalent).
- Flash: Built-in flash unit.
- Viewfinder: Optical viewfinder for framing shots.
- Self-Timer Lamp: Indicates self-timer operation.
2.2 Rear View

Image 2.1: Rear view of the Olympus C-3000 Digital Camera. The LCD screen is prominent in the center, with control buttons and a directional pad to the right.
- LCD Monitor: 1.8-inch display for viewing images and menu navigation.
- Control Buttons: Various buttons for menu access, playback, and settings adjustment.
- Directional Pad: For navigating menus and selecting options.
- Viewfinder Eyepiece: For composing shots.
2.3 Side View (Memory Card Slot)
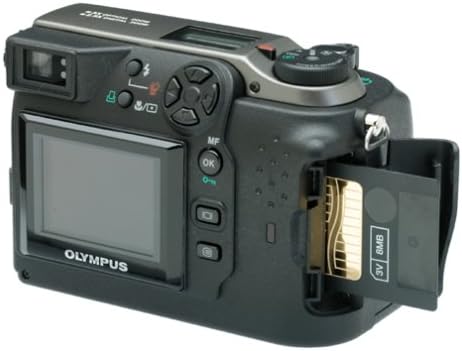
Image 2.2: Side view of the Olympus C-3000 Digital Camera with the SmartMedia card slot open, showing an 8MB card inserted.
- SmartMedia Card Slot: For inserting and removing SmartMedia memory cards.
- USB Port: For connecting the camera to a computer.
3. Setup
3.1 Battery Installation
The camera operates on four AA batteries or two disposable lithium batteries. Ensure batteries are inserted with correct polarity.
- Open the battery compartment cover located on the bottom or side of the camera.
- Insert four AA batteries or two lithium batteries, matching the (+) and (-) indicators inside the compartment.
- Close the battery compartment cover securely.
Note: Using rechargeable NiMH batteries is recommended for extended use.
3.2 Memory Card Installation
The camera uses SmartMedia cards for image storage. An 8 MB SmartMedia card is typically included.
- Locate the SmartMedia card slot cover on the side of the camera (refer to Image 2.2).
- Open the cover.
- Insert the SmartMedia card with the correct orientation until it clicks into place.
- Close the cover securely.
Caution: Do not force the card. Incorrect insertion can damage the card or camera.
3.3 Initial Power On
After installing batteries and a memory card, you can power on the camera.
- Remove the lens cap.
- Slide the power switch to the "ON" position. The lens will extend.
- The LCD monitor will display the current settings.
Important: Always remove the lens cap before turning on the camera to prevent damage to the lens mechanism.
4. Operating the Camera
4.1 Basic Photography
To take a picture:
- Turn on the camera.
- Select your desired shooting mode using the mode dial (e.g., Program, Aperture Priority, Shutter Priority, Manual).
- Frame your shot using the optical viewfinder or the LCD monitor.
- Press the shutter button halfway down to activate autofocus and exposure.
- Once focus is achieved (indicated by a green light or beep), press the shutter button fully to capture the image.
4.2 Zoom Function
The camera features a 3x optical zoom and 2x digital zoom.
- Optical Zoom: Use the zoom lever (typically around the shutter button) to zoom in (telephoto) or out (wide-angle). Optical zoom maintains image quality.
- Digital Zoom: If enabled, digital zoom extends beyond the optical zoom range. Note that digital zoom can reduce image quality.
4.3 Flash Modes
The built-in flash offers several modes to suit different lighting conditions.
- Auto Flash: Camera automatically determines if flash is needed.
- Red-Eye Reduction: Emits pre-flashes to reduce red-eye effect.
- Fill Flash: Forces the flash to fire, useful for brightening shadows in bright conditions.
- Flash Off: Disables the flash.
- Slow Synch: Combines flash with a slow shutter speed for balanced exposure of subject and background in low light.
Refer to the camera's menu for selecting flash modes.
4.4 Exposure Control
The C-3000 offers comprehensive exposure control:
- Program (P) Mode: Camera sets both aperture and shutter speed for optimal exposure.
- Aperture Priority (A) Mode: You set the aperture (f-number), and the camera sets the shutter speed. Controls depth of field.
- Shutter Priority (S) Mode: You set the shutter speed, and the camera sets the aperture. Controls motion blur.
- Manual (M) Mode: You set both aperture and shutter speed.
4.5 White Balance
White balance adjusts color tones to appear natural under different light sources. The camera features an automatic white balance setting.
- Auto White Balance: Camera automatically detects and adjusts for the light source.
4.6 Self-Timer
The self-timer allows for a delay before the shutter fires, typically 10 seconds.
- Activate the self-timer function via the camera's menu.
- Press the shutter button. The self-timer lamp will blink, and a countdown will begin.
- The picture will be taken after the set delay.
4.7 Video Recording
The camera can record short video clips (MJPEG format) at 15 frames per second at resolutions up to 320x240.
- Switch the camera to video mode (if available via mode dial or menu).
- Press the shutter button to start recording.
- Press the shutter button again to stop recording.
4.8 Image Playback
To review captured images and videos:
- Switch the camera to playback mode (usually indicated by a play icon).
- Use the directional pad to navigate through images.
- Press the "OK" button or a dedicated playback button to view details or play videos.
4.9 Connecting to a Computer
Transfer images to your computer using the provided USB cable.
- Ensure the camera is turned off.
- Connect one end of the USB cable to the camera's USB port.
- Connect the other end to a USB port on your computer.
- Turn on the camera. Your computer should recognize the camera as a removable storage device.
- Follow your computer's instructions to transfer files.
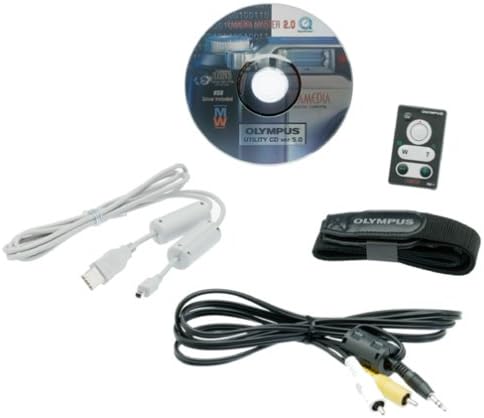
Image 4.1: Included accessories for the Olympus C-3000, featuring a USB cable, video cable, software utility CD, and a wrist strap.
5. Maintenance
5.1 Cleaning the Camera
- Camera Body: Wipe with a soft, dry cloth. For stubborn dirt, use a cloth lightly dampened with water and then dry thoroughly.
- Lens: Use a lens brush or a soft, clean lens cloth. Avoid touching the lens surface with your fingers. Do not use chemical cleaners.
- LCD Monitor: Gently wipe with a soft, dry cloth.
Caution: Never use organic solvents such as alcohol, benzene, or thinner to clean the camera.
5.2 Storage
- When not in use for extended periods, remove batteries from the camera.
- Store the camera in a cool, dry, well-ventilated area, away from direct sunlight, high temperatures, and humidity.
- Use a desiccant (e.g., silica gel) in the storage area to absorb moisture.
6. Troubleshooting
| Problem | Possible Cause / Solution |
|---|---|
| Camera does not power on. |
|
| "Card Error" message appears. |
|
| Images are blurry. |
|
| Flash does not fire. |
|
7. Specifications
Key technical specifications for the Olympus C-3000 Digital Camera:
- Model Name: Olympus C-3000
- Image Sensor: 3.2 Megapixel CCD (1/1.8-inch)
- Effective Still Resolution: 3.3 MP
- Lens: 3x Optical Zoom (32-96mm equivalent), F2.8-F11 aperture
- Digital Zoom: 2.5x
- Image Stabilization: Optical
- Focus Type: Autofocus & Manual (TTL Contrast Detection)
- Shutter Speed: 1/800 to 16 seconds
- ISO Sensitivity: Expanded ISO Minimum 100, Maximum 400
- White Balance: Auto
- Exposure Control: Manual, Aperture Priority, Program, Shutter Priority
- Flash Modes: Auto, Red-Eye Reduction, Fill Flash, Flash Off, Slow Synch, Rear Curtain Synch
- Storage Media: SmartMedia (8 MB card included)
- File Formats: JPEG, RAW
- Video Recording: MJPEG, 15 fps @ 320x240/160x120
- LCD Monitor: 1.8 Inches (no color screen)
- Connectivity: USB
- Power Source: 4 AA batteries or 2 disposable lithium batteries
- Dimensions (Approx.): Item Height: 2.6 inches
- Weight: 13.44 ounces
8. Warranty and Support
8.1 Warranty Information
The Olympus C-3000 Digital Camera comes with a standard warranty:
- Warranty Description: 1 Year Parts/Labor
Please retain your proof of purchase for warranty claims. The warranty covers manufacturing defects and does not cover damage caused by misuse, accidents, or unauthorized repairs.
8.2 Customer Support
For further assistance or technical support, please refer to the official Olympus support channels or visit their website.
Note: Product support availability may vary depending on region and product age.


