1. Introduction
The Vivitar 283 Electronic Flash is designed to provide versatile and reliable illumination for various photographic needs. This manual provides detailed instructions for the proper setup, operation, and maintenance of your flash unit.
Key features of the Vivitar 283 include:
- Vertical Bounce Flash: Allows for softer, more diffused lighting by directing the flash head upwards.
- Auto Thyristor Circuitry: Ensures fast recycling times and an increased number of flashes per battery set.
- Remote Sensor Capability: Enables off-camera flash synchronization.
- Multiple Automatic f/stop Settings: Provides flexibility for various exposure conditions.
- Illuminated Calculator Dial: Assists in determining correct exposure settings.
- Autocheck and Sufficient-Light Indicator: Confirms proper flash exposure.

Figure 1.1: Front view of the Vivitar 283 Electronic Flash.
2. Setup
2.1 Battery Installation
The Vivitar 283 flash requires four (4) AA batteries for operation. An optional Vivitar SB-4 110-volt AC adapter can also be used.
- Locate the battery compartment cover, typically on the side or back of the flash unit.
- Slide or unlatch the cover to open the compartment.
- Insert four AA batteries, ensuring correct polarity (+ and -) as indicated inside the compartment.
- Close the battery compartment cover securely.
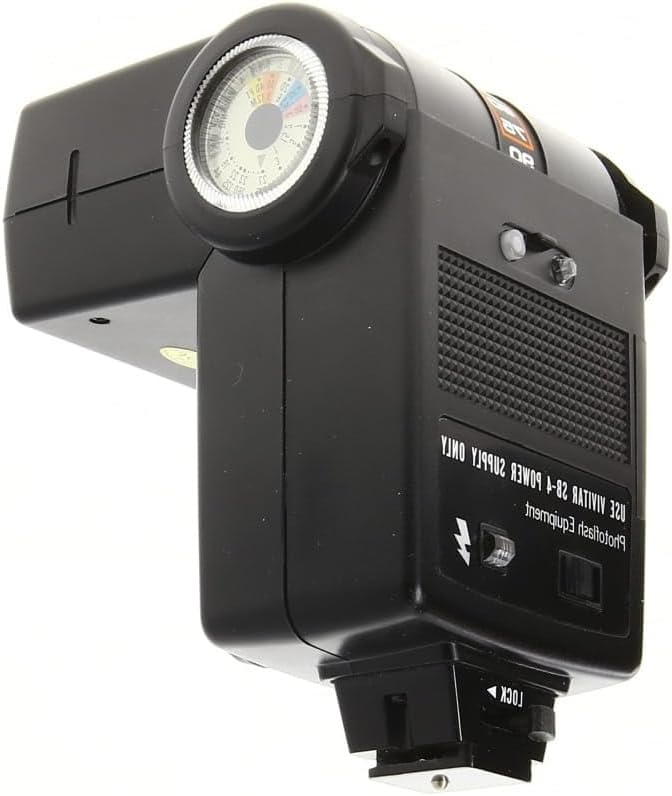
Figure 2.1: Back view of the flash, indicating the area for battery access.
2.2 Mounting the Flash
The Vivitar 283 is designed to mount onto a camera's hot shoe or a flash bracket.
- Slide the flash's mounting foot into the camera's hot shoe.
- Secure the flash by tightening the locking mechanism on the mounting foot.
Important Note on Trigger Voltage:
The Vivitar 283 flash units, especially older models, may have a high trigger voltage (potentially over 300 volts). This high voltage can damage the sensitive electronics of modern digital cameras. It is strongly recommended to verify the trigger voltage of your specific unit using a voltmeter before mounting it directly onto a digital camera. For digital cameras, consider using an external trigger or a voltage protector if the flash unit's trigger voltage is high. Using the flash off-camera with a compatible trigger is generally safer.
3. Operating Instructions
3.1 Powering On and Recycling
- Turn the power switch to the 'ON' position.
- Allow the flash to recycle. The 'Ready' light will illuminate when the flash is fully charged and ready to fire.
3.2 Setting Automatic Exposure
The Vivitar 283 features an Auto Thyristor system with four automatic f/stop settings. Use the illuminated calculator dial to select the appropriate setting based on film speed (ISO) and desired aperture.

Figure 3.1: Side view of the flash, highlighting the calculator dial and auto sensor.
- Set your camera's shutter speed to the flash synchronization speed (typically 1/60s or 1/125s, refer to your camera manual).
- Adjust the calculator dial on the flash to match your film's ISO speed.
- Select one of the four automatic f/stop settings (e.g., f/4, f/5.6, f/8, f/11) on the flash and set your camera's aperture to the corresponding value.
- The flash's auto sensor will measure the light reflected from the subject and cut off the flash duration when sufficient light has been emitted.
- The 'Sufficient-Light Indicator' will light up after the flash fires if the exposure was adequate.
3.3 Bounce Flash Operation
For softer, more natural lighting, the flash head can be tilted upwards to bounce light off a ceiling or wall.

Figure 3.2: Top view of the flash, demonstrating the tiltable head for bounce flash.
- Gently tilt the flash head upwards to the desired angle.
- Ensure the surface you are bouncing off (ceiling, wall) is neutral in color to avoid color casts.
- Adjust exposure settings as needed, as bouncing light can reduce its intensity.
3.4 Remote Sensor Use
The Vivitar 283 can be used off-camera with its remote sensor capability. This allows for more creative lighting setups.
- Connect a compatible remote sync cord to the flash's remote sensor port.
- Position the flash off-camera as desired.
- Ensure the remote sensor on the flash has a clear line of sight to the main flash or trigger.
4. Maintenance
4.1 Cleaning
- Use a soft, dry cloth to clean the exterior of the flash unit.
- For stubborn marks, slightly dampen the cloth with water or a mild cleaning solution, then wipe dry immediately.
- Do not use abrasive cleaners or solvents, as these can damage the finish or electronic components.
- Keep the flash tube and sensor clean for optimal performance. Use a lens cleaning cloth for these delicate areas.
4.2 Battery Care
- Always remove batteries from the flash unit if it will not be used for an extended period (e.g., several weeks or months).
- Inspect the battery compartment regularly for any signs of corrosion. If corrosion is present, clean it carefully with a cotton swab dipped in white vinegar or lemon juice, then wipe dry. Ensure no liquid remains.
- Use fresh, high-quality AA batteries for best performance and to prevent leakage.
4.3 Storage
- Store the flash unit in a cool, dry place, away from direct sunlight and extreme temperatures.
- Protect the flash from dust and moisture, ideally in a camera bag or protective case.
5. Troubleshooting
| Problem | Possible Cause | Solution |
|---|---|---|
| Flash does not fire | No power; Batteries drained or incorrectly inserted; Flash not fully recycled; Camera sync issue. | Check batteries and polarity; Replace batteries; Wait for 'Ready' light; Ensure camera shutter speed is at sync speed. |
| Slow recycle time | Low battery power; Old batteries. | Replace with fresh, high-quality batteries. |
| Inconsistent exposure | Incorrect f/stop setting; Auto sensor obstructed; Subject too far/close. | Verify f/stop and ISO settings; Ensure sensor is clear; Adjust distance or use manual mode if applicable. |
| Battery compartment corrosion | Batteries left in unit for too long; Battery leakage. | Remove batteries when not in use; Clean corrosion as described in Maintenance section. |
| Flash damages camera | High trigger voltage. | Always check trigger voltage before mounting on digital cameras. Use voltage protector or off-camera trigger if voltage is high. |
6. Specifications
- Model: Vivitar 283 Electronic Flash
- Dimensions: Approximately 5 x 3.7 x 3.7 inches (12.7 x 9.4 x 9.4 cm)
- Weight: Approximately 12.8 ounces (363 grams)
- Power Source: 4 AA batteries (alkaline or rechargeable NiMH recommended) or optional Vivitar SB-4 110-volt AC adapter.
- Flash Range: 3 to 43 feet (0.9 to 13.1 meters)
- Automatic f/stop Settings: 4 settings available
- Flash Sync Speed: Up to 1/250 second (camera dependent)
- Features: Vertical bounce flash, Auto Thyristor circuitry, Remote sensor capability, Autocheck, Sufficient-light indicator, Illuminated calculator dial.
- Compatible Mountings: Standard hot shoe (Canon, Nikon, Sony compatible, but verify trigger voltage for digital cameras).
7. Warranty & Support
Specific warranty information for the Vivitar 283 Electronic Flash is not provided in this document. For details regarding warranty coverage, please refer to the original product packaging or contact Vivitar customer support directly.
For technical assistance or further inquiries, please visit the official Vivitar website or consult authorized service centers.


